
The aim of the article (indeed this series) is to provide a guide for your own painting process. In no way is this the definitive guide on how to paint World Eaters. If you don't have the exact colours, please substitute them. If you don't like a stage please feel free to skip it.
In the end my hope is that you take whatever you can and interpret it in a creative way for your own work.
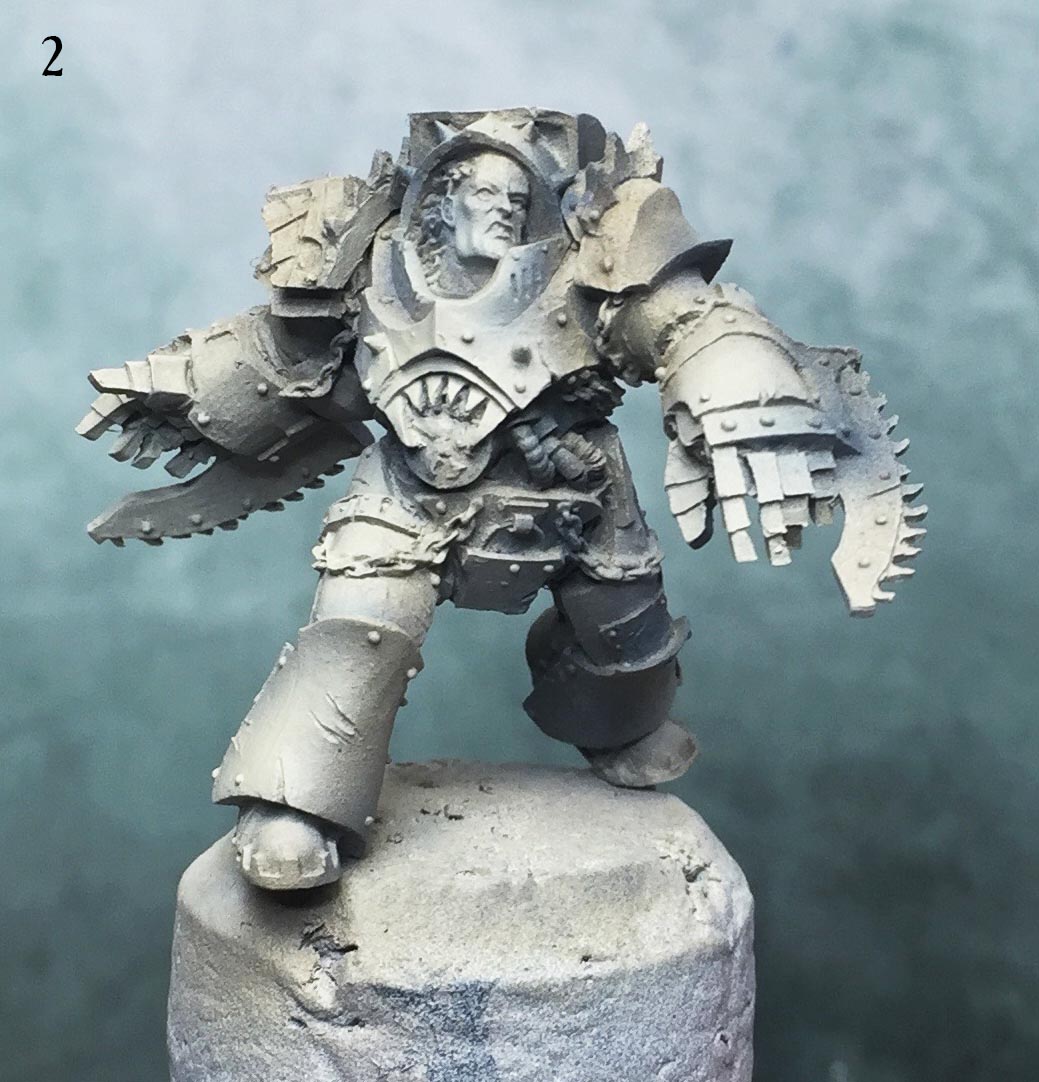
0. Undercoat white (I use Halfrods car primer Grey, then Model Mates White)

1 Airbrush. Com Art Stone Flesh. PSI 20. Cover all armoured areas with this.

2 Airbrush VMC Dark Sea Green. PSI 20. Shade the model with Dark Sea Green. The cool blue and green in the mixture will give a nice contrast.
3 Airbrush Forgeworld Typhon Ash (Medea Com Art Paint Thinner 40;60 mix). PSI 20. We are introducing a water tone here to contrast with the cooler pre shade layer. Work in thin gradual layers.

- Airbrush. Medea Com Art White (Medea Com Art Thinner 50;50 mix). Hit the very highest parts of the armour with pure white.

- Paintbrush. Reapers Brilliant Blue. Put down a consistent layer of blue.

- Airbrush. Medea Com Art White (Medea Com Art Thinner 50;50 mix). Highlight pure white.

- Paintbrush. Apply Games Workshop Asurmen blue as a filter to tie everything together.

- Paintbrush. Apply Light brown in the shadows and Tallarn flesh on the lighter parts of the face. A Light Brown B Tallarn flesh C Sunny Skin tone D white sand scale 75 E vallejo ink sepia. This is the colour palette I used. Try and be fluid with the execution of these stages. Do not dogmatically follow these instructions stage by stage. Flow from one stage into another, work back, re-highlight and apply.


- Paintbrush. Increase the contrast with increasing layers of Tallarn flesh. I’ve also added some white sand to the mix (you can see the difference between the jaw which has been painted and the forehead which hasn’t).


Paints used: Vallejo, Reaper Master Series, Games Workshop Washes, Com Art Medea Airbrush Airbrush: Iwata Hi-Line HP-CH Airbrush Paint Brushes: Rosemary & Co. Raphael 8040, Broken Toad Brushes, Windsor and Newton Series 7