With the ETL VI deadline fast approaching, this last week was mostly given over to the task of completing my Renegade Armiger Warglaive, and I would very much like to share my progress on this project with you today! It wasn’t all smooth sailing, either, because Germany has been in the iron grip of a heat wave for quite a while now, with temperatures solidly in the mid-30s Celsius degrees for most of last week — certainly not unheard of in other parts of the world, but not something we are all that used to in my particular neck of the woods…
But I soldiered on regardless, so let’s take a look at what I have to show for my perseverance:
Here’s where we left off last time:

The biggest task at this point was to paint the bigger amour plates for the legs as well as the top carapace. In order to save myself some time, I decided to use GW’s Mephiston Red spray as an undercoat for the armour plates. But while it did end up laying down a nice, even coat of red, the red was also fairly flat and chalky — so I did end up re-painting all the red areas anyway…
In the end, it probably did save me some time, after all, but it was certainly not a game changer on par with, say, the Leadbelcher spray.
Anyway, I tackled the armour plates one after another, picking out the various details and blocking in the different colours. The biggest piece of work was the top carapace, of course, so that’s where I started. Here it is, with most of the detail already blocked in:
As you can see, I also added some decals during this stage: These days, I never save the decals until everything else has been painted, because that will invariable make them look tacked on, almost like an afterthought. By applying them sooner, they can be weathered and damaged along with the rest of the model, as needed, in order to actually make them look more realistic. Now in this case, this only really involved a subtle pass of sepia wash to make them look just a bit more natural, but it’s a habit I have picked up. Besides, none of them were in the way of the eventual highlighting, so that helped, too 
Some of the decals were actually chosen to tie the model into the lore of my World Eaters army: The paw print hints at Gilgamesh’s honorary membership in the Legio Audax, the “Ember Wolves” (while the Titan Legio is an actual part of the background, as of “Betrayer”, I did make up Gilgamesh’s membership in it as part of my own head canon).
Meanwhile, the numerals on the right pauldron stand for the XII Legion’s IVth company — mirroring a similar marking on Gilgamesh’s right shoulder guard:
So here’s what the carapace looked like at this stage:

And here it is, a short while later, with all of the missing detail painted and a pretty serious (at least for my standard) amount of highlighting in place:
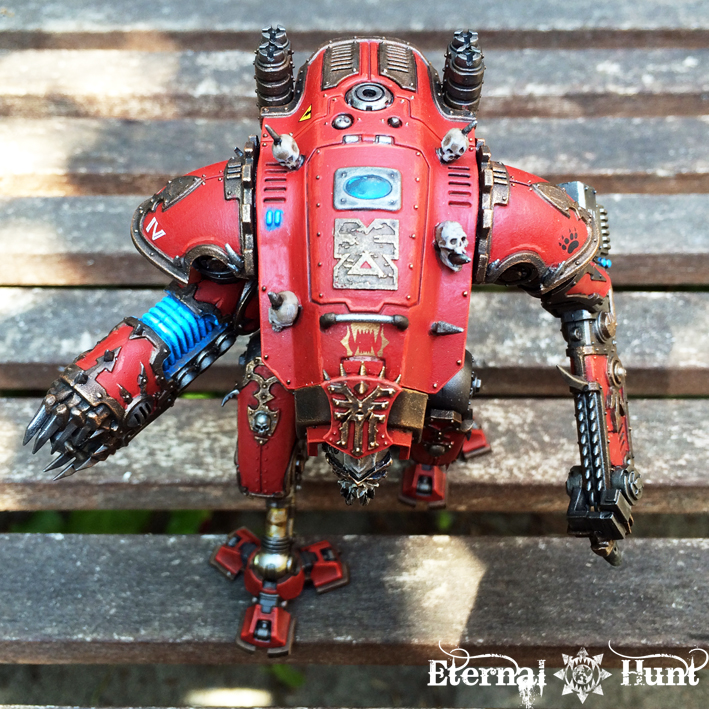
The rest of the armour plates were given the same treatment, and while none of this is any award winning stuff, the subtly higlighted red ended up looking quite a bit deeper than the armour on Gilgamesh, while still fitting the overall look: While the Armiger should still look like it belongs, it also shows off how I have grown as a painter over the last couple of years, and I like that, to be honest
So anyway, here’s the Armiger in its almost finished state:
At this point, I made a To Do list for myself listing all the small cleanup work and small tweaks I still needed to do before the model would be finished. I also made an eleventh hour decision to diverge from the original conversion, as the original plan had been to add some marauder shields on top of the Armiger’s pauldrons, for an even more baroque, chaotic look. Like so:
But when I added them to the pauldrons, I just couldn’t shake the feeling that the model actually worked better without them, so after hemming and hawing and asking for feedback over at the forums, I eventually decided to leave them off — something about them just didn’t quite click with me, while the model did seem complete enough without them.
So at this point it was mainly a matter of checking all of the boxes on my To Do list, one after another.
One area of notice was the detailing of the cockpit and reactor section, and I am pretty happy with how that area came out. Take a look:
For the cockpit displays, I chose an approach I had seen on a Knight by fellow hobbyist Noigrim — I really liked the idea of approaching enemies being visible as red dots on the radar
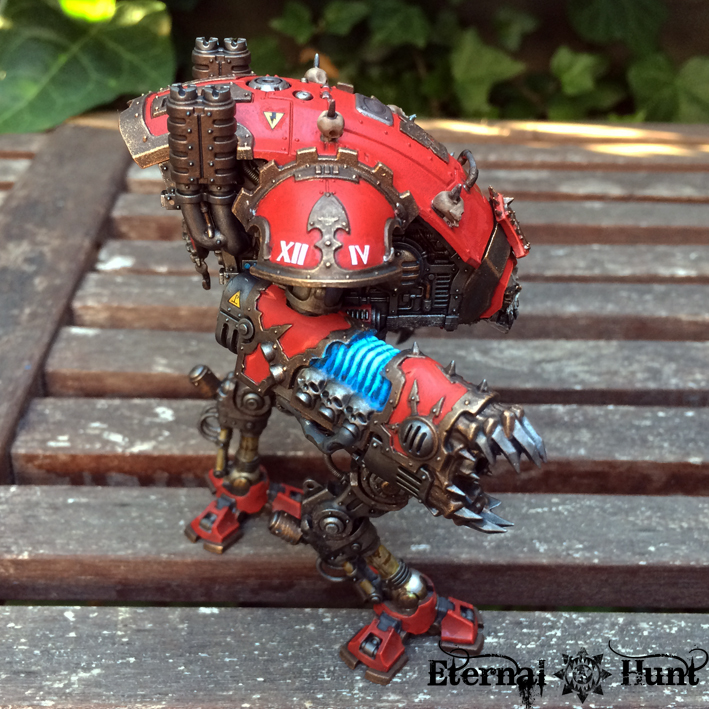
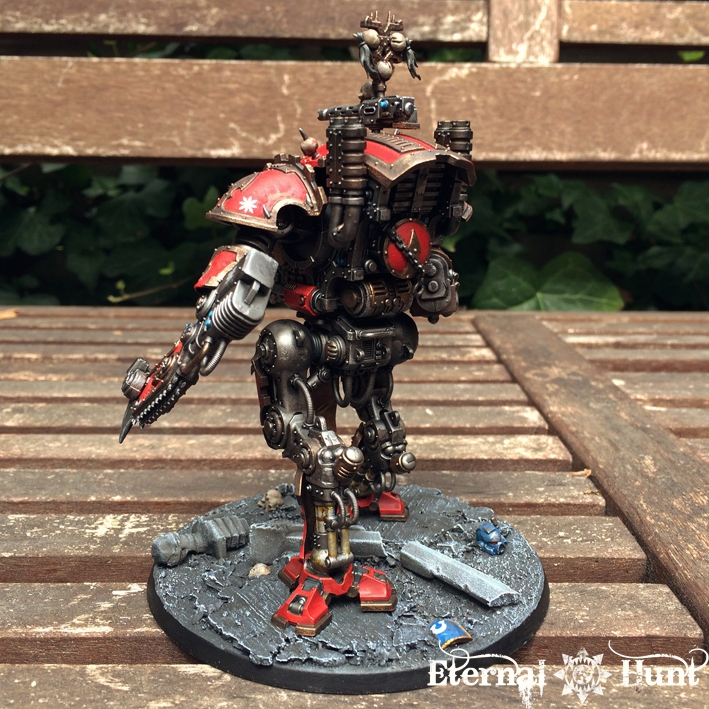
And here’s a closer look at the reactor section:
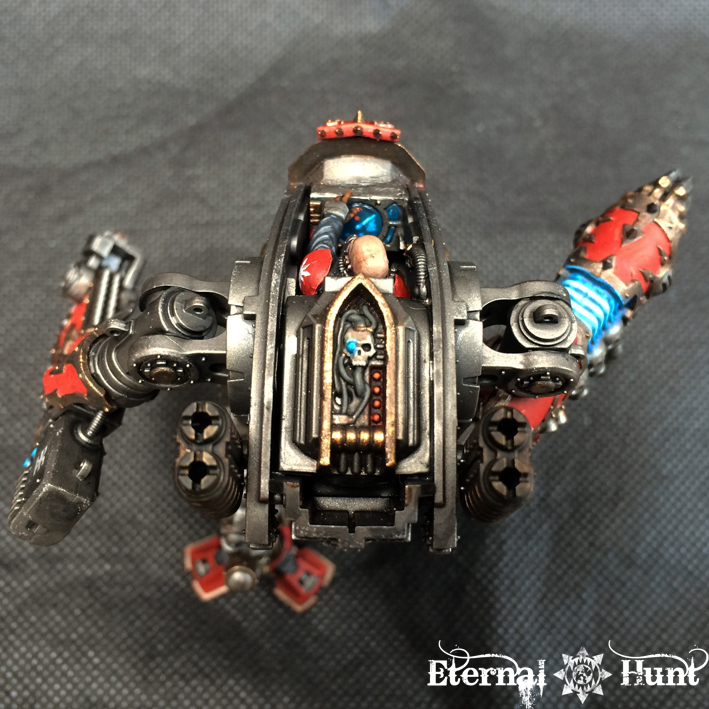
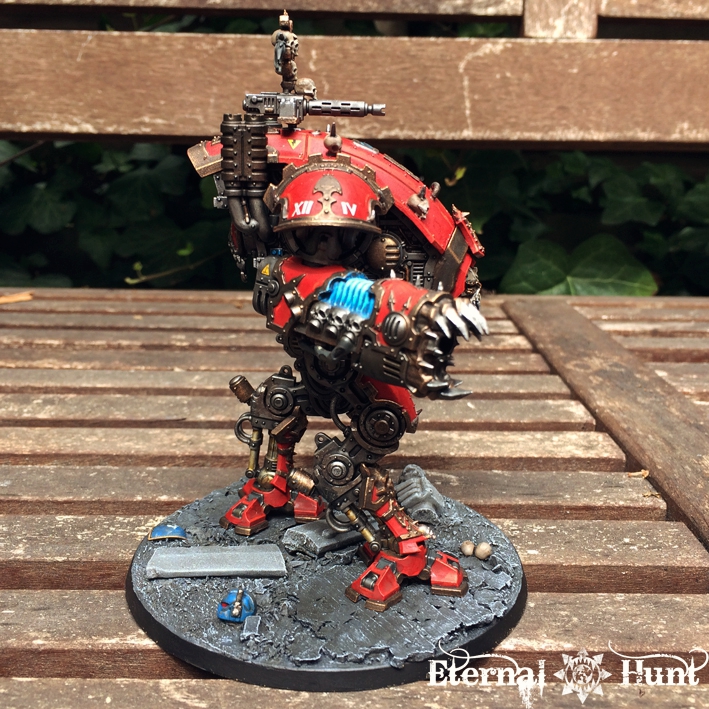
This is how the whole assembly looks when seen from the side, by the way:
From a conversion perspective, this is probably the most involved customisation on the entire model, but I do think it has been worth it.
The other big thing to take care of was the base. Here’s the completed build I came up with:
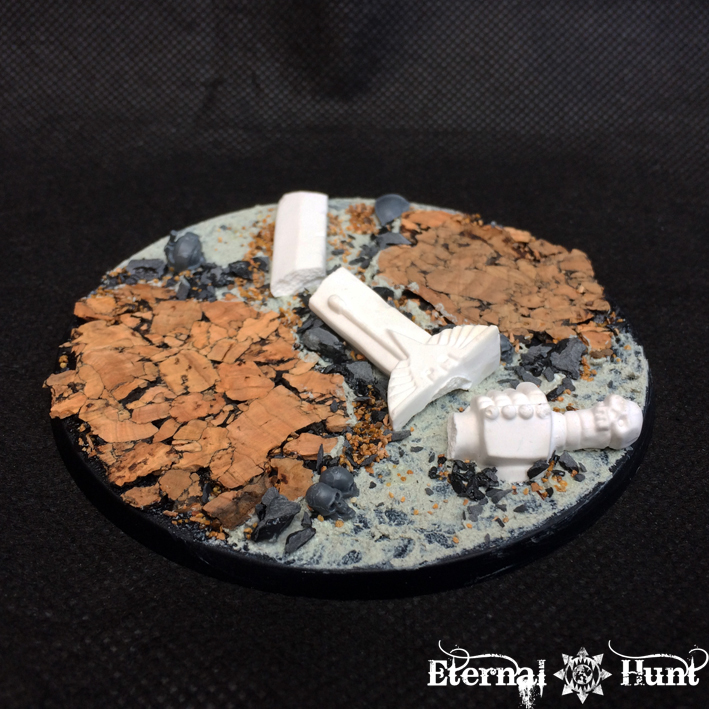
Gilgamesh’s base uses several pieces of broken imperial statuary (courtesy of GW’s “Honoured Imperium” terrain kit), and I thought it would be cool to match that look, albeit on a slightly smaller scale. So the base was built around a shattered statue’s broken sword (once again, a very apt metaphor for the failing Imperium of Man, and all that), and I used different kinds of slate, sand and cork to build up a suitable amount of rubble and texture around it all. The main floor texture was, once again, created using Vallejo’s Sandy Paste.
I also did a preliminary dry fitting to find out wether the model would fit neatly onto the base:
And after that, it was off to the painting desk for one last time. Here’s the finished base, completed a short while later:
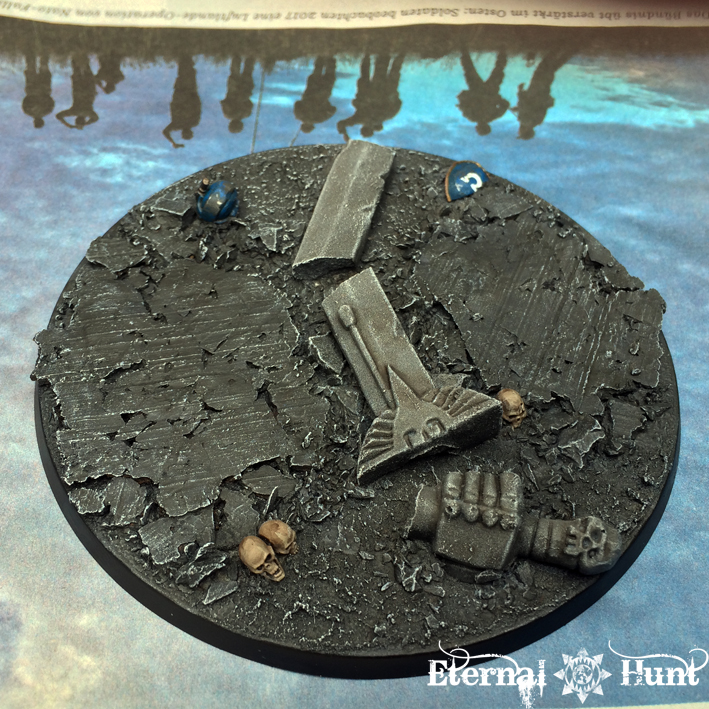
As you can see, some skulls and broken Ultramarines armour pieces were also added to the base, if only to tie the model into the 28mm scale a bit better (and make for smaller areas of visual interest).
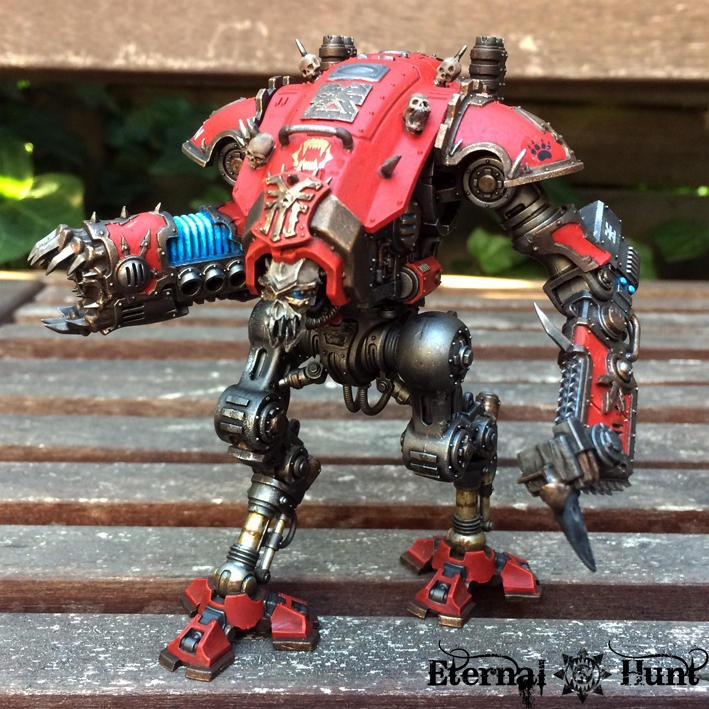
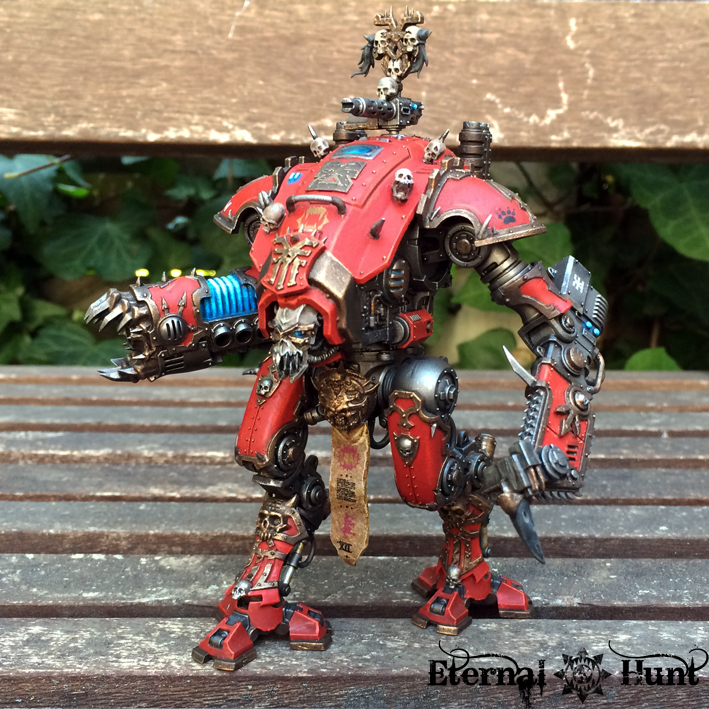
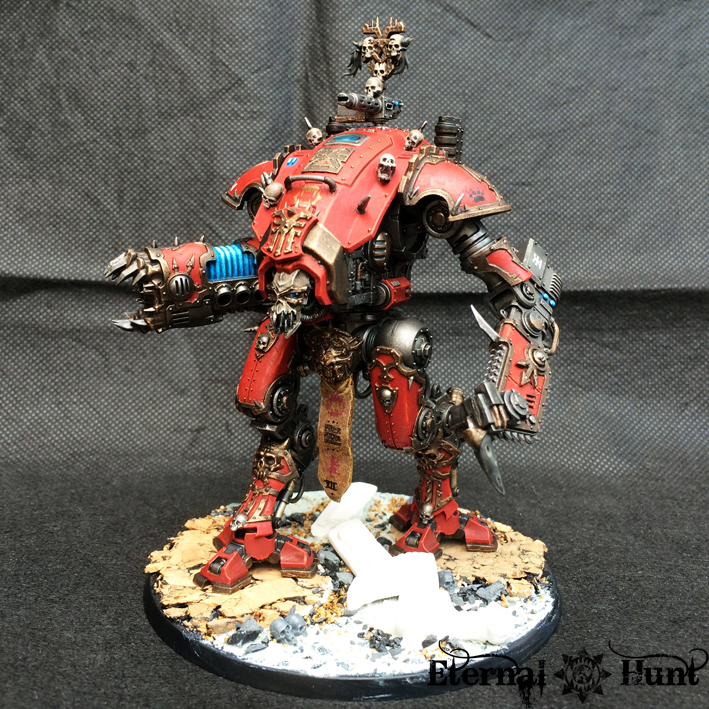
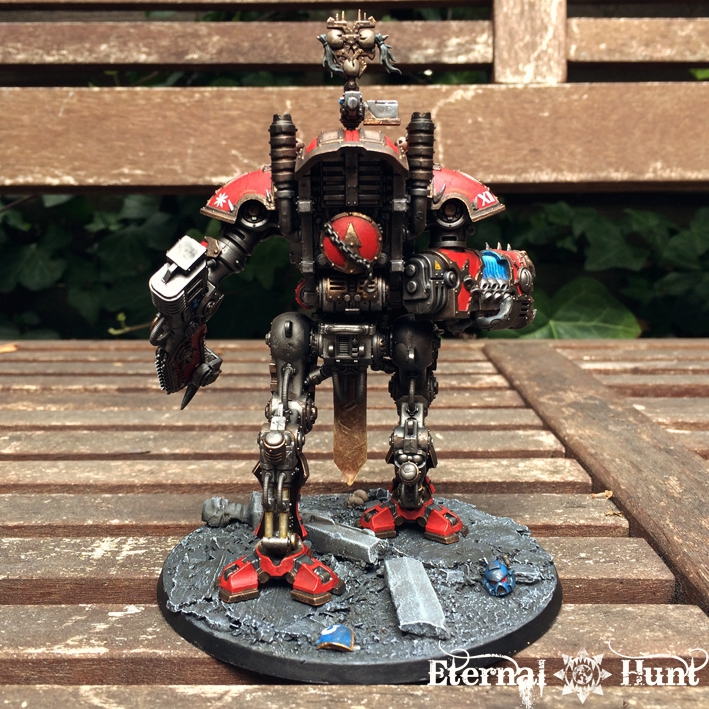
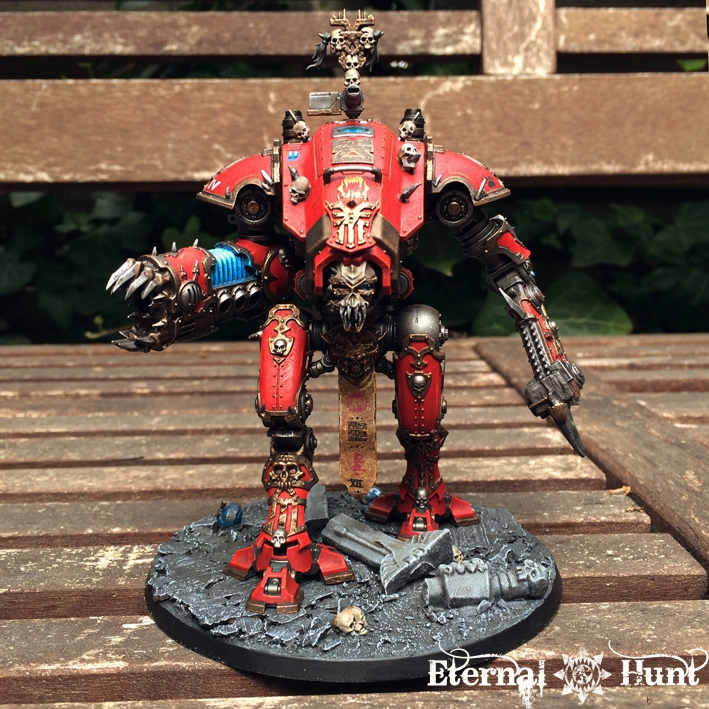
And with that, my Renegade Armiger was finished. So let’s take a look at the model, shall we?
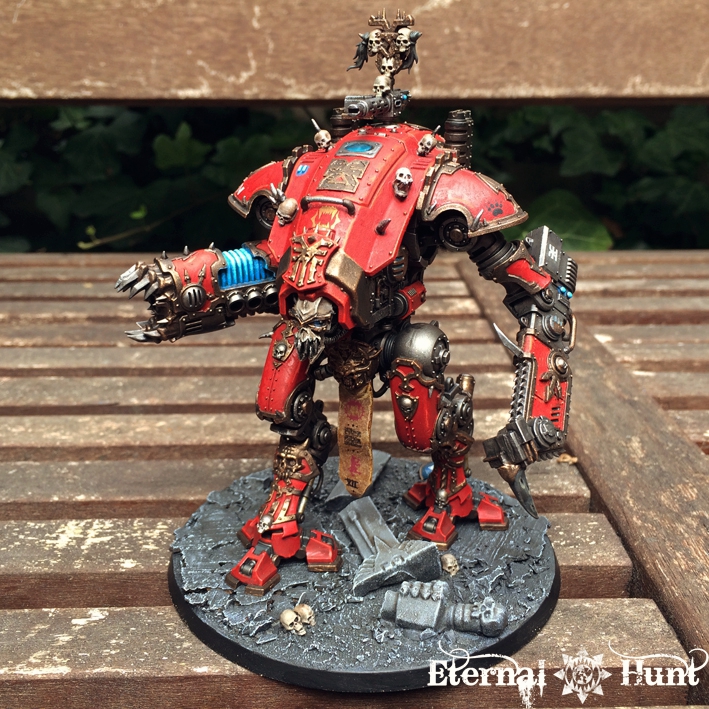
The Hound
Enkidu Lance
attached to the XII Legion’s 4th assault company
And a couple of detail shots, of course:
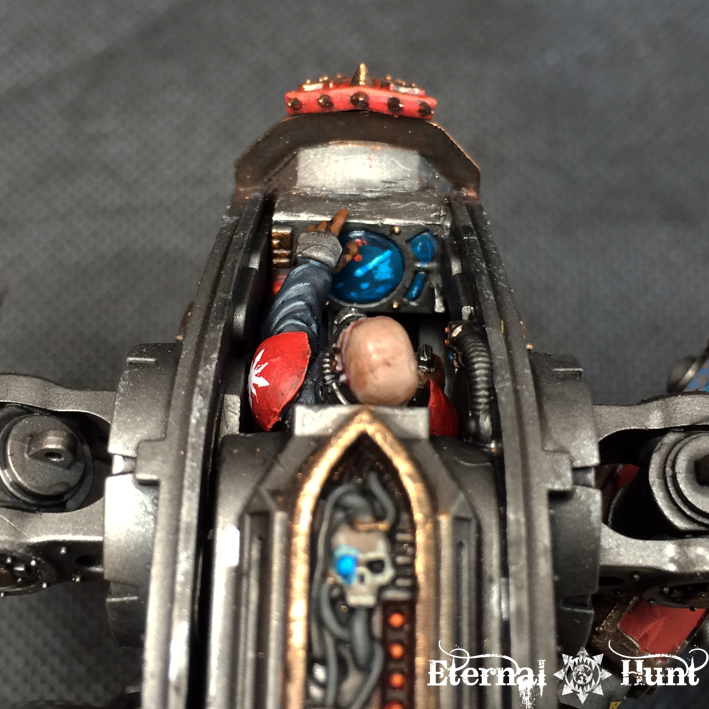
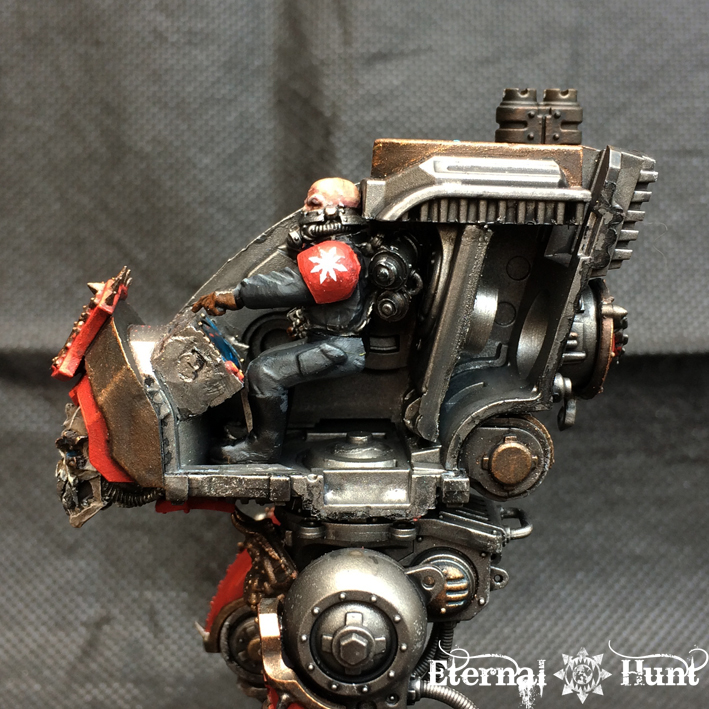
First up, the Armiger with its carapace removed and a closer look at the pilot:

The plan was to make the pilot look similar to Gilgamesh’s pilot, the Baron Harrowthorne:

At the same time, I wanted it to be fairly obvious that the Hound is below the Baron in rank, so his uniform is just a bit plainer. I think the finished look works pretty well:
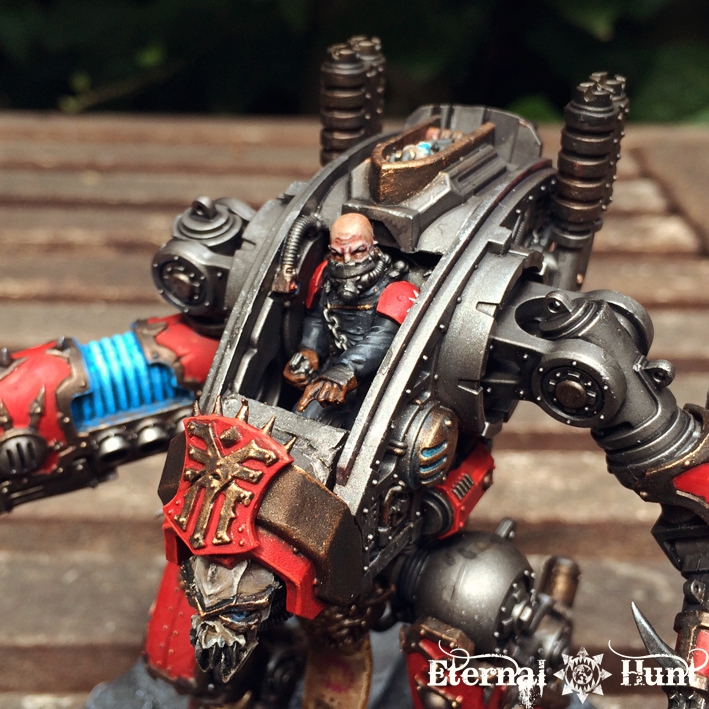
The top carapace will – obviously – stay removable, if only because it allows me to show off the custom cockpit and pilot every once in a while In fact, the entire model retains a certain amount of modularity:
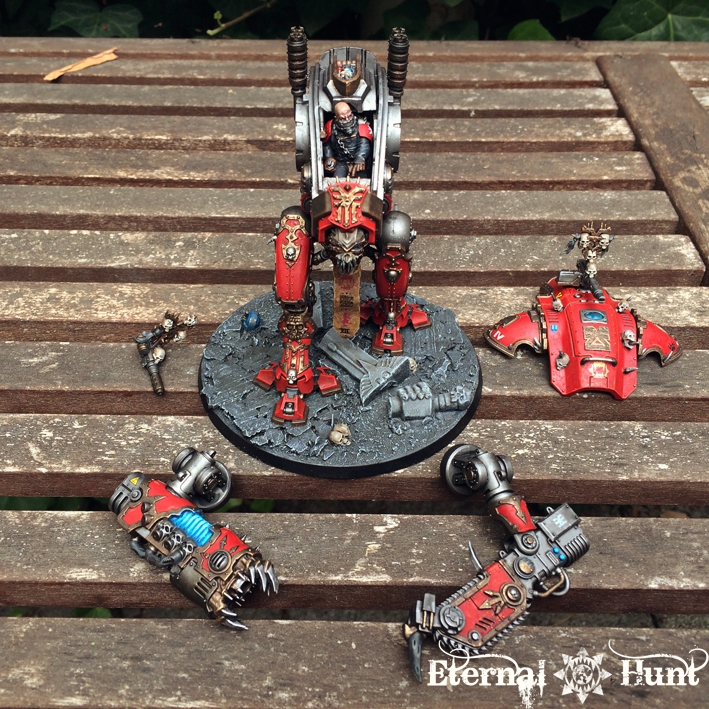
This should provide a nice extra bit of flexibility once the second Armiger (codenamed “The Huntress”) has been completed! Incidentally, the harpoon arm I shared with you in my previous post will actually serve as the Huntress’ stock armament…
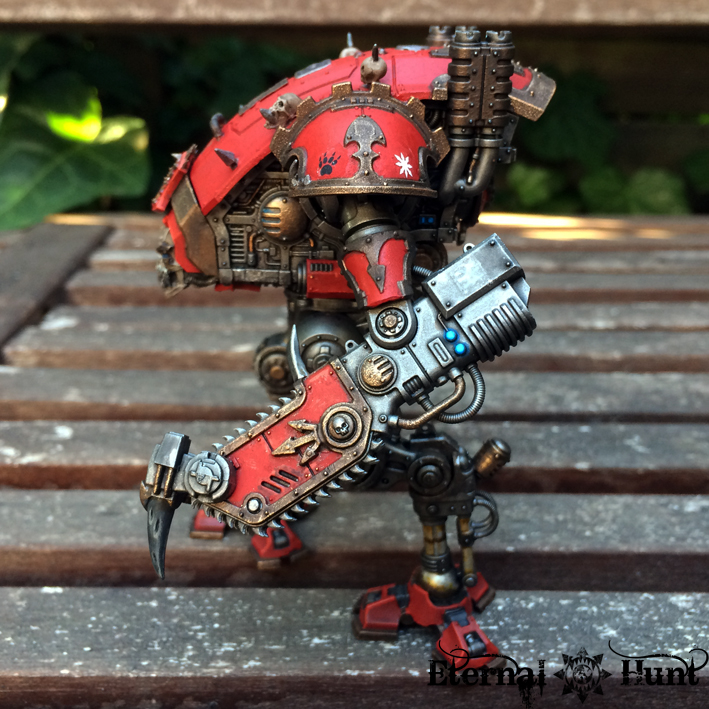
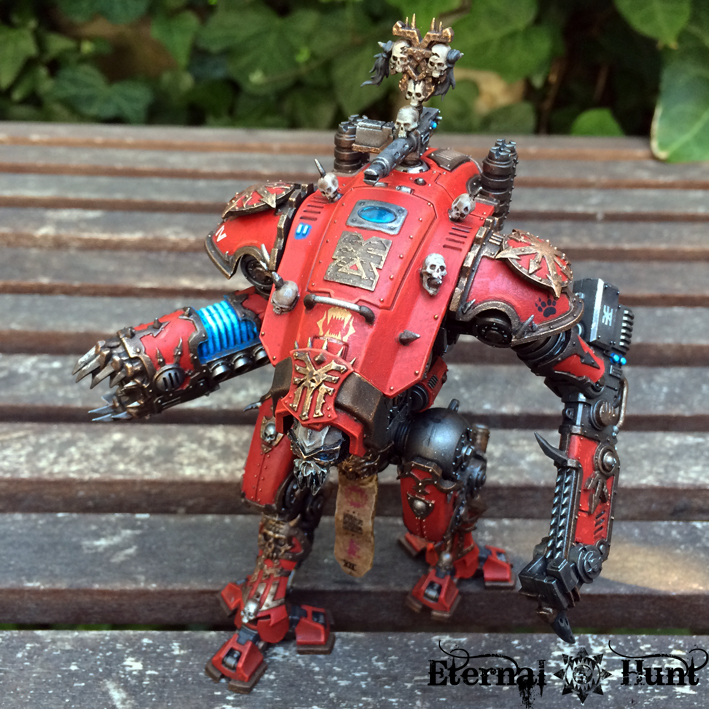
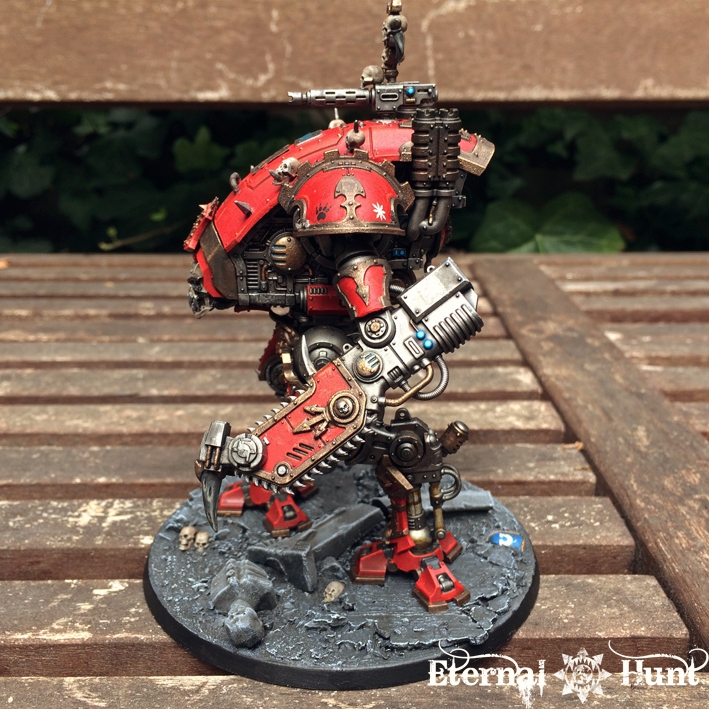
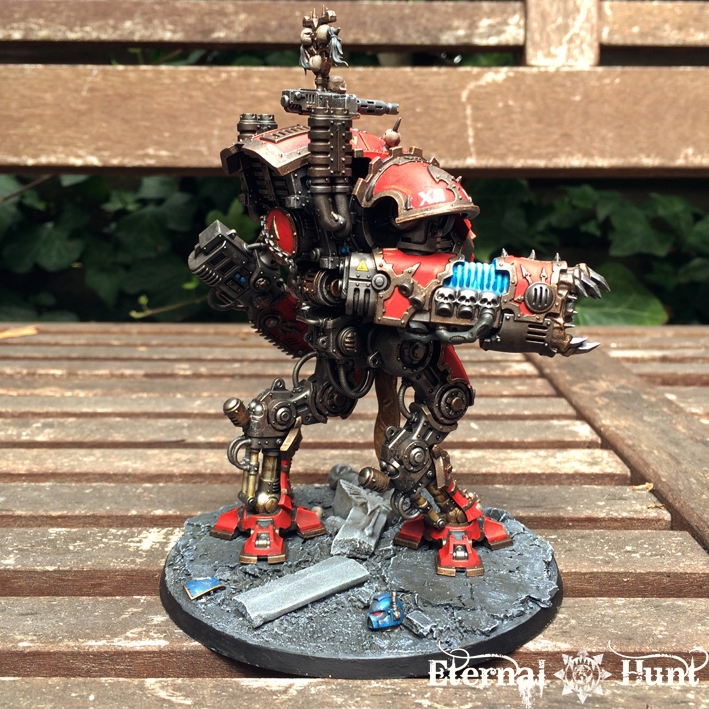
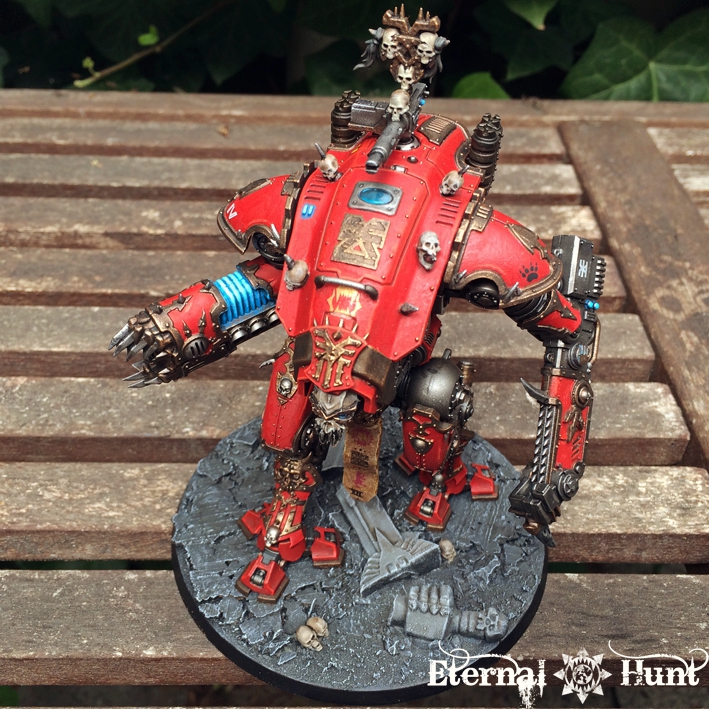
Here’s a side view that gives you a better idea of the detail work on the undercarriage:

The amount of detail on the Armiger’s skeleton owes a lot to the “JeffTibbetts school of Knight painting”, as it were
Another area of the model I want to showcase is the banner between the Armiger’s legs:

While loyalist Armigers appear a lot less draped in personal heraldry than their Imperial Knight masters, I wanted to invoke the impression that Armiger pilots may serve their lords for far longer in the Great Eye, so it seemed appropriate to include a banner showing the pilot’s battle honours: It shows both the World Eaters’ legion badge as well as the War Hounds’ old symbol — probably a shout out to the Hound’s epithet.
At the same time, I also wanted to make the banner look more rugged than the banner on the bigger Knight, so I painted it as some kind of roughly tanned hide. I used the approach outlined in Brandon’s tutorial here, with a couple of minor tweaks, and am pretty happy with the finished effect.
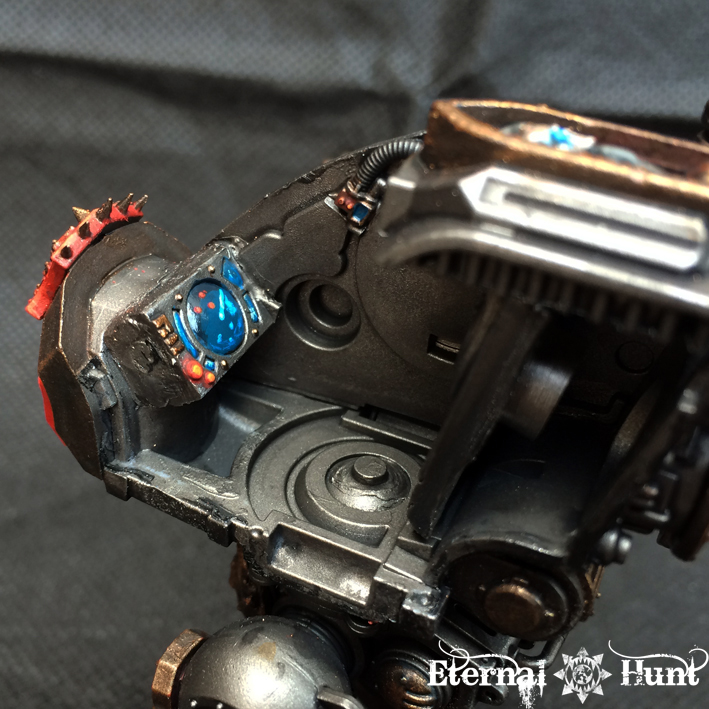
Oh, and I also finally managed to take a picture of the face that shows of the Armiger’s glowing eye:
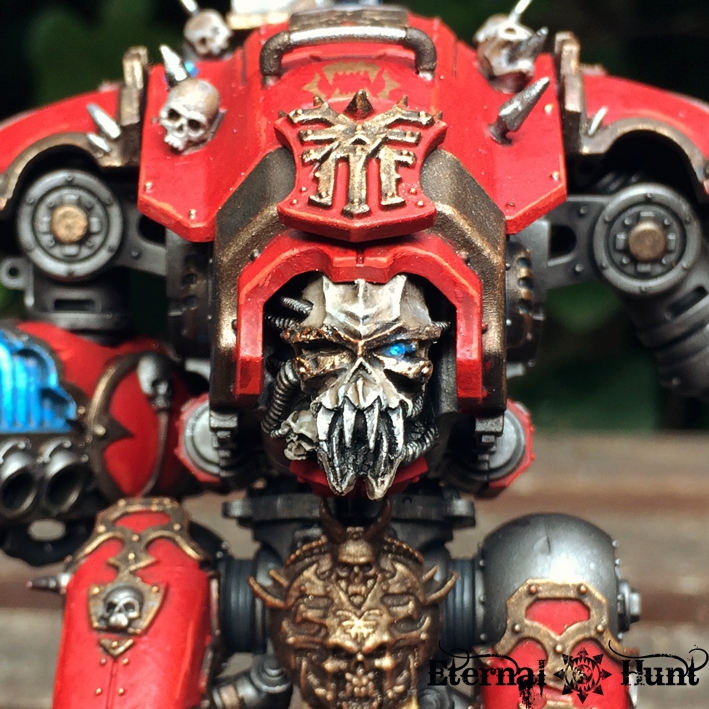
The missing optical sensor on the right side was originally a consequence of a slight miscast of the face, but I think it gives the model an even more sinister and chaotic look, so it actually works in its favour, wouldn’t you agree?
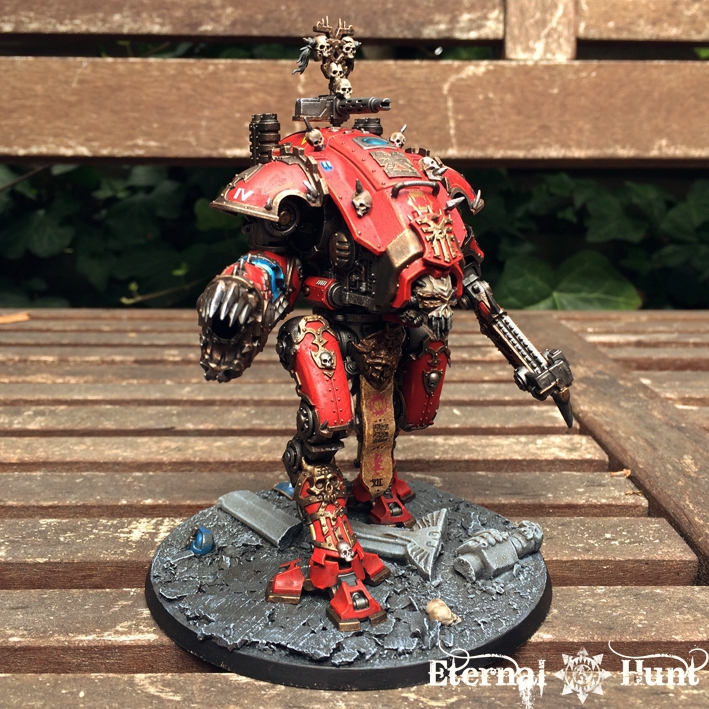
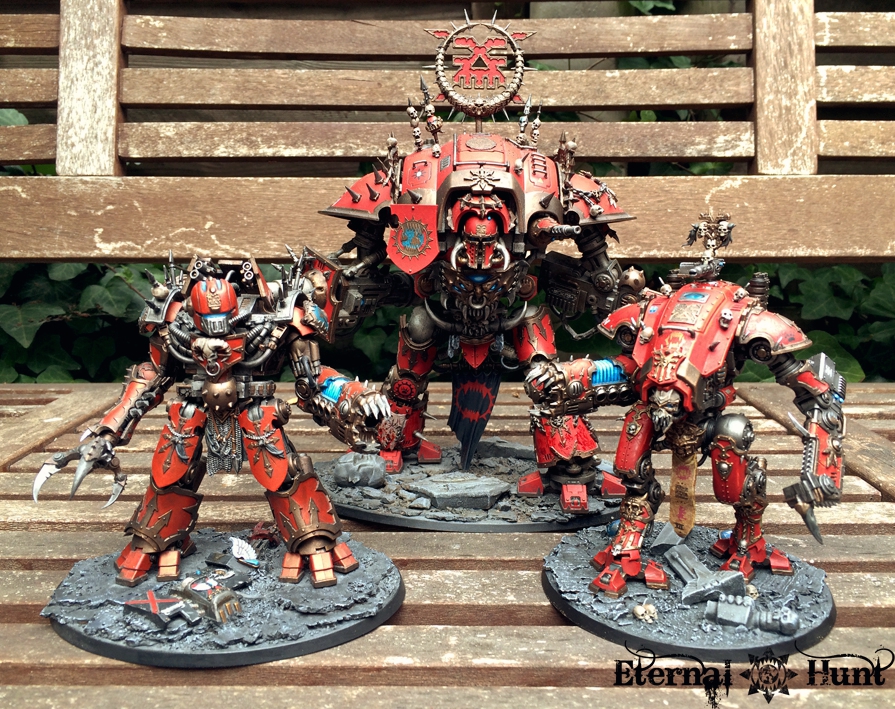
Oh, and here’s a picture of the Armiger and my Renegade Knight Titan, Gilgamesh, “The Warrior King” — “Father and Son”, so to speak:
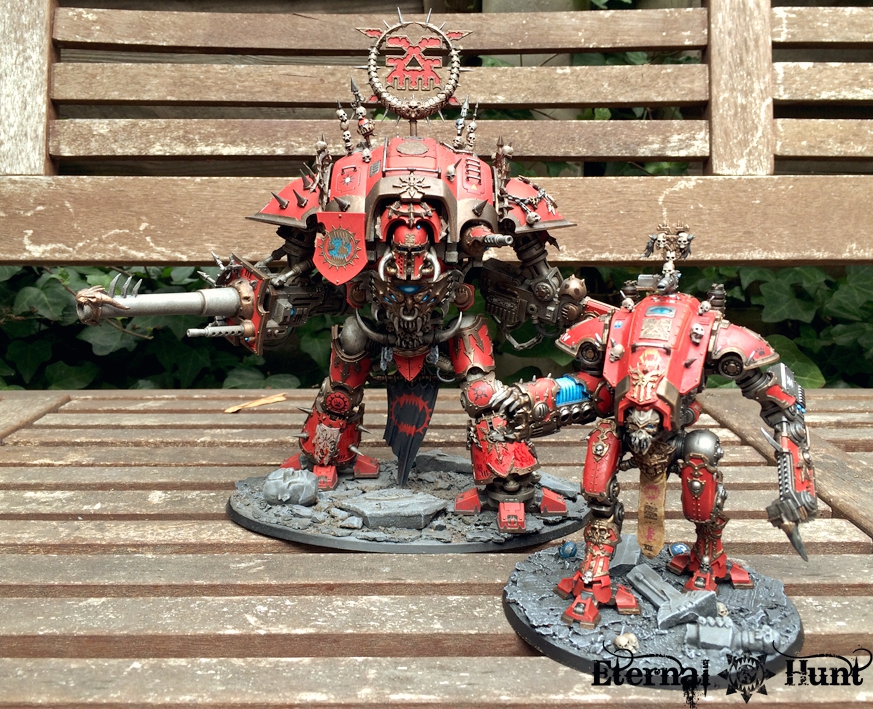
In fact, I discovered that my older Wargrinder conversion could actually work as an Armiger fairly well, at least from a scale perspective:
And with that, I have managed to finish both my entry for this year’s ETL event as well as my contribution to Azazel’s “Jewel of July” challenge. Pretty nifty, eh? To be honest, I am immensely pleased with the finished model — I actually put this off as long as I could, and I really had to force myself to start painting, but I couldn’t be any happier with the result. That being said, this has been a pretty involved project, so I think I’ll allow myself a bit of rest and mostly focus on small fry for a bit
But anyway, so far for my first Renegade Armiger Warglaive. It goes without saying that I would love to hear your feedback on the model, so leave me a comment! And, as always, thanks for looking and stay tuned for more!