The following is a collection of painting tips that aren't commonly discussed on painting and hobby forums, but which I have found incredibly useful over the last 10-12 months or so. This post will mark the first in what will hopefully become an ongoing collection of hobby tips lists.
Preamble
As you'll no doubt have noticed if you are a regular reader of my blog, I've been doing some painting of late. Last year I only completed about 2, possibly 3 figures, so this year I've set myself the target of painting up at least 7 figures this year. As such, I've been doing a lot of reading and video watching on painting techniques etc to try and get myself not only working more quickly, but also to a higher quality. Through this process I have picked up a number of tips from other painters, and also learned a few myself through trial and error. I figured that some of you may not have heard these tips before, and that for the rest - there may be something of use in here too.
So without further rambling, here are some of the miniature painting tips and techniques I have learned in the last few months:
- Use a BIGGER brush
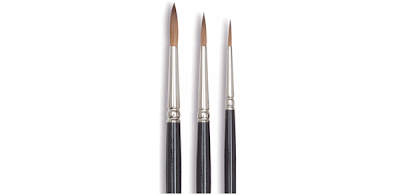
I used to do 90% of my painting with, at most, a size 00 brush. This, I have realised, is madness. Not only does it take you far longer to get the miniature painted due to being able to hold less paint on the brush, but it also increases the likelihood of brush strokes.
Therefore, I recently picked up a Raphael 8404 size 2 brush to use to apply my basecoats and initial blending and transitions. I can't tell you how much of a difference this makes to blending on large surfaces. The best way for me to demonstrate is to show you the video by Jeremie Bonamant Teboul from which I learned this from: - Change the angle of your brush strokes
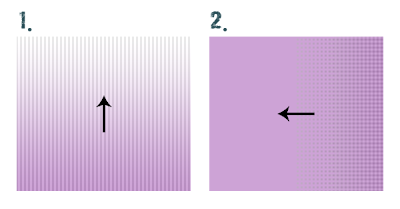
If you continually apply paint with brush strokes from the same angle, you are more likely to create unsightly tide marks and will also struggle to get smooth highlighting and shading. Think for a minute of how a professional decorator would paint a ceiling. They apply the paint from the roller in one direction first, before applying a second coat from a direction at a 90 degree angle from the first. The diagram above explains what I mean - think of the line pattern as being the brush strokes, if you cross the angles you get more complete and uniform coverage without building up too much paint going in the same direction.
 - How to hold sub-assemblies such as arms without using glue
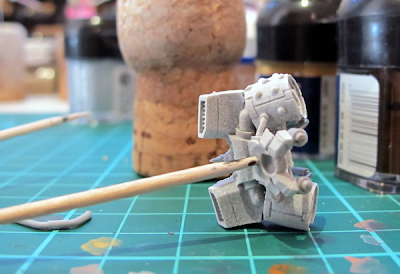
I came up with this one the other day while getting frustrated with the arm I was painting falling off of the cocktail stick with blu-tac on the end that I had been using to hold it. I didn't want to glue a pin in as this leaves an uneven surface where the dried glue was which can effect the join when it comes time to attach it to the model - it can be cleaned up but it takes additional careful work so as to avoid rubbing off any of the paint job you've just done.
In place of gluing, I decided to drill a small hole in the join surface of the arm, but instead of gluing wire in, I decided to cut a little off the end of a cocktail stick and press it into the hole. If you cut enough off to make a snug fit, you don't require any glue and it holds firm without rotating while painting. Best of all, when you are finished the piece, it comes off easily without much force - meaning you don't ruin any of your hard work and don't have to clean any dried glue! - Use a wet palette (the bigger the better!)
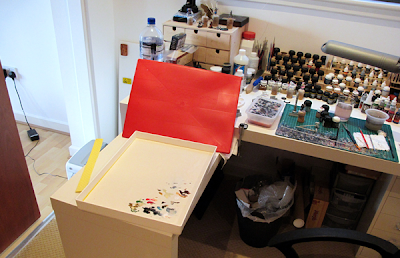
I had been using a small home made wet palette for the last 3 years or so, but I was beginning to get annoyed by how quickly I would run out of space for colours and the uneven surface causing some paints to pool, or dry out quicker. At the turn of the year I decided to buy a proper wet palette (a large Masterson "Sta-Wet" Palette to be precise) and the difference already has been huge.
Wet palettes in general are great because they suit painters, such as myself, who paint in fits and starts and don't want to keep trying to mix up the same colours. They also allow much more control of the paint and how you apply it by giving you time to mix it and use small quantities. The big benefit of a large wet palette is the extra space, however as it is a professionally made product, I have also found the palette paper and sponge to be much better than any I had previously been able to find. The sponge is totally flat, meaning no pooling or accidental colour mixing, and the paper doesn't curl up at the edges leading to annoying drying.
The only downside is that, because it is so large, you need a lot of space to put it on. Fortunately, my work desk has a second slide out worktop so it's not really an issue. If you are pushed for space though, I believe they do make palettes in medium and small sizes too - best to measure how much space you realistically have on your worktop while painting and buy whichever fits best if you intend to get one! - Take proper care of your good brushes
Final tip for this post before it runs on forever! Take proper care of your good brushes.
Good brushes aren't exactly cheap, most run at between £6 and £12 a brush. Take proper care of them though and they last a long time. What do I mean by proper care?
Don't use your good brushes to apply paint from pot to palette. This causes the bristles to rub against the edge of the ferrule (the metal collar that holds the bristles), which can cut into them and damage the bristles - leading to splaying and fish-tailing.
The same goes for aggressively mixing paint and how you rinse your brush out. When cleaning your brush, don't push the bristles against the side or bottom of your water pot. It should only take a quick shake in the water pot for a few seconds to remove the paint unless you've overloaded your brush and got paint right up to the ferrule - which is a big no-no!
If you want to go the extra mile in brush care, you can apply a little hair conditioner (the type you'd normally put on your head) to the bristles after painting. Leave it on for an hour or so and then give them a rinse in your water pot and they should be good to go again. Why do this? Well bristles are just hairs anyway so the conditioner will stop them from drying out and keep them soft and supple. After spending so much money on them, "they're worth it!"
Feel free to share your thoughts, or any other tips you may have picked up that you have found useful in the comments below!