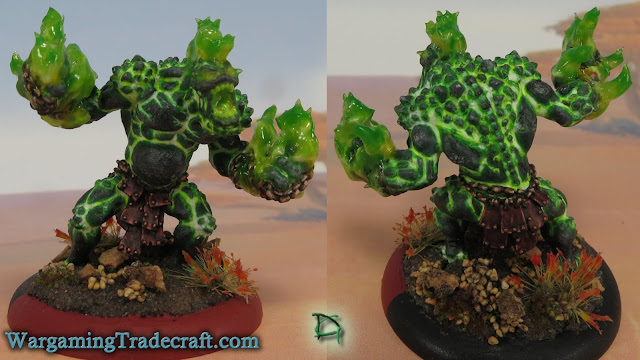
In the last post, I showed how I painted the lava effect on my Infernal Pyre Troll. Today I'll actually show how I create really nice fire effects. Again, this'll be green Fel Fire rather than a red/orange, but the theory is still applicable to your own work.
The two supplies I use are Heavy Gel (mandatory) and Liquid Fill Paint. (optional)
Basic "gel" is available in normal, Heavy and Super Heavy. It's basically a white substance that dries clear and the heavier it is, the more sculptable it is. Great for creating fire, water ripples, etc. I use it all the time, like on my Harlequin Wraithlord.
Liquid Fill (Martha Stewart brand) paint is a product I found while wandering a hobby store (Michaels) and it's designed to dry semi-clear. I'm going to write up a larger post on this stuff, because it's pretty cool. Otherwise, regular paints or washes will work as well.
Since I'm working light to dark, I've painted all the flames white to start.
I use a dentist pick to scoop gel out of the container (a toothpick would work in a pinch) and cover the flames. Because heavy gel can be sculpted, I can now pull and tease it with my tool to shape the flames how I want them.
Don't try to make the the flames as big as you want them in the end. You'll be layering the gel... watch how things build up.
Once the gel dries, it's clear. Add some colour and a few more layers, and we'll have some fire!
Here are the paints I'm using, so to begin I apply the yellow to the gel. Worth noting, is this stuff is _really_ liquidy, so to dry, I had to prop his base upside down so it wouldn't pool. (Also, contrary to what the bottles say, it doesn't take 21 days to dry, at least not for these purposes.)
Now, if you're just using regular paints, they'll work too. Since they're not completely clear though, you'll need to use less paint and extra layers. There's a pic at the bottom of this post as an example.
Once the paint is dry, apply another layer of gel. Make it bigger and more flowing - you can even pull some of the smaller flames together.
Here's what this layer of gel looks when dry.
Now I've added the green paint, which I'll have to dry upside down too.
To make it all uniform, I finish off by varnishing all the flames with gloss.
Fav / Comment on it on Deviant Art
As I mentioned earlier, if you were using regular paint instead of translucent ones, you can still create this look by using more layers of paint and gel. It won't be quite as blended, but as long as you go light on colour with your last layers, everything will turn out fine.
Depending on the look you're after, you can start with a dark colour first and work up to the light ones.
 | Take a look at my Step by Step page for the entire Hordebloods project. Here you will find each model broken down into links showing each step: Concept, Works in Progress, (for both modelling and painting) and Final Shots |


.jpg)
.jpg)


