This is the second part of our Greyhawk Adventures campaign. The log for the first part can be found here.
 |
| The heartland of the Flanaess. |
Common Year 579
Never before has there been a more perilous quest. The world of Oerth is unforgiving and dangerous, filled with wonder and horror in equal measure. Most of the folk like you and I that live here cram into cities and villages, huddled together for protection. Yet this world walks with more brave souls than you would think, heroes who step forward to face the dangers of the unknown in search of glory and lost treasure.
In times past I would have said the party need not fear the unknown, for they are powerful slayers. That would be a lie, for the way ahead is mind-bogglingly dangerous. Horrors await the bold whose touch drains away years of life and will, whose very forms cause the mind to rebel and terrors whose power extends to the very core of the earth. For the careless and unwary there will be nothing but death. Those heroes whose will holds, whose swordarm does not tire, and whose spells are mighty will win a great prize indeed - honor, glory and even more powerful magic.
As we join our party, we find a troupe of great heroes. They have adventured upon the Azure Sea, and helped the Storm Giant King Orsos defend his realm from horrible creatures beneath the sea. They defended their ship, and made it back to Onnwal hailed as heroes. These intrepid adventurers formed a bond of fellowship, and have returned to Greyhawk City the plan their next venture. For a time, they linger in the Slaughtered Pig Tavern to rest and relax.
Yet they do not realize that they are being watched...
Current Adventurer Roster (DISBANDED)
- Dunelore, Oeridian Cleric of Hieroneous VII
- Aeslan Fargoer, High Elf Fighter V / Cleric of Corellon V / Magic-User V
- Belethor, Dwarf Fighter VII
- Elmund Krakeham, Oeridian Magic-User VII
Deceased
- Jooran Doohan, Oeridian Magic-User VII
- Carlyle Cordaine, Oeridian Fighter VII
- Victor Olfdensen, Suloise Fighter VII
- Brother Grimlock of St. Cuthbert, Oeridian Cleric VII
- Tars, Half-Elf Thief VI / Magic-User V
- Spendelmen the Kobold Slayer, Gnome Fighter V / Illusionist V
- Buttermilk, Oeridian Monk VI
- Vaeronis, High Elf Ranger VI
- Mantrid, Grey Elf Fighter VI / Magic-User V
Adventure Log
Total Time: 59.5 hrs (4.14.13)
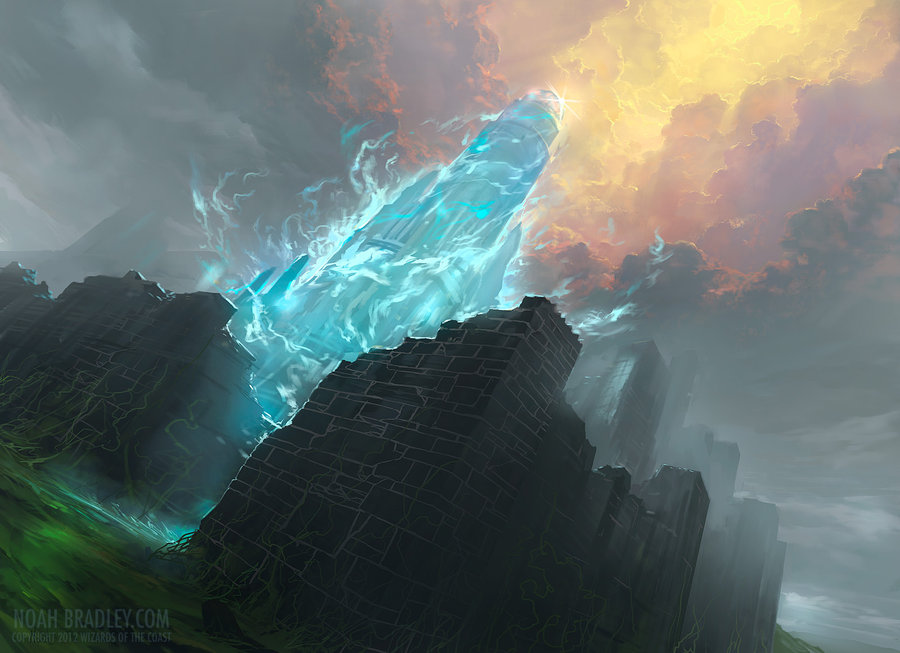 |
| The Ghost Tower and the Upper Ruins. |
- The Ghost Tower of Inverness (2.10.13 through 2.24.12) Total Time: 20 hrs - The adventurers begin their search for the infamous Soul Gem, and brave the dungeon beneath Galap-Dreidel's massive fortress of Inverness.
- As the adventurers relax at the Slaughtered Pig in Greyhawk City, they are approached by an older man who buys them all a round of ale. After some mysterious questions about how brave and bold they are supposed to be, the stranger suddenly casts a teleportation spell, moving the party's entire table to an opulent throne room! The Duke of Urnst and his Seer are surprised and incensed, until the stranger is revealed to be Tenser the Archmage! He informs the Duke that these are the warriors he seeks, and teleports away. The Duke and Seer tell the party the legend of Galap-Dreidel and the Soul Gem, and arrangements are made to take them to the Keep that very night. The party met an unfortunate accident in the ruins, and were nearly all killed. Tenser's apprentice Jooran Doohan was crushed in a cave-in, and could not be revived. So, the party sent for their friend Buttermilk the Monk, who joined them for their second foray into the ruins. This time, however...the Duke warns the party not to return without the Soul Gem. We leave the party in the Dungeon Level of the ruins... (8 hrs)
- The adventurers explore most of the Dungeon Level, and find all but one of the keys! Great deliberation was taken in a giant Chess trap, but the characters all survive this portion of the exploration with all their limbs intact, despite dangers from gnolls and bugbears seemingly strewn around the magical dungeon in states of stasis! (6.5 hrs)
- Moving on from the stasis room, the adventurers find the last of the keys, and enter the hidden center chamber of the Ghost Tower itself! A strange odyssey follows as the characters climb the towers levels. Traversing fantastic locales that scarcely seem real, the characters attempt to disbelieve their situation - but to no avail. Attacked by pteranadons while climbing a foggy staircase, the adventurers climb to the hidden glade of a Medusa (who turned three of the adventurers to stone with a glance) and further up still to a flaming sea of fire where Carlyle Cordaine met his end at the hands of a murderous fire giant. Most fantastic of all was the downside up desert island odyssey, where our party spent quite some time - until they found the hidden valve under a coral formation, where they swam down/up to the resting place of the Soul Gem! Much comedy was had as the adventurers attempted to unravel the mystery of the place...Belethor went as far as attempting to inspect every area of the room. Yet when the Soul Gem flashed it's light upon him - he was dragged into one of it's facets. Olfdensen finally decided enough was enough, and though the resulting blast took the wind out of him, his mighty bastard sword destroyed the Force Sphere around the Soul Gem in one blow! Immediately, the players grasped hands, grabbed the bleached form of Belethor, and used the amulet to retun to the Seer of Urnst. There, they began their rest after their sojourn, and the Seer was able to restore Belethor's stolen soul to his body. (5.5 hrs)
- The Dungeons of Elemental Evil (3.3.13 through 4.14.13) Total Time: 39.5 hrs - Summoned to Greyhawk City from Leukish by a mysterious missive from "T", the party gathers itself and journeys west. In the Free City, they find Elmund Krakeham, one of the apprentices from the Tower of Unknown Depths. As Elmund tells the party of Tenser's concern about the Temple of Elemental Evil, they waste no time in preparing to head even further west, to the town of Nulb along Imeryd's Run.
- Cautiously entering the temple and exploring the evil edifice, the party finds what seems to be a quiet dungeon. However, when they find the evil clerics lounging around things turn bad quickly. Buttermilk locked one of the clerics in a side room even as the other one succumbed to Tasha's Hideous Laughter. They eventually parley with the other cleric, the head of the Fire Temple. He offers interesting information about the dungeon ahead, and departs through the north passage. (5 hrs)
- Taking the back way through the Fire Temple, the adventurers dispatch a fearsome warrior with a flaming sword and his monstrous lackeys before inspecting cauldrons and the glowing, scented oil at the altar. Navigating down treacherous corridors warded with evil elemental magic, the players negotiate the dungeons confusing and deadly traps until Belethor dips his hand in the wrong fountain. A giant idol crushes several members of the party, yet the group has some healing magic. The adventurers are left in the Water Temple, bewildered as to the deadly events that just occurred. (5 hrs)
- As the adventurers collect themselves, they creep back to the Water Temple and check the monstrous idol - it's back in position, and nothing is moving except Spendelman, who had been thrown clear when he was struck. Elmund and Victor were dead, and Horus was knocked unconcious. The party only had one scroll of Raise Dead, and used it on the less mangled form of Elmund. The party retreated from the dungeon, and as they carried Victor's body back they encountered Brother Grimlock of St. Cuthbert, who was proselytizing in the middle of Nulb. He consecrated the body and they buried him in a small cemetery outside Nulb. The next day, Tolub and both his river crews docked at the Boatman's Tavern for a rip roaring time including all sorts of ale, booze and even song courtesy of Buttermilk. The adventurers set out a few days later and return through much trepidation to a hall near the Water Temple, and set about finding a way down. Soon, they find hidden stairs and descend. Shortly thereafter, in a room filled with weird statues and powerful magic, they encounter Will o' the Wisps, who drain the life from poor Brother Grimlock. Even with an Elixir of Life, Grimlock just could not stand the strain on his soul and body and stayed to serve St. Cuthbert in the afterlife. The party retreats to Nulb once more, carrying Grimlock, where they bury him next to Victor. (5 hrs)
- Observing life in Nulb, the adventurers encounter several interesting characters, including Vaeronis. After making many plans regarding egress into the temple, the party returns to explore portions of the lower level, all the while aware of a resurgence in the temple's forces. The party encountered an illusionary trap full of monsters, but when they found a brass pit caging an umber hulk tragedy struck as Tars became befuddled and ran Buttermilk through. Likewise, the hulk did a number on Dunelore...killing to poor cleric outright. The players traveled to Hommlett, as they heard they might receive help there. Brother At Arms Kade (of the Billets) was successful at the revivifications, and was quite interested to hear tales of the temple...since he was sent by the Archcleric of Veluna to ascertain that specific fact. (5.5 hrs)
- Stupefied by the staggering evil exemplar in the old temple, the adventurers recover from their hardships at the Inn of the Welcome Wench. As they collect their thoughts, they begin to piece together a horror story of impossible magnitude. The party discusses what information they have on the temple for what feels like the first time, as they recently have made the connection that it's not just another gnoll-hole. As they speak to one another, the disparate knowledge they all possess comes together when they realize that the Elder Elemental Eye may not be the entity they think it is. Old texts, forgotten symbols, ancient tales and childhood stories are recounted as the party slowly connects the dots. The mages and clerics pore over tomes for hours, including their holy texts and accounts from the books on magic the wizards possess. In the end, they come to the conclusion that the Elder Elemental Eye may be in fact the Chained God, whose true name should never be spoken! They know the names and natures of many of the demonic entities associated with the cult over the years (such as Lolth and Iuz), but do not know the exact nature of the temple as yet. However, the demoness Zuggtmoy has been identified in the depictions of the temple, though they possess only her name and a smattering of the symbology associated with her. For the entire day, the party sequesters themselves - only by chance meeting Mantrid, who agrees to join the party to fight this evil. Though they know more of the nature of the enemy, only time will tell if the party will give the proper respect to their mission and attempt to avoid the certain death that awaits them far below the surface of the Temple of Elemental Evil. (6.5 hrs)
- Though many of the party opted out, a small expedition was mounted into the Temple. A good portion of the first level was mapped, and it was surprisingly empty. However, there were some creatures in there - mostly ghouls and their chained up larder! Eleven souls escaped death in the Temple at the hands of those monsters or deranged priests by the intervention of the party. They revealed they had been brought to the Temple by Dick Rentsch, who the adventurers promptly visited after exiting the dungeon. Though it had been the longest and most exhausting foray yet, the party was in high spirits when they woke poor Dick up and killed poor Wat! After some terse questioning, the party commanded Dick and his wenches to leave - and he quickly gathered up his mercenary buddies. The party split up to take naps, get food or simply loot Dick's stuff. All of that proved fruitless as the mercenaries bust into rooms, held some of the adventurers at the Boatmen's Tavern and the poison trap Dick left on his stuff killed poor Tars without anyone even knowing it had happened. Soon, Belethor and Spendelmen were fighting for their lives against a horde of mercenarios, while the mercenaries chase the other adventurers out of the Hostel. They had scored big when they found Tars' body - he was carrying all the party's treasure! Some daring aerial antics by Buttermilk ensue as he rescues Tars' looted body, and Dunelore slipped away using his Ring of Invisibility! The session ends as the party attempts to regroup and head toward Hommlett. (7.5 hrs)
- The party arrives in Hommlett, but Brother Cade has not returned, so Tars cannot be resurrected. The players rent the large chamber at the Inn of the Welcome Wench, and take a few days to rest. However, terrible things have been set in motion. An assassin from the Temple comes to Hommlett in search of them, and while visiting with the traders Rannos and Gremag, manages to assassinate Spendelman! The gnome disappears, and the party begins to grow suspicious. They wait until after dark and go searching for the illusionist, and track him to the traders. However, they aren't there - they've departed for the Temple with Spendelman's body! The party has dispersed, and the two remaining at the Inn to rest are attacked by an assassin. Yet, they manage to become invisible and evade him, but he sets the building aflame to burn them out! Meanwhile, the other players attempt to break into the traders in a very loud manner and eventually attract the attention of the guards. Refusing to obey even cursory orders given, the players find themselves stealing horses and killing the guards (a Web spell accidentally killed two). Now pursued, they attempt to seek refuge in the moathouse nearby...but are tracked down by the NPC's sent from Veluna to quell the Temple activity. Mistaken for bandits, the players are taken prisoner. Three are executed as horse thieves and murderers, the rest have their treasure taken and told to get out of town. The rest limp off in separate directions, save Dunelore and Elmund, who return to Greyhawk City and retire from adventuring. (5 hrs)
This concludes our Greyhawk Adventures game for AD&D 1st Edition. I hope everyone had as much fun as I did amidst all the blood and gore.
We set out to play the game as RaW as we could, as unforgiving as possible, and we found it to be intensely difficult. Our game group simply couldn't defeat the Temple of Elemental Evil at this time. Since this was our group's second party to die or go mad dealing with the module, we're moving on to another world. This weekend, we'll begin our Dragonlance Adventures for 1st Edition. Again, we'll be using the old modules verbatim, RaW as possible.
Take heart adventurers! Do not despair! This has been the first game we've ever played that has had this sort of ending - it's got to happen once in a while. Now that you know the score, bear this in mind when we play Dragonlance this upcoming weekend. See you on Game Day!