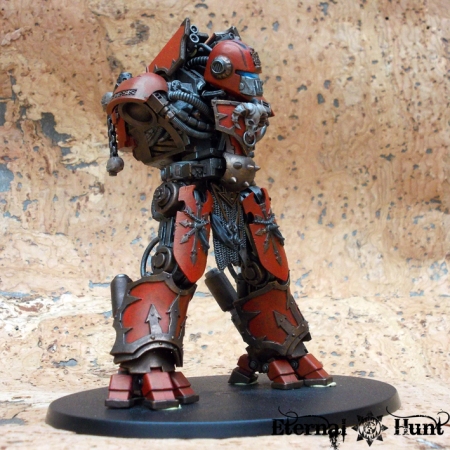
So, time to revisit that mysterious model from the fuzzy teaser shot, I think. Some of you may already have recognised the model in question, and to tell you the truth, ever since I built my converted Dreadknight / counts as Decimator (inspired by Chris’ fantastic conversion over at A Host of Word Bearers), I’ve been itching to get this big boy painted. While painting the model seemed like a rather daunting task at first, painting my various Chaos Dreadnoughts has taught me that models at a slightly bigger scale can be real fun to paint, if only because the actual painting can be less fiddly due to the increased size.
In any case, there was really only one way to find out…
So, how did it go? Just to remind you, here’s where we left off last time:

Before breaking out the paints, I used the last possible opportunity to add some final bitz: A chaos smoke launcher was cut in half, with both halves added to the cowling behind the model’s head. A chain with dangling skulls was also added to the reactor on the model’s back.
The next step was to break down the model into the different sub assemblies and get everything undercoated in chaos black. Thankfully, this was pretty fast work. Here’s most of the model undercoated and tacked together (again):

I then started painting the different sub assemblies, starting with the legs. Fortunately enough, my predicition proved correct: Painting the model turned out to be quite a lot of fun!
While larger models take much more paint to be completed, you can also cover much more ground and work with larger brushes, without having to worry about all the small nooks and crannies — at least at first…
So a short while later, the legs were basically finished:

At this point, I really liked where this was going and I was basically hooked. So I pressed on, painting the torso next…

As you can see, the amount of cables and metal doodads on the torso front meant that I could use a healthy dose of washes to make the metal look suitably dark and oily. I was also happy to finally see the head painted (but we’ll take a closer look at that in a minute). The last parts for the torso to be painted were the armour plates for the model’s chest. I quickly finished these, then tacked together what I had so far:


I am actually pretty pleased with the WIP model so far. The paintjob already does a fairly good job of blending together the different parts used in the conversion.
On a related note, I realise that the use of a head from an 80s’ toy was a point of contention for some. So my hope was that the paintjob would go a ways towards making it look like an actual part of the model. Take a look:

While I am pretty sure that this particular choice of head will never make everybody happy, I am pretty pleased with the result: I don’t think it looks that much like an action figure any more. As you can see, I also added a simple blending effect on the models visor, trying to ride the cylon motif for all that it’s worth ![]()
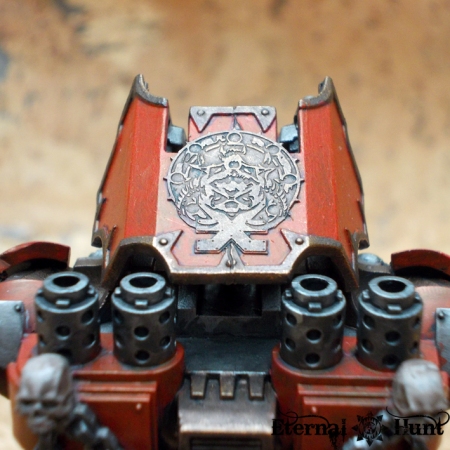
A brass etched symbol of Khorne (kindly sponsored by PDH — cheers, mate!) was added to the armour plate on the model’s shoulders:

You may say that it looks like it’s the wrong way around: a result of the plate originally being positioned slightly differently. In any case, it fits much better this way around anyway, so there is little to be done.
Again, I am really pretty happy with the model so far, even though it’s not yet complete: The next step, obviously, is to paint the model’s arms. And, of course, a suitably impressive base will have to be designed and painted at some point. Expect the next update pretty soon, though, because I am rather stoked for finishing this model.
Until then, feel free to let me know what you think in the comments! And, as always, thanks for looking and stay tuned for more!
Filed under: 40k, Chaos, Conversions, paintjob, WIP, World Eaters Tagged: 40k, blood knight, chaos, chaos space marines, conversion, counts as, daemon engine, decimator, khorne, khorne's eternal hunt, painting, painting in progress, paintjob, PIP, wargrinder, WIP, world eaters
