The start of something wonderful!
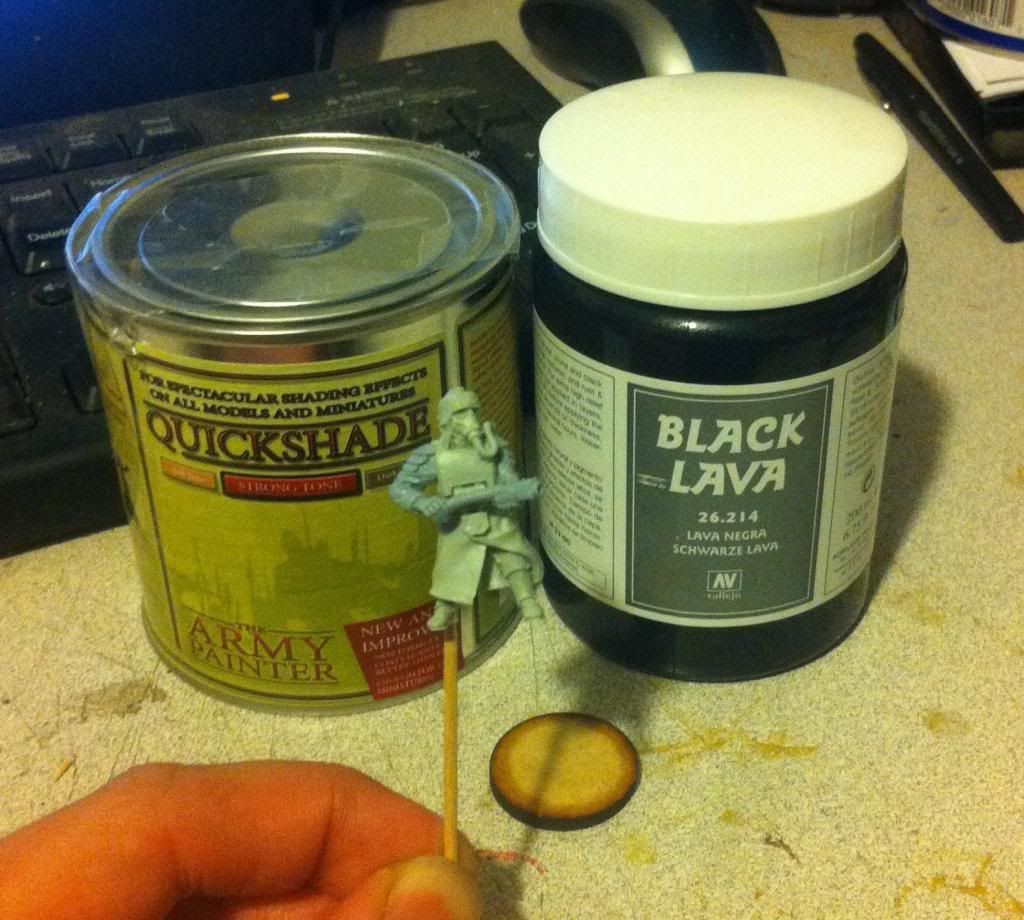
I've purchased quite a bit of stuff from Forge World recently. It's a solid chunk of the stuff I'll need to build a large Death Korps of Krieg army. I'm intending that the army will have over 120 guardsmen at 1850pts. In order to paint that many models, I'll have to rethink the way I paint miniatures, which is where the products pictured above come into play.
Normally, I paint by priming with a color primer, painting on basic colors, washing all or part of the model, finally adding details, highlights, etc and varnishing. While I could do that for this build, applying the wash by hand is entirely too time consuming, so I bought some of The Army Painter's Strong Tone Quickshade dip.
Let's see how it works, shall we?
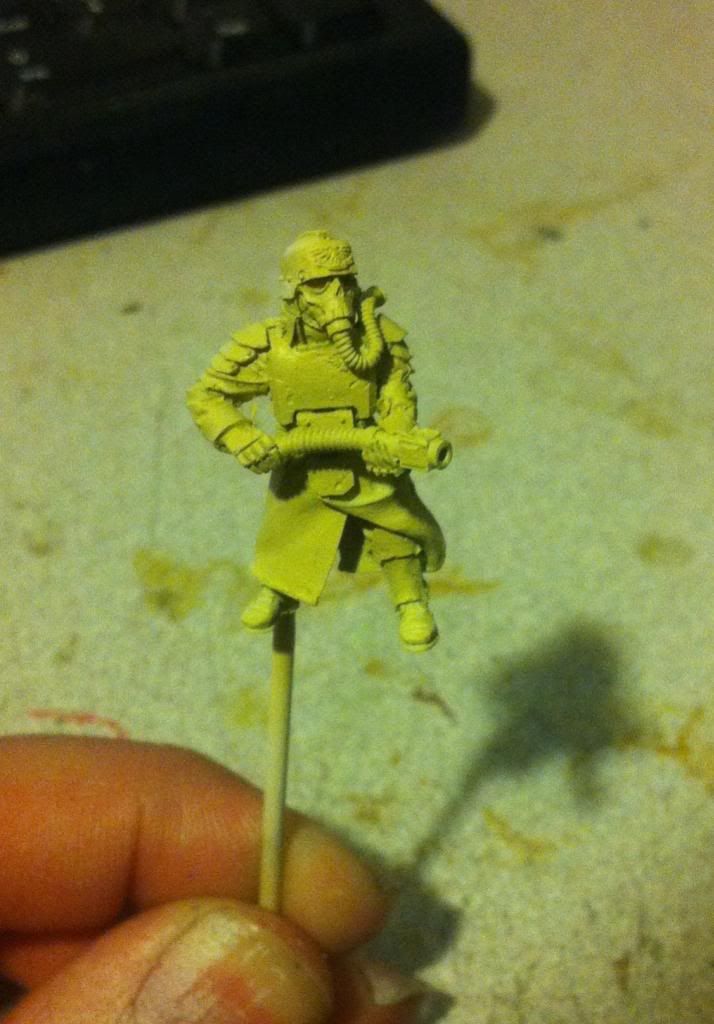
The model--in this case, a Death Korps Grenadier with a hose section--got a hole drilled into his heel and toothpick jammed into the hole. He then got primed white and had a base coat of The Army Painter Skeleton Bone Warpaint applied by airbrush. I use a 50/50 paint/water mix. Works great.
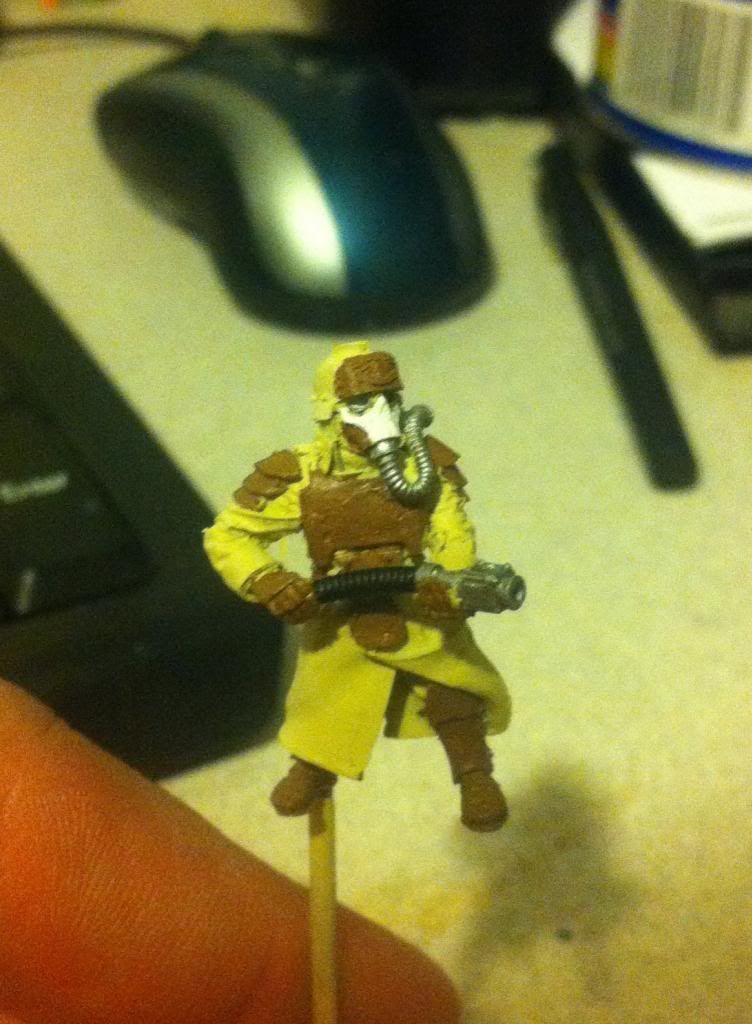
The next step is to apply the layers of paint on the model by brush. A few basic colors from The Army Painter's Warpaints range, and we're pretty much good to go. This guy probably took about 45 minutes to paint to the condition that he's in as pictured.

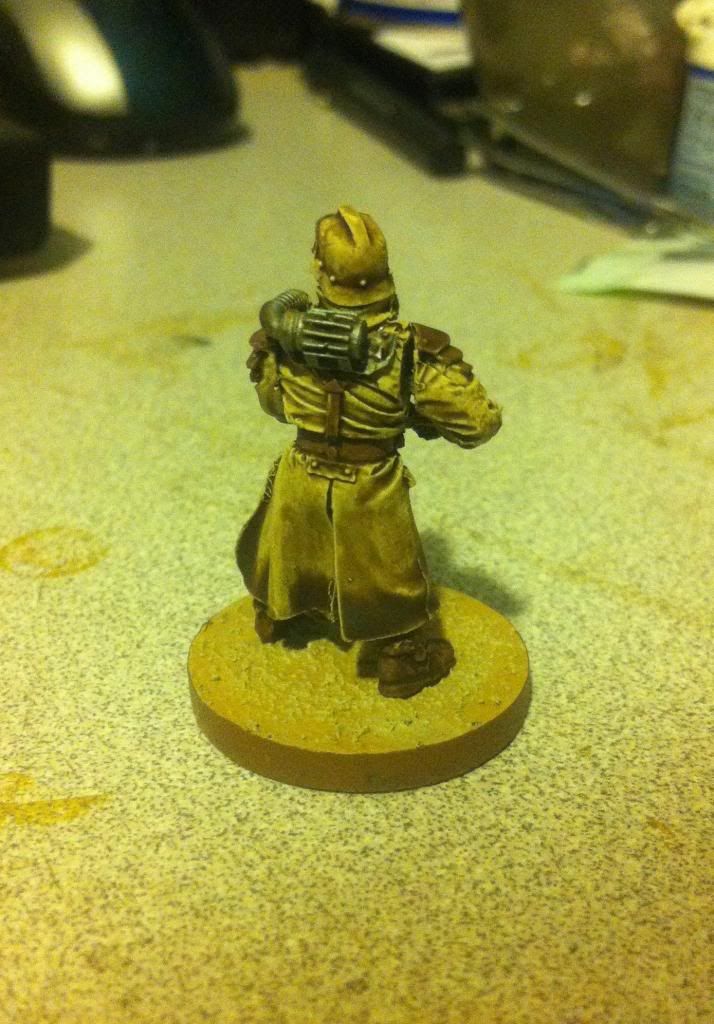
While the Grenadier was drying, I added some Vallejo Black Lava textured paint to a 25mm MDF base I cut out with my laser cutter. This was my first time working with textured paint like this, so I wasn't sure what to expect. Oni had very positive things to say about the product, so I figured I'd give it a chance.
From the one model I've used Black Lava on, I think it's a keeper. The product does have to get "slopped" on instead of brushed on if you want an even grit across the whole base.
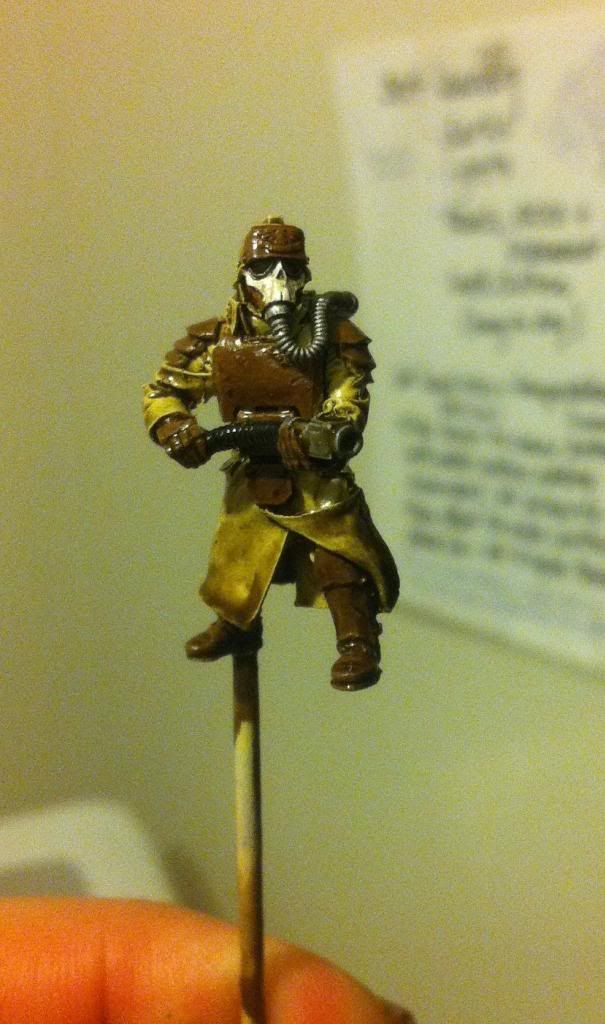
After letting the Grenadier dry for about half an hour, I put the Quickshade dip to the test. The stuff is pretty much wood stain. Tons of hobbyists use Minwax instead and save a couple bucks in the process, but I like the way the Strong Tone looks on models and didn't want to spend money and time trying to figure out which shade of stain matched closest.
The entire process of dipping models is new to me. The dip looks like it coats very heavily and does have to have the excess tapped back into the can and the few drips and such shaken off. Unfortunately, I neglected to glue the toothpick to the Grenadier's heel, so he flew off while I was trying to remove excess dip. After his second airborne excursion, I just sopped up the heavier pools of dip with a paint brush.
The thing I like least about the dip is that it requires 12 hours to dry and 24 to cure fully. While this can be a drag, I imagine it's not such a big deal when you're dipping 20 to 30 models at a time and letting them dry while you work on the next batch. As was to be expected, the dip dried to a high gloss, which shows off the varnish component of the dip.
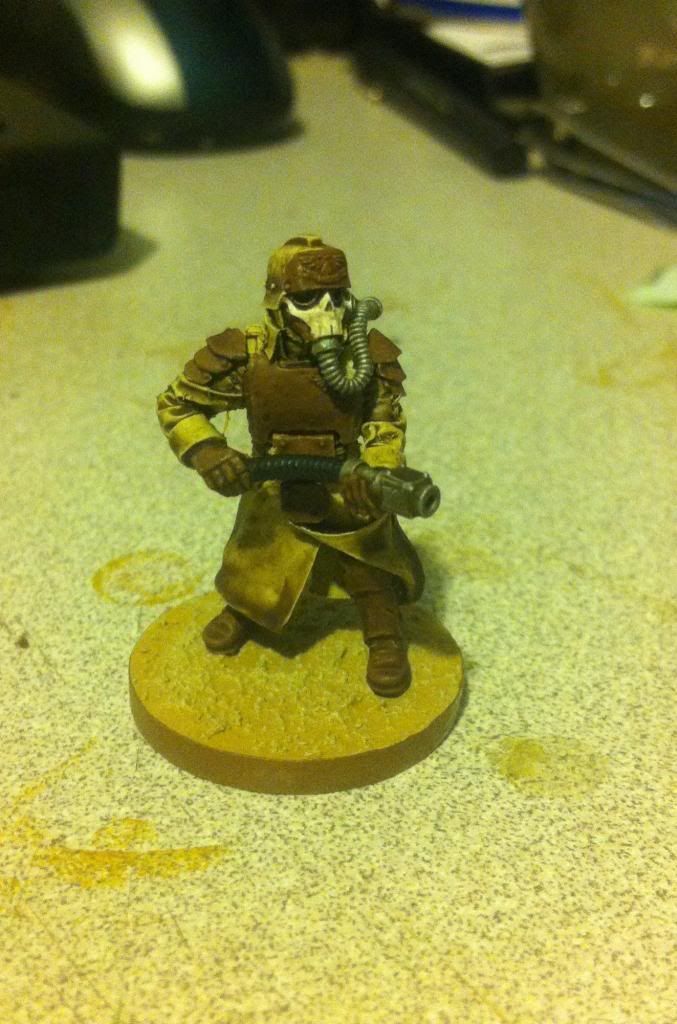
And so, after waiting the requisite amount of dry time, I hit the model with my favorite Testors Dullcote. I can honestly say I couldn't be more pleased with the result. The camera on my cellphone fails to capture how splendid the model looks for the level of effort I put into it. I did have to do a tiny, tiny bit of touch up work with Strong Tone Ink, but aside from that, this chap's ready to hit the table top.
The base is my usual desert scheme: Desert Yellow base coat, a drybrush of Skeleton Bone and the lip painted Leather Brown; Warpaints all. I primed the base white.
The entire Death Korps army will be painted using this technique. I have some plans for magnetized squad-sized movement trays, just so my opponent doesn't kill me when I tell him I'm playing with more than 100 models, but that's a post I'll get to when I reach that point in the project. For now, I think we can all call this experiment a resounding success!
All the best,
-Jordan