First was the base that I made way back in January at the basing workshop with Matt Cexwish.
As there is also a Brushbrothers contest for basing, and it ended last night, I figured I best just finish the base and call it done.
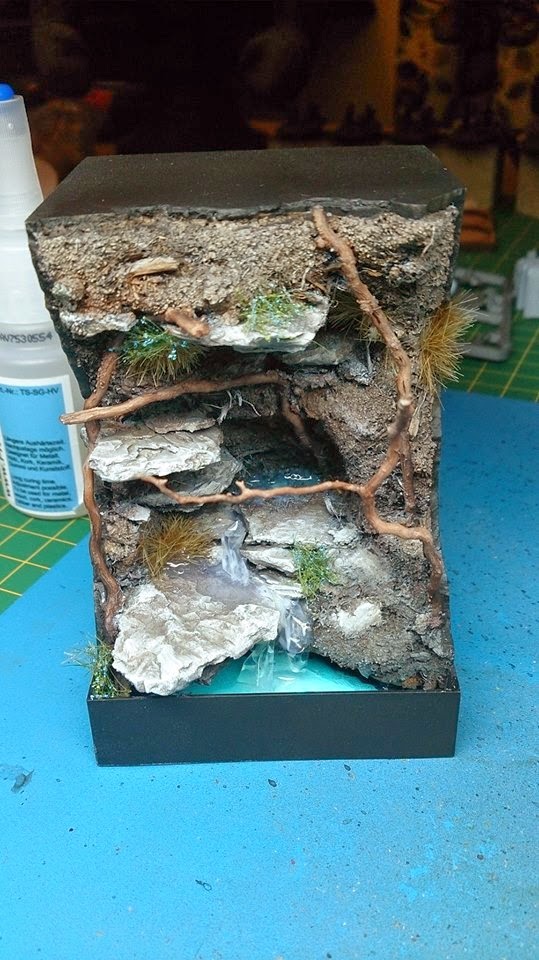
Main things I did though was just touch up a couple of the colors on the base, add some foliage ( yay! Finally got to use some of my polak stuff that has traveled almost as much as I have! ), and then add the water effects. Prior to putting down the water effects though I did paint the bottom of the dice cube with teal and white stippling to make it look more magical? Shallow? Like water??
One of the biggest things I tried ( and not sure if it fully worked yet ) was to make a small waterfall with the water coming from inside the cave system.
This was one of the techniques that we learned, but I think I didn't do properly, from the class.
Basically taking some cling wrap or plastic, and gluing it down where you want the waterfall to occur. By gluing I mean, place it with satin or gloss varnish and let that kind of hold it in place. As I said, I was not too good at this part, but it still worked in the end I guess. Maybe the piece at the bottom is a bit too large though.. no idea.
From here, it was just putting in the water effects. For me, I finally got to use some of my liquids that I have been hording here. For this one I tried to use the Vallejo Still Water effects. It seemed simple enough... pop a hole into the top of the bottle.. pour bottle where you want the water effects! Wait 24 hrs?
For me, I just poured some into the bottom well. And then also poured some into the reservoir at the back of the cave, and just let it run through until it reached the bottom cavity again. So I hope it will be a more natural effect when it is all dried. Had to play around with a big of it with the paint brush ( hope I haven't destroyed said brush now! ) to get it to move around where I wanted it to. Now we just wait till tonight to see how it all settled and what the plastic looks like afterwards also.
On top of this though I also went ahead and built up a HobbyZone miniature transport case out of wood. Pretty simple. Just used white glue.. and when that didn't work Thin Viscosity Super Glue and Accelerator. Made the pieces that didn't want to stick stick real quick :)

As you can see.. it is pretty big. Actually big doesn't begin to cover it. Which is sad cause I was hoping I would be able to use this for my upcoming trip to Germany, but it looks like I will need to find an alternative solution instead. Something that is not as heavy, large or unwieldy. Though this piece is more than large enough to store quite a few pieces ( heck maybe a smaller army could fit here! ) and some larger pieces like the Sci-Fi bust I am working on currently. So in that part it is good.. but damn if I want to be carrying this everywhere, or if I want to try to get this into the overhead compartments when on a plane. Something tells me that it will not fit there, and I don't really want to have to lay it on its side.
But you can see at least a few of the projects underway that I wish to take with me to upcoming events ( Salute, Duke, MV ). So we shall see if I can find an alternative solution to this all. In the meantime I will attempt to take it to Salute and see how well I do. Worst case I have a sore arm at the end of the day. Best case is I become a professional body builder during Salute.
Time will tell.... enjoy!