
40K HOBBY TIPS
Painting Chaos Spawn
By
Uktena
Uktena
South Mississippi Gamers
Got some Spawn to paint? Not sure where to start? Well, that can be a problem with Spawn because there is no traditional way to paint them because they are Chaos personified, meaning that they can take almost any shape or color. Chaos Spawn are the ultimate painter's playground since you can literally color them any which way you so desire.
That all being said I can imagine some people are just interested in getting their Spawn painted and done. They don't have time or patience to dream up the ultimate, fun paint job. Or maybe some people just lack the confidence or skills to make their models look good? For all of those people they are in luck here and I present to you this painting article. Just follow the steps and you are on your way to painting up some good looking spawn for your army. These painting steps are not difficult and will paint a Chaos Spawn in a relatively quick amount of time once you get it down. The finished models won't win any contests but they will be painted fairly well.
You might ask about Marks of Chaos on your spawn and painting the Spawn the corresponding God colors? Glad you asked, here is my take on it. Look through the Chaos Space Marine Codex and find me the rule where it says your spawn has to be a certain color to represent a certain Mark of Chaos? Go ahead, but yeah, you won't find it. Sure, fluff wise you might want to do that and that is fine. But for rules purposes you can have a polka dot purple and yellow Spawn and slap any Mark of Chaos you wish on him.
This article explains how to paint red Chaos Spawn. If you want another color then just substitute the red colors for the corresponding colors that you want. I use Citadel colors and if you do too then here is a helpful link for the paint conversion between old and new Citadel paints. For those of you using another company's paints then here is a useful full conversion chart.
Full disclosure here, the author thinks of himself as an intermediate to somewhat experienced painter. He's no pro and he isn't going to be winning any painting contests. The purpose of this article is to get some Chaos Spawn done fairly quickly and painted to a tabletop, or better, type of quality.
Let's get started.
STEP 1.
Assemble the model, base it and prime black.
I will assume everyone is capable of doing these things and will move on to the next step.
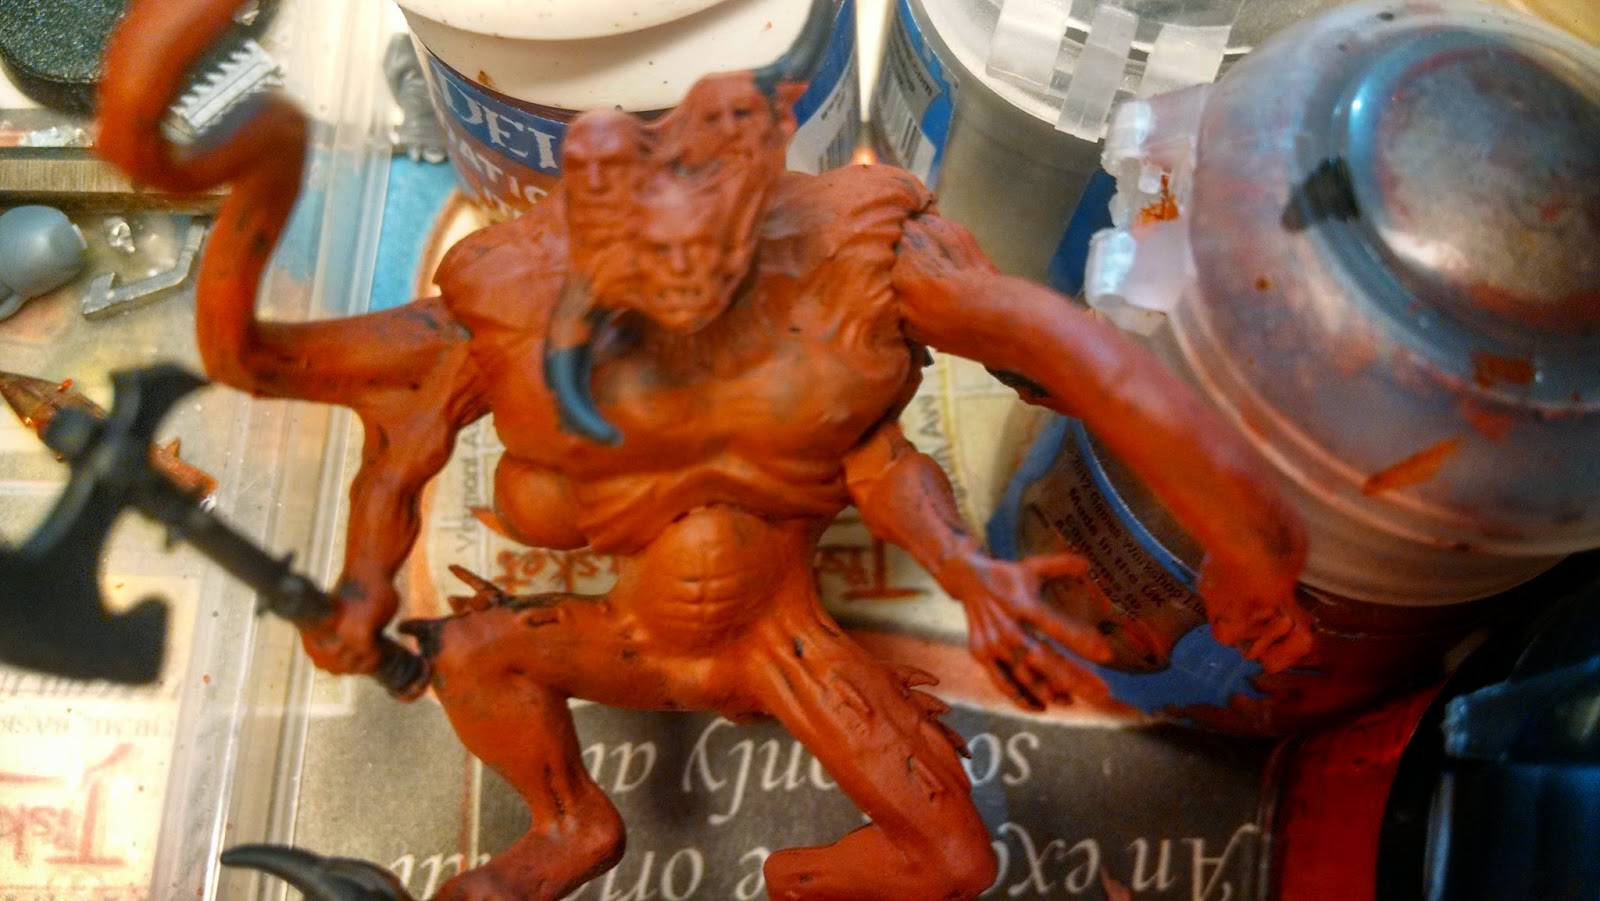
STEP 2
Paint the body with Mephiston Red (aka Mechrite Red)
Paint the entire body a rich red, including limbs and the head but not horns, weapons or other bony things. It is ok if you get red on other parts because you will color over them later. Mechrite red is a great layer and it goes on easy and thick. I haven't used the new Mechrite Red (called Mephiston Red) yet but I assume it is a layering color also. It really doesn't matter, just use a rich, kind of darker red and you will do fine for the base layer.
 |
| STEP 2. Paint the body parts a rich red. |
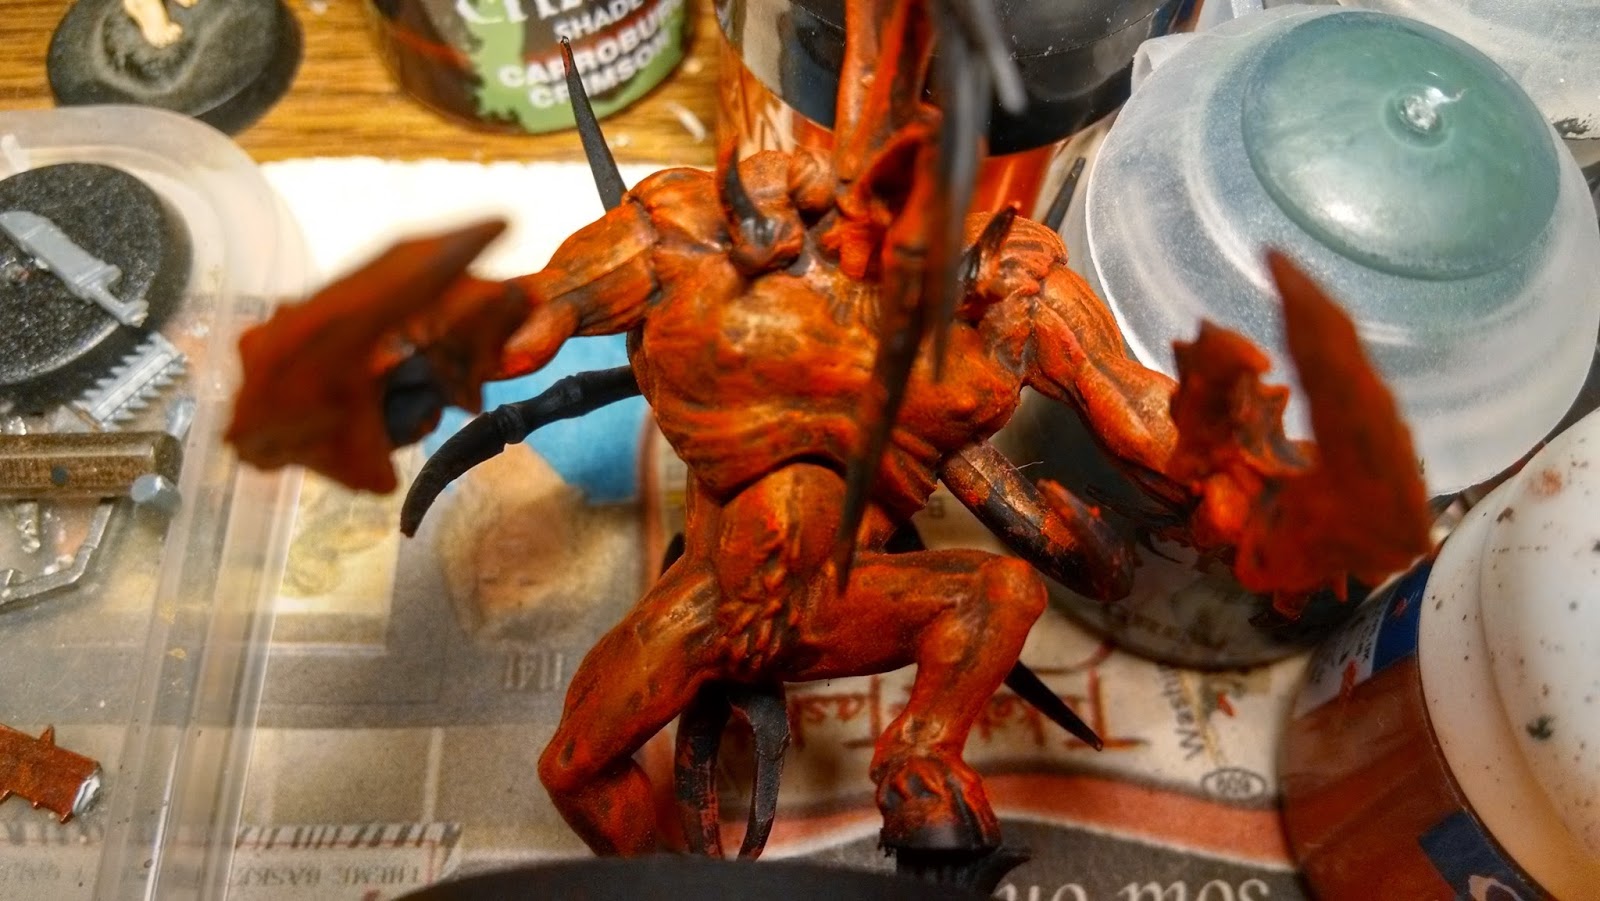
Black wash.
It's time to slather the model with a black wash. I used Nuln Oil (aka Badab Black). Put the wash on good and thick and get in into all those crevices - Chaos Spawn have lots of them! We are, of course, just washing the areas painted red and not the black areas.
Painter's Tip: Shake washes before you use them.
 |
| STEP 3. Generous amount of black wash applied. |
Drybrush Blood Red (aka Evil Sunz Scarlet)
Get out that old, reliable drybrush because you will be giving it a good workout. Give the body, and all those red parts, a good drybrushing of a colorful red.
 |
| STEP 4. Drybrush with a colorful red. |
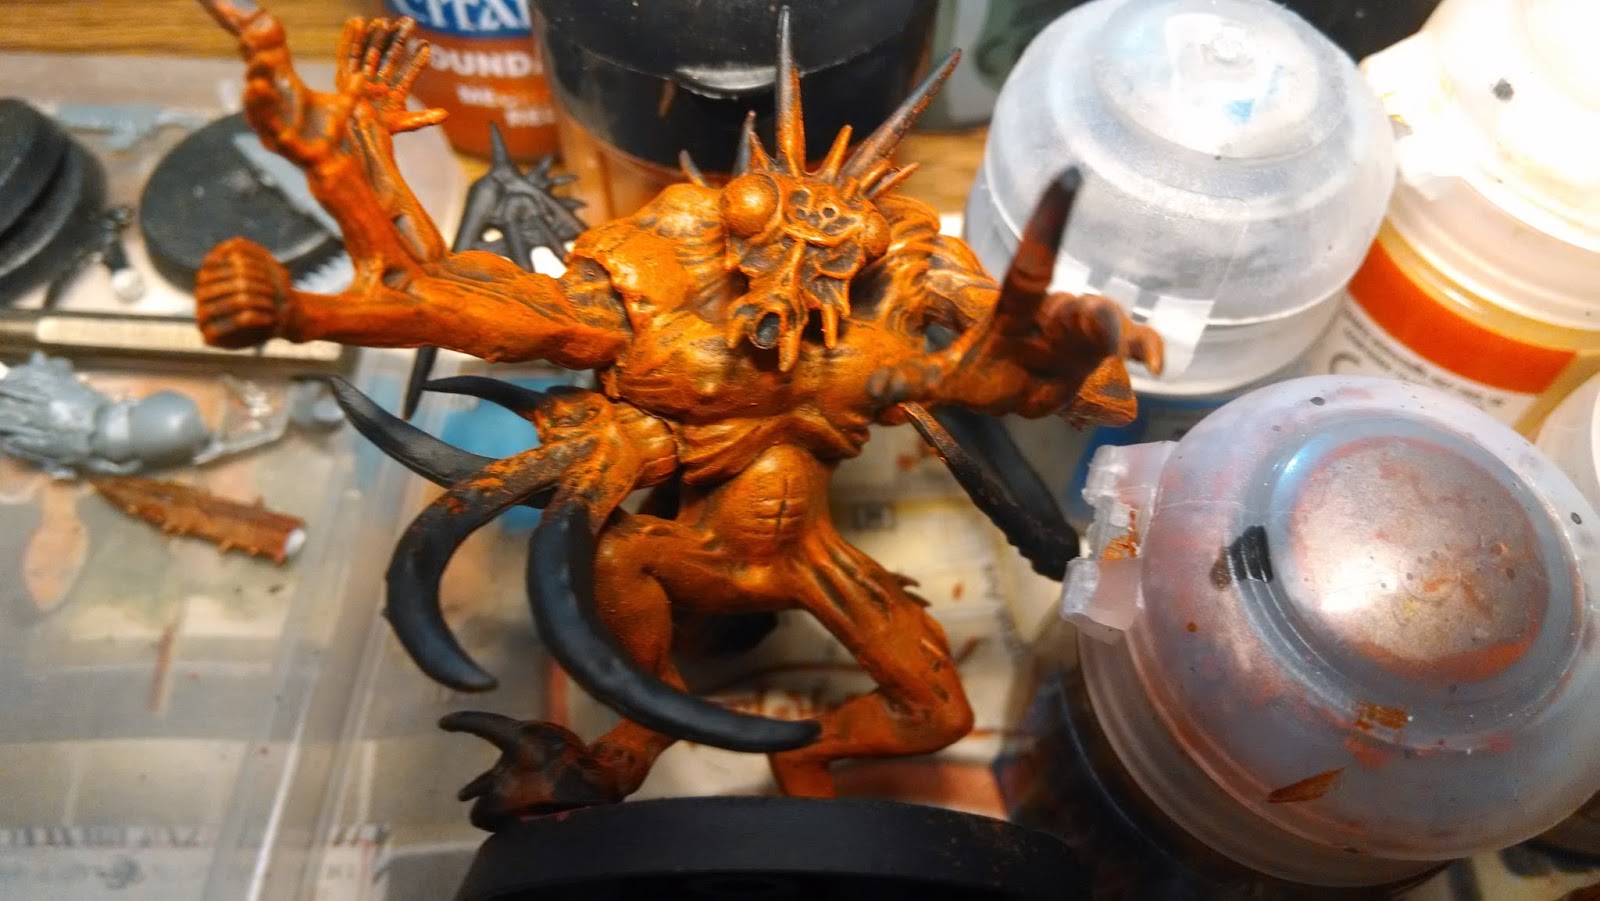
Drybrush Blazing Orange (aka Troll Slayer Orange)
OK, next drybrush the same areas but this time with a bright orange. This will bring the red 'to life' and brighten it up. The model will end up looking a bit orange-red and in bright light it will probably look orange like in the picture I made for this step. You can adjust how bright you want your model to be by controlling the amount of orange you dry brush onto it. Again, don't worry about getting paint on black parts.
Beginner's Tip: When a drybrush starts to look frayed it is just entering it's prime!
 |
| STEP 5. Drybrush with a bright orange |
STEP 6.
Paint the horns and bony parts Ushabti Bone (aka Bleached Bone)
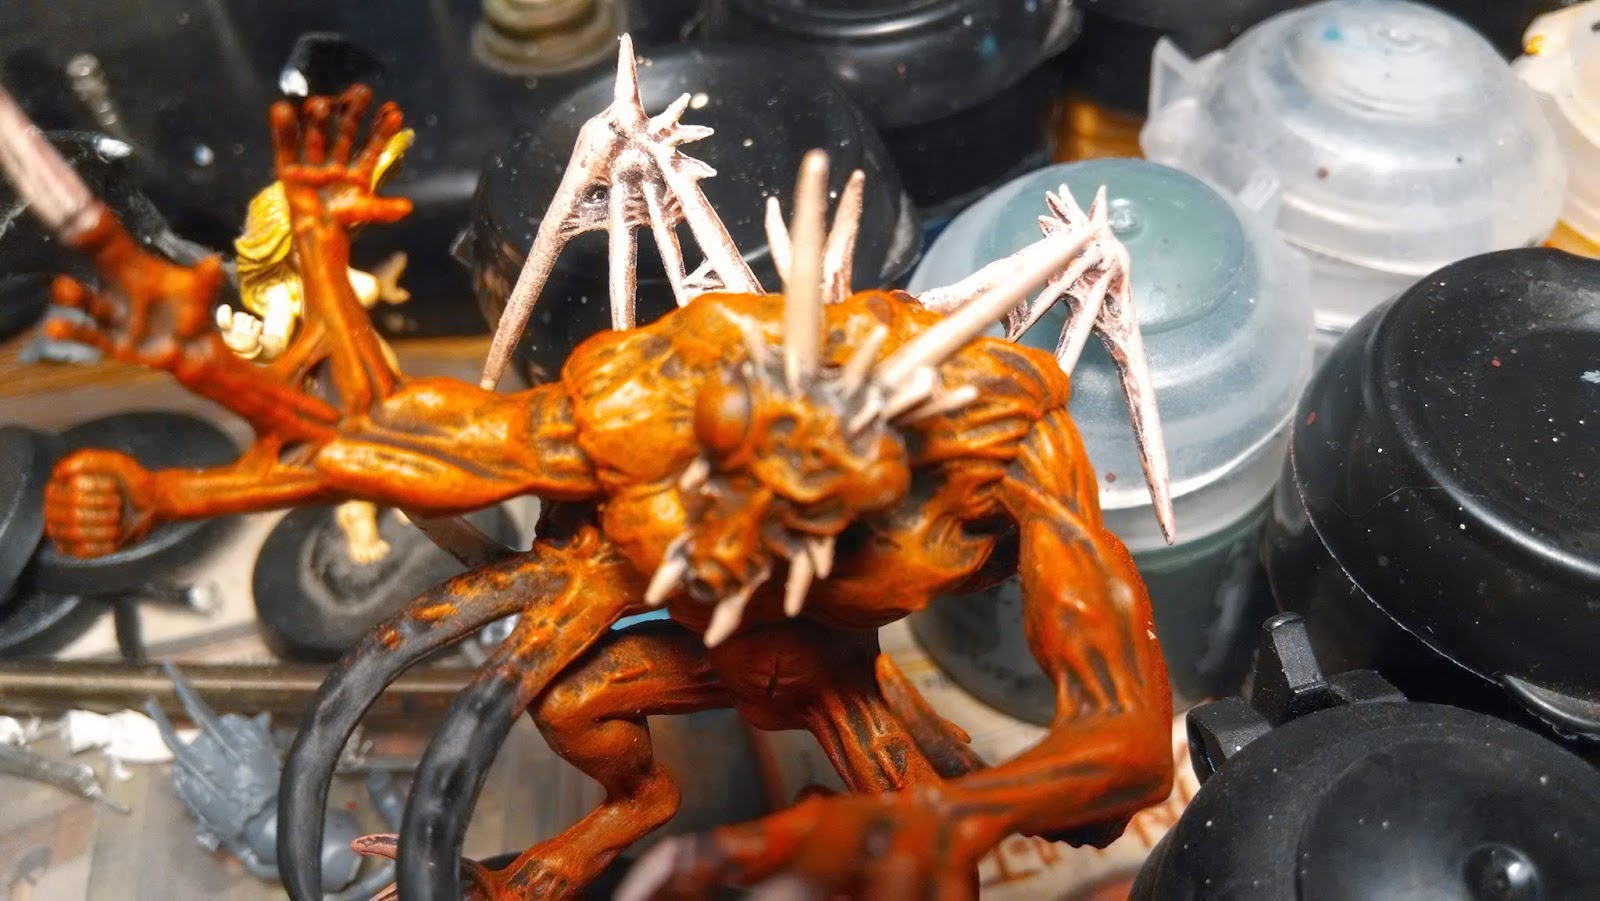
Time to start painting the peripheries. Anything that looks like smooth bone, fangs, teeth, talons, claws, etc. go ahead and paint it a bleached bone color. Chaos Spawn also have those long, curved bony like appendages with lots of bumps and detail - leave those black. I will have another step for those later. In the picture you can see the bone-like appendages I am talking about as I left them black.
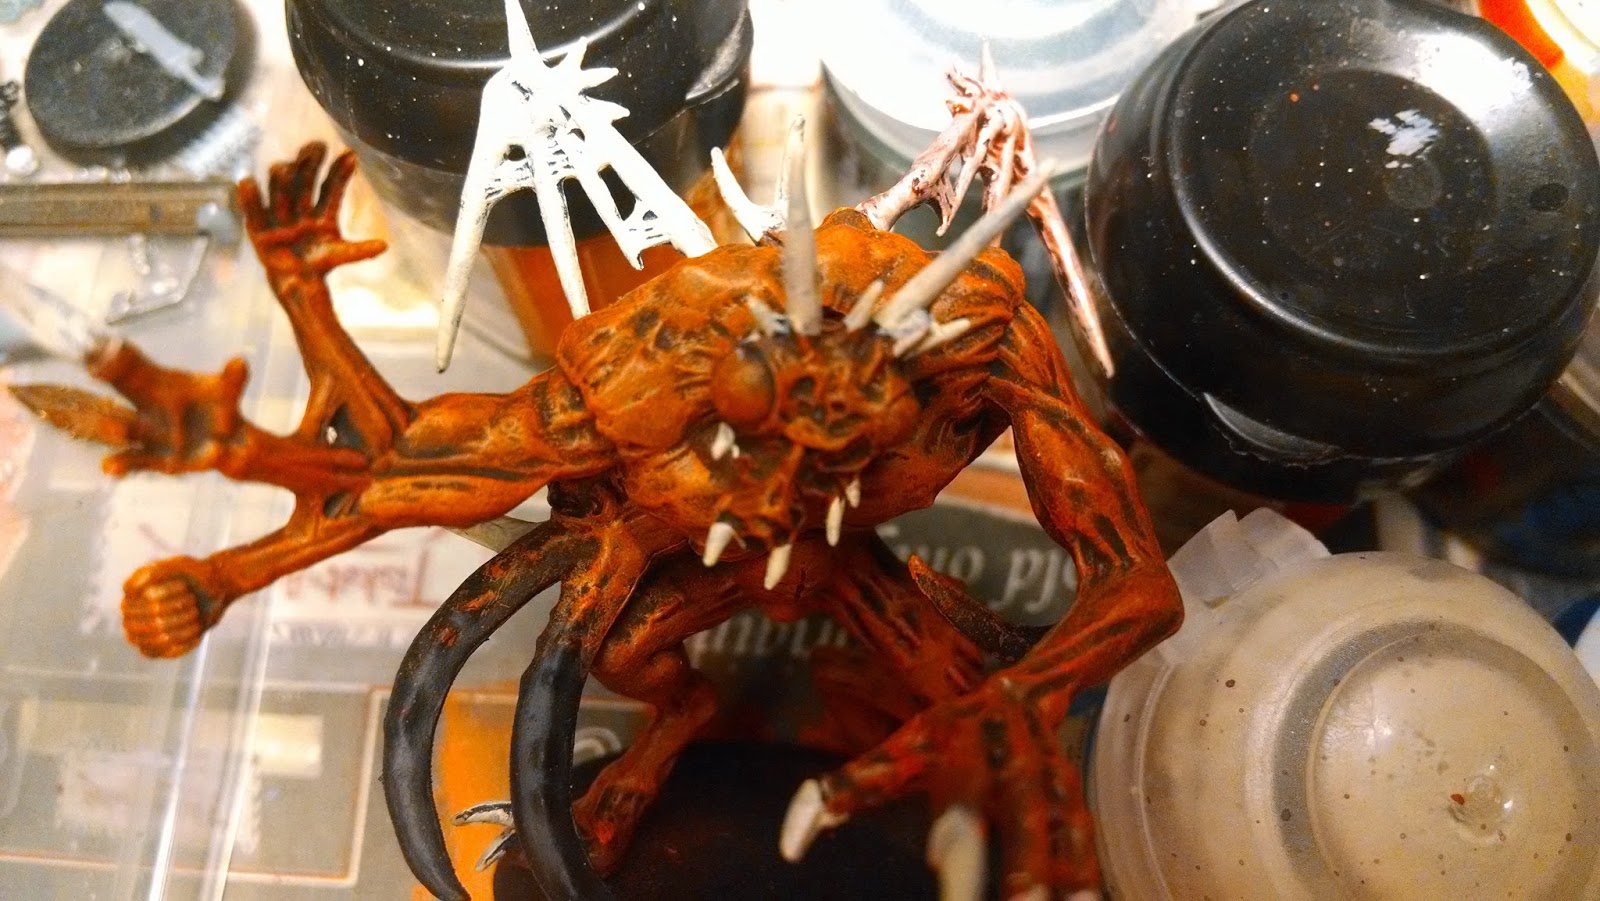 |
| STEP 6. Paint horns/bones/etc. bleached bone. ( Ignore right wing, it has red wash on it. Oops. ) |
Red wash the bony parts.
Easy step, put a heavy red wash on the parts you just painted with bleach bone. Don't worry about mistakes as red wash on the body will blend into the chaos-ness of the model. I used Carroburg Crimson (aka Baal Red) for my wash.
 |
| STEP 7. Red wash the bone paint. |
Drybrush the red washed bony parts with Ushabti Bone (aka Bleached Bone)
Using Ushabti bone again, give a drybrushing to all the bony parts you washed with red. This will give a gnarly, bloody appearance to the bone for a creepy look. You can drybrush the white heavier if you prefer a whiter bone rather than a bloody look.
A little white getting on the body from the drybrushing is fine, it can look natural on Chaos Spawn. But if you get to much white on them you can touch it up with red and it will look fine. The natural chaos-ness of Spawn lends itself to being very forgiving with mistakes.
When you are done drybrushing you can add some red wash along the base of the bony parts where they come out of the body. This will give it a more bloody and interesting look. It's up to you and you can always just drybrush back over the wash if you don't like it.
 |
| STEP 8. Front view - drybrushed bony parts. |
 |
| STEP 8, pic 2. Rear View - drybrushed bony parts. |
STEP 9.
Drybrush fleshy parts between the bones with red.
See those fleshy parts in the wings, toes and on some other bony appendages? Drybrush them lightly with a red and make them appear raw and bloody. A lighter drybrushing makes it look even more sickly. Or you can just put some red wash on the fleshy parts for a quicker, but duller result.
 |
| STEP 9. Drybrush fleshy areas red. Try for a lighter drybrushing than in the pic, I think it is too red. |
STEP 10.
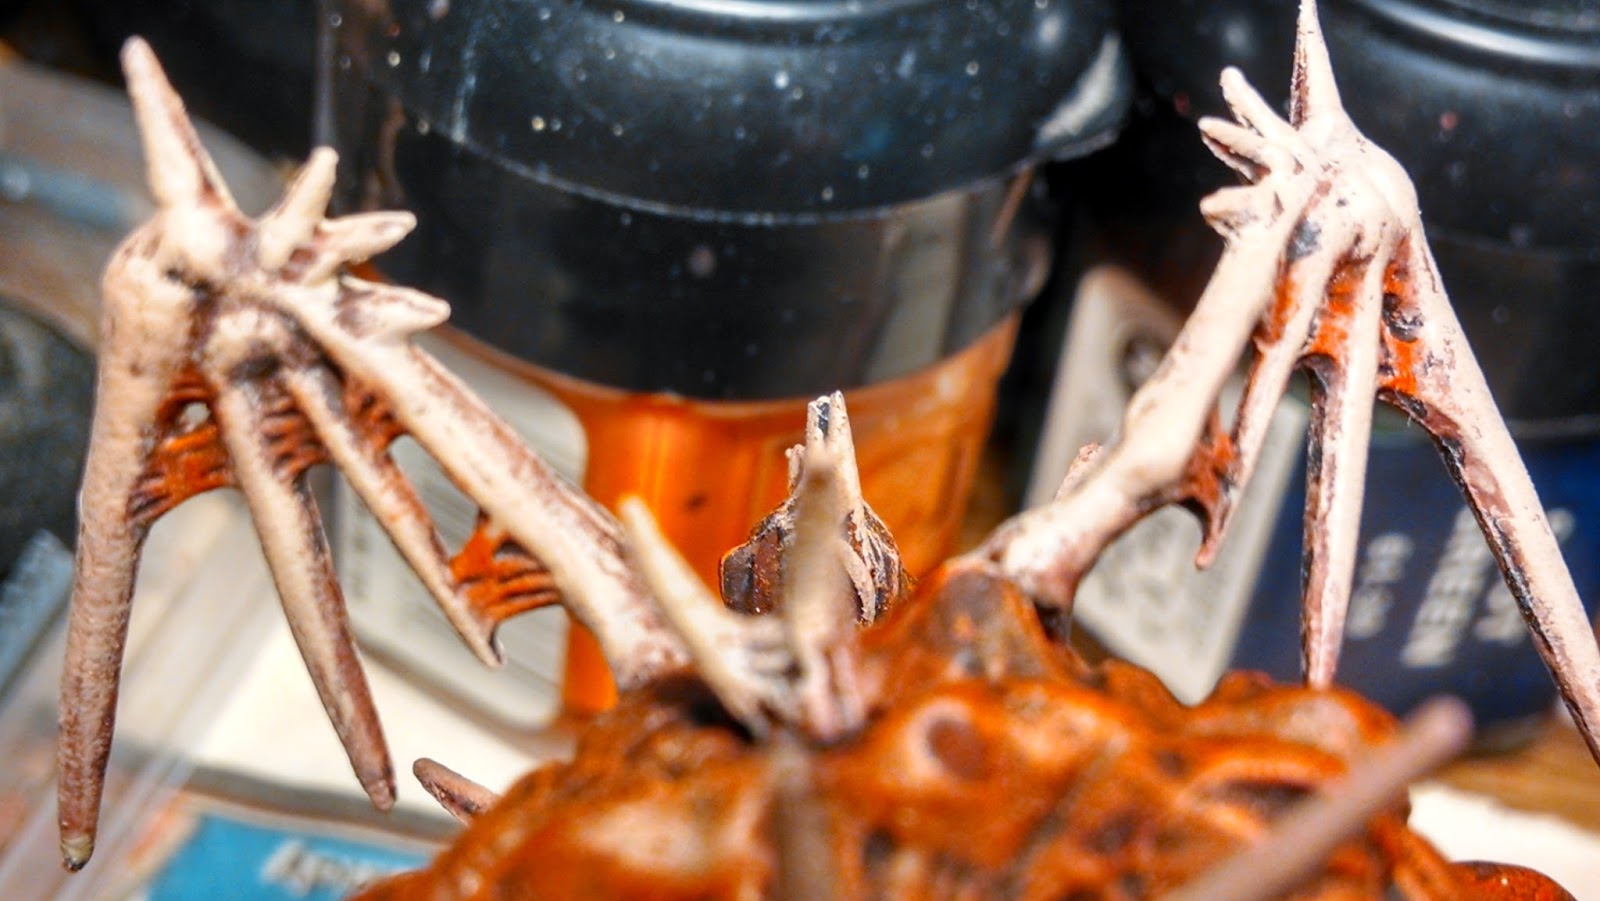
Drybrush the bony appendages with Ushabti Bone (aka Bleached Bone)
and apply red tips.
Apply a medium drybrushing to the bony 'appendages' to give them a grungy, dirty look. This method allows a lot of detail to be shown with all the bony bumps and shapes on the appendages. When you get a look that you like I recommend you put a blood red tip on each appendage to give it both a visually appealing and a dangerous look.
 |
| STEP 10. Drybrush bony appendages with bleached bone. |
 |
| STEP 10, pic 2. Apply blood red tips for a dangerous look. |
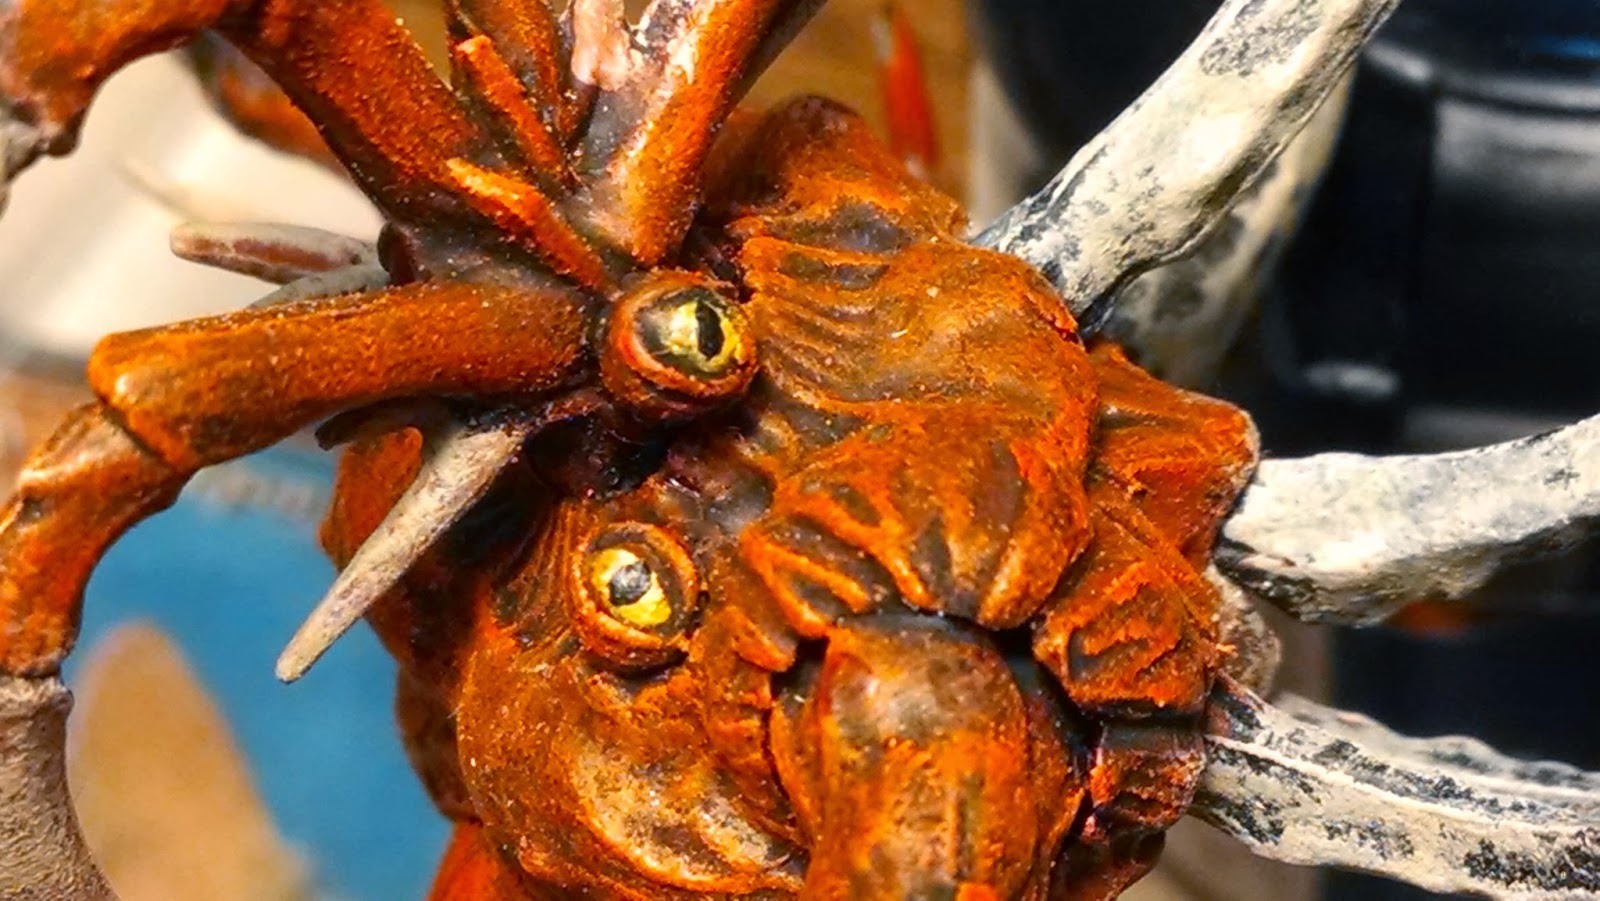
Paint the eyes yellow and apply black 'pupils' if needed.
Some Spawn will have little eyes, some have medium eyes and even others sport giant eyeballs. Using a yellow color paint the eyeballs if you can. If the eyes are very small then just put on some paint where the eyes are while purposefully getting it around the eyes so to (hopefully) make a 'glowing' eye effect. For my yellows I use either Golden Yellow (Yriell Yellow) or Sunburst Yellow (Flash Gitz Yellow) but any yellow should do the trick. Orange is also a color you can use for eyeballs but it tends to blend in with the red body.
When the eyeball dries go ahead and paint black pupil slits on the eyeballs, like a cat's eye. Hopefully this will give your Spawn a predatory look. If the eyeballs are very large try painting multiple pupil slits for a weirder look.
Beginner's Tip: Yellow is often a hard color to work with and you might have to use more than one application. Patience is the key.
 |
| STEP 11. Paint those eyeballs yellow and apply pupil slits. |
 |
| STEP 11, pic 2. Large eyes with multiple pupil. Not sure if I like these eyes, I might need to practice with eyes some more. |
Paint any paraphernalia like weapons.
Some Spawn arms come with weapons or other stuff on them. Paint them however you wish.
 |
| STEP 12. For the axes I used snakebite leather, mournfang brown and ironbreaker. Then I applied a black wash and reapplied the colors afterwards as needed. |
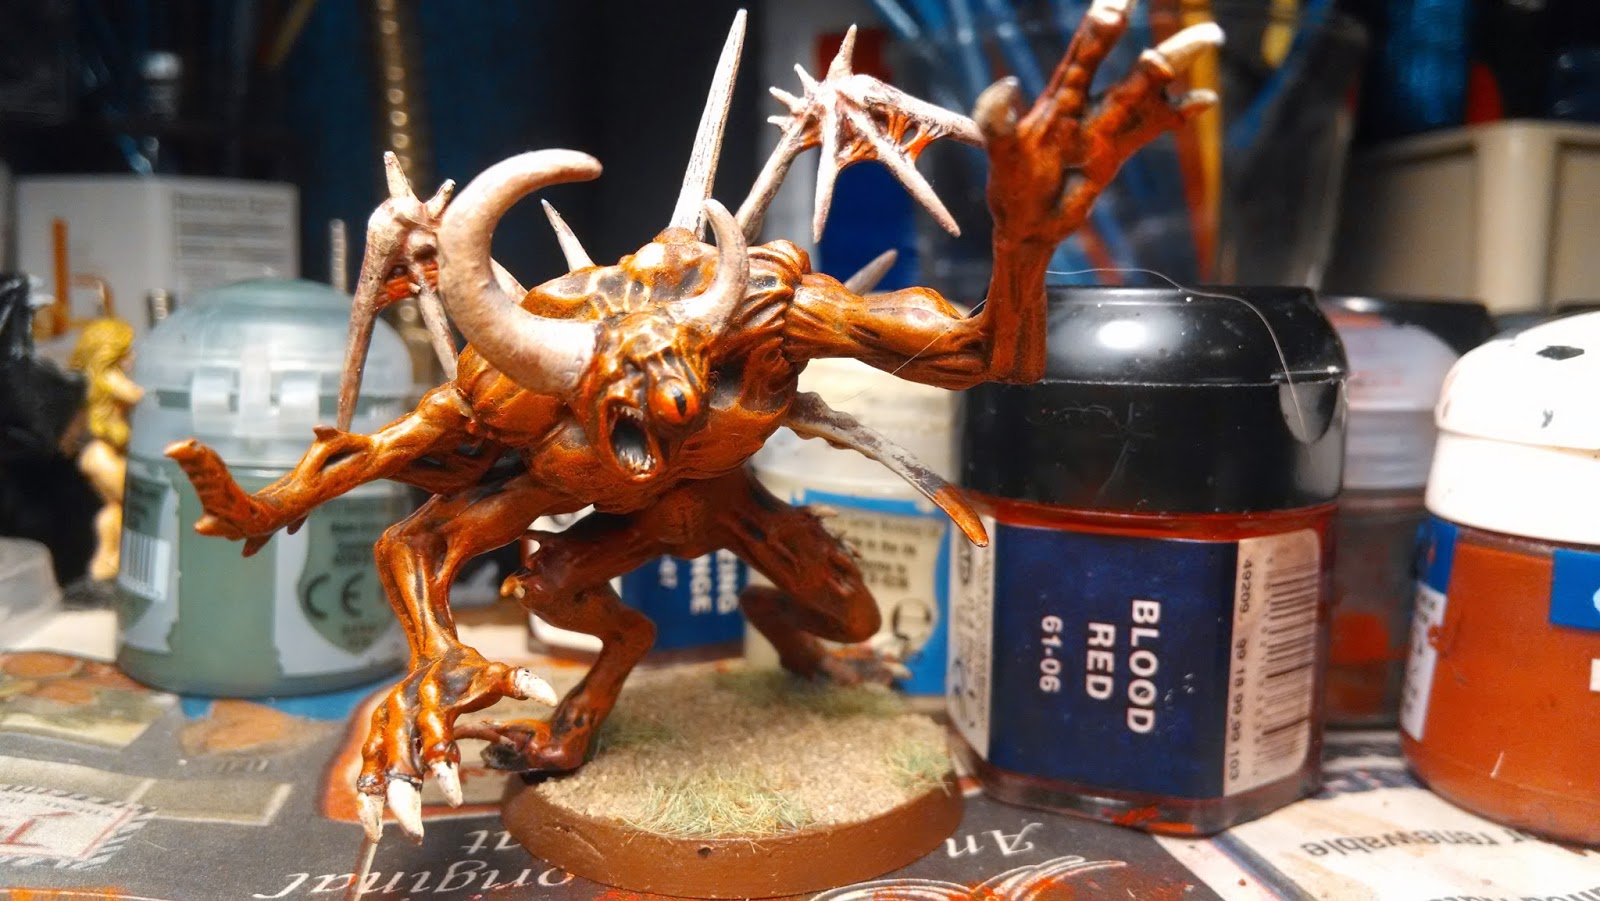
Paint and flock the base.
Finish up the base however you like and then BAM! Done Chaos Spawn.
fin.