Hi everyone,
For the past two weeks now I have been extremely busy with work. A colleague of mine fell sick and I have ended up working over 20 hours worth of overtime per week. This has left me knackered and way too tired to do much. In fact, on my free days I spend most of the time reading or watching a DVD. Unfortunately, inertia has claimed me for the time being.
Nonetheless, I have managed to scrounge up some energy and I have started my next project, which is the 54mm
Conan the Barbarian model from
Andrea Miniatures. This is the first of four single miniatures I have to paint up to fulfill my New Year's resolution. The others being a 70mm Wolverine figure from
Eaglemoss Publications, and a Viking and Celtic warrior from
Pegasus Models.
So let's begin. As I stated a few posts back, I managed to do the face of the model a couple of years back. I always start with the face. If it does not turn out right, then I start again. In this case it came out OK. My intention here is to get back into the rhythm and complete the model. I am not interested in painting a masterpiece, just something that looks good in my showcase. Below is the miniature in the state I left it in.
My first task was to paint in all the base colours, in order to get a feel for the model and see if I like where I am headed. The box art shows the model in drab and earth colours, and I think that is the right direction.
After the base colours and some washes were added, I like to take some time to see if the look of the figure 'works'. I think it does, but I have decided that the armour needs to be brightened up. With its present colour, it makes it too dark - even though it is more compliant with the box art.
The solution in my opinion is to paint up the armour in metallics. This will add a central brightness to the model and hopefully add some realism while I am at it. Alas, my energy was completely drained with this mighty effort and I decided to put it aside.
The next day I did not feel like continuing with the model, so I decided to tackle the base. The good thing with painting the base is that one does not have to be over-careful or precise. This allows for some easy going, and that is what I needed in my current wasted condition!
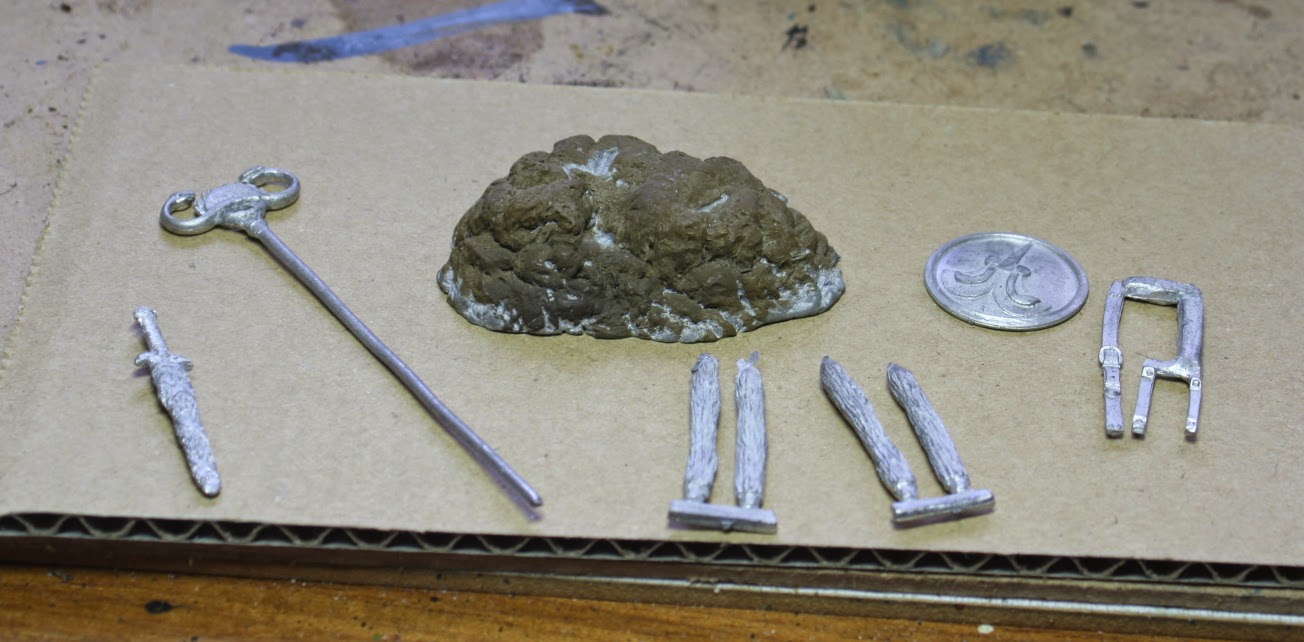
The picture below shows the components of the base. It comprises a scene from the first
Conan movie, after the heroes escape from the Serpent Temple, towards the end.
Finding a base for this is naturally the next step. I did not want to spend money, so I opted for a base I bought on the cheap from my local Sunday market. The base is made from wood and came unpainted. After applying varnish and polishing the base up, I glued the main part of the set to the base and drilled some holes into it, in order to peg the wooden stakes.
Now I needed to fill in the rest of the base and glue the stakes into place. This was actually the fun part! Looking for bits of stone and fitting them in with epoxy putty to achieve an interesting base actually kindles reserves of energy I did not think I had.
When the putty dried, I started the painting process. The first step was to give the whole base a nice base coat. I opted for a dark rust red, followed by a black paint wash.
Then I started with several layers of drybrushing until I got an earth tone I thought was interesting. This was followed by a light brown wash to tie everything together.
At this point I am still not ready with the base's painting, but my energy reserves have finally run dry. So I decided to conclude this session by painting up the bronze standard and shield and give it a first wash.
So, that is all for now. Hopefully, my colleague will recover by the end of the week and I can get back to my normal schedule and dedicate some quality time to this model and get it done. If not, then I will have to figure out what to post. Until then, farewell and good health from your fellow blogger and hobbyist.
NR