
So I received this cool model from Elias over at Fallen Frontiers on the weekend. Showed it off in a mini review here on Tuesday. And have since begun to paint it up as quickly as I could.
Goal was simple.. paint a nice table top + level model that would look good on the table. Bright, colorful piece so that it stands out among the scenery as well. Some parts worked in this plan.. others not so much :) Some my own doing as well :D

First thing was to get them all pinned up and ready for airbrush work. Now I thought well since this is such a great material, and holds such good details, lets see if it could be painted without a primer! Well.. first off.. no.. there is so much details, that when putting it back together you will rub some of the paint off :) Ok.. rookie mistake my side, but also a lesson learned for other gamers not painters out there :)

Plan was to paint the pants bright! Cause it is a sci-fi model, and I want him to stand out.. bright green was called in. Plus it fits in with the default color that was shown on the kickstarter!
I did take some step by step photos.. but honestly.. this is not my strong suit.. and they came out all looking the same. Too much light, not enough contrast on the colors chosen most likely.

But I accomplished what I wanted from them.. very bright green pants! Can see a mold line in this photo that I should have caught on the strap.. but the other lines on the pant legs are seams on the pants themselves.

For the glove, we went typical Hellboy style here. Bright red! Taking some orange for the highlights there.. but again the purple was not enough of a contrast for the shadows.

End results so far for these pieces.. bright as all heck!

And for the body, I wanted it to be white.. clear.. and desaturated a bit more.. this one worked better than I had anticipated and I really liked the results ( so much so I might use this on other pieces later on! ).

I ended up adding a bit more blue to the shadows though.. and more still later on..

End results are these.. a very interesting Green, White, Red coloring... Maybe Riffs are Italian?


Now when putting them together I did run into some problems. You can see a bit on the glove there with the paint rubbing off while trying to assemble it. And there is a bit of a gap on the torso to pants, and glove to arm. Which shouldn't be, but because of the spraying of paint, it did create some new layers there..
So although I saved, and would save even more with a full squad, some time with the airbrush stages.. unless you varnish coat them before assembly you might find some issues with it. Another lesson learned on my side :D

Next up was painting up the belts, pouches, and knee pads for the pants. Tried new colors, and gave them a go.. which was fun, and came out alright in the end.

For the glove I would attempt to just leave it mostly red, and do some chipping on it. Some dark browns, purples, and then metallics.

It worked alright in the end.. and can be seen. You can also notice that I painted up the boots, and straps there. You can also see the gap that I was talking about on the torso to pants section. Easy to fix if I put it all together at once and painted it instead of in sub assembly stages.

From here I kind jumped all over the place and didn't take a lot of photos.
Knife was painted in metals. Same with bracelet. Face was given some more colors for the lip that would match the shoulder area. And the spikes would receive some black to see how it all works..
Honestly.. I could have stopped a long time on this before.. thrown a heavy Army Painter wash all over it to darken it, and give it some definition, but I really wanted to paint this fully with Scale75 colors and pieces.
I would go back over it a bit more, and hit the shadows with Purple ink on the pants and glove. Blue ink for the skin. Quick daps on the spikes with grey and white. And some brown/chestnut wash on the leather sections.
I would in the end have this as a final piece..


I think the end result is not too bad. Just needs a coat of varnish to seal in the colors.. a gaming base.. and he will make his way off to fight the Ares or Sayx soon enough! If I wanted to push him a bit further for colors.. I would look at some controlled washes or even Oil washes to make a few sections really come out.. but for a table top gaming piece.. I think he will do his job just fine.. :D
Though I still have Sihlas Fenn to paint up.. but he will be done with less airbrush, more brush, and more as a single piece as well. Plus a completely different color and a nifty showcase base to go with him!
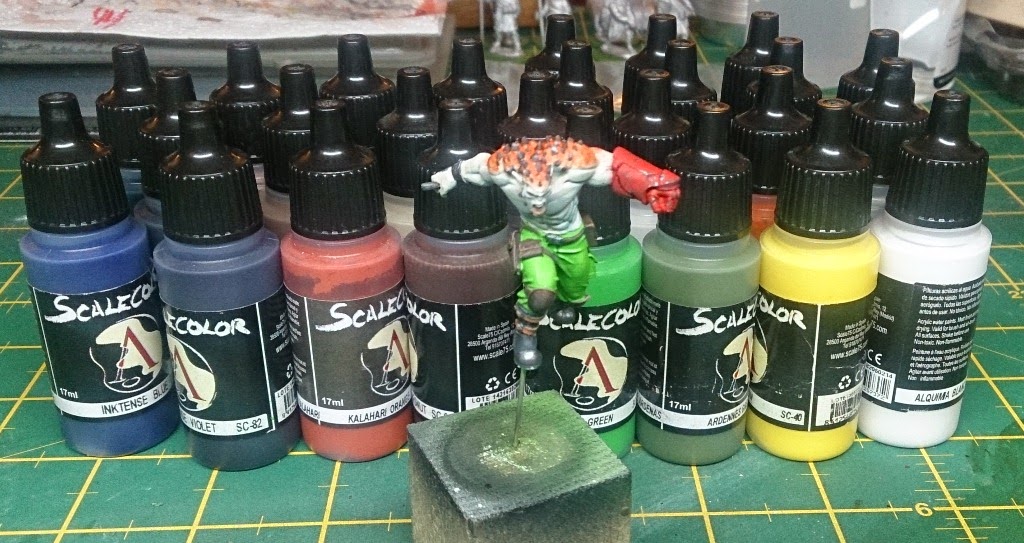 |
| Berzerker and all the Scale75 colors I used to paint him up! |
Now there is still time to pledge to the campaign. Am in for an Assault Trooper boxset at the moment, with a custom starter box consisting of Riff and Harvesters. Looking forward to both faction quite a bit here! Though I suspect that I will add a bit more or upgrade to a higher tier soon cause I really want to have more berzerkers to paint up!!!!
Hope you liked the ( wonky ) step by step here.. need to still find my way on how to do these.. and looking forward to seeing more Fallen Frontier models arriving in the future, and to see how others paint them up as well!!!