Sounds a little bit like an undiscovered work of Tolkien, or maybe the next Harry Potter spin-off but is in fact my journey through a series of painting videos and the resulting miniature that was my creation. In this post I want to share the pictures of the Bust, but also some of my thoughts about the experience of watching the video and then putting into practice the techniques taught.
In my recent post about Painting Buddha, “Painting Buddha needs our help!” I mentioned the work that they do bringing free miniature painting videos to the masses and their Patreon campaign. Part of what made me post was how useful I was finding their recent videos.
I have been painting for nigh on 25 years now and have tried many different techniques over time, and have slowly added them to my skill set chopping and changing as I felt appropriate. But each time it was a real slog to try and get a new skill, reading articles on the internet and then practising as much as I could. Video tutorials (and more recently live masterclasses with some of the industry greats) have really turned this around and given people a chance of learning how to paint much more efficiently. I have watched many videos over the past few years, from freebies on youTube to paid ones from people such as Miniature Mentor, but I must say that the Painting Buddha videos are the best.
So, why all this preamble? I just wanted to chat about the bust I recently finished using the techniques in one of the PB video sets. It is the tutorial by Ben Komets for how to paint Games Workshop’s new Chaos Lord ‘Korghos Khul’ from the Age of Sigmar box and tackles every aspect of painting the miniature from a black basecoat to a fully rendered and beautifully painted display piece. Check out the entire series in this playlist.
I don’t have that particular model, but I really liked the techniques being taught and wanted to try them right away so I grabbed something from my shelf that has been waiting for paint for a little while to give it a go. The Model was an out of production bust by Mproyec of an angry looking wild elf-type (the sort that puts Legolas to shame)… this guy:

“Grrrrrrr!”
I know, nothing like the piece from the video, but there were a few analogous areas – flesh tones, cloth and a bit of armour. Following Ben’s lead (and actually where I tend to start anyway) I started with the flesh tones following this video.

Other than the innovative techniques used, one of the great things about these vids is the 3 camera setup. At all times, the pallet, the miniature and the artist are visible. This allows you to very easily see the consistency of the paint and how it is applied to the model. It also helps really engage with the artist as the explain the decisions they are making and makes you part of the whole process.
I have used a different base tone to Ben as I wasn’t going for a sickly skin feel, but I did stick relatively close to the shadow and highlight colours – I just so happened to have Tank Brown in my arsenal already… and Dark Sea Green come to think of it 😉 One thing I did do differently is that I didn’t have a white that was really heavy enough to pull off the wet on wet in the way it was shown so I used Vallejo Ivory (so a slightly warmer tone), but I think it worked out well in the end.
The technique in a nut shell is based round the concept of having 2 colours on the brush simultaneously and using that to get a smoooooooth gradient. The highlight colour is relatively thick and the other colour is much thinner. Otehr colours and the shadows are then glazed over the top to create some superb effects. But please, watch the video – Ben explains (and of course shows) how to do it much better than I ever could…! In fact that is pretty much the whole point of this post – these videos are an amazing way of learning how to paint, second only to face to face teaching. Here is where I got to with the skin:
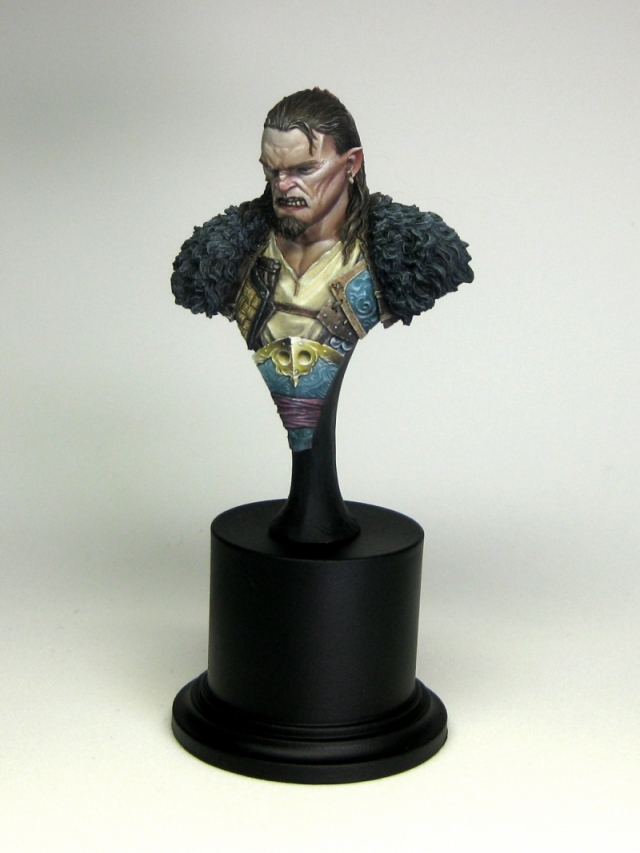
 There are currently 10 videos in this particular playlist over on Painting Buddha’s YouTube page and I have watched them all, and added a number of techniques into painting this model. I used the technique Ben used for the red armour on the sash round his waist, the NMM gold on his belly plate, and also wet on wet blending (especially the Loaded Brush method) wherever physically possible. It has been particularly effective on the blue/teal areas which have some fine detail which I have been able to really pick out with some judicious highlighting.
Finished photos can be found below.
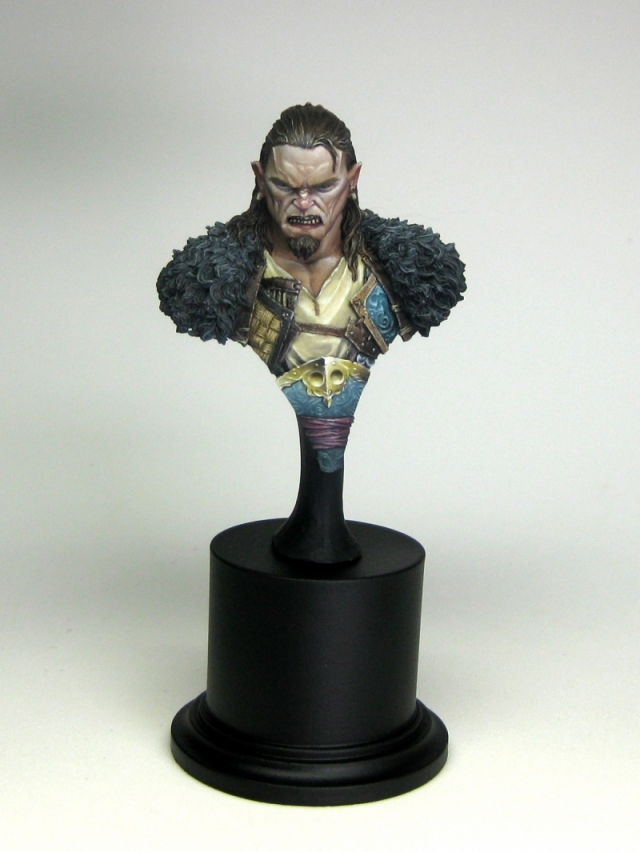
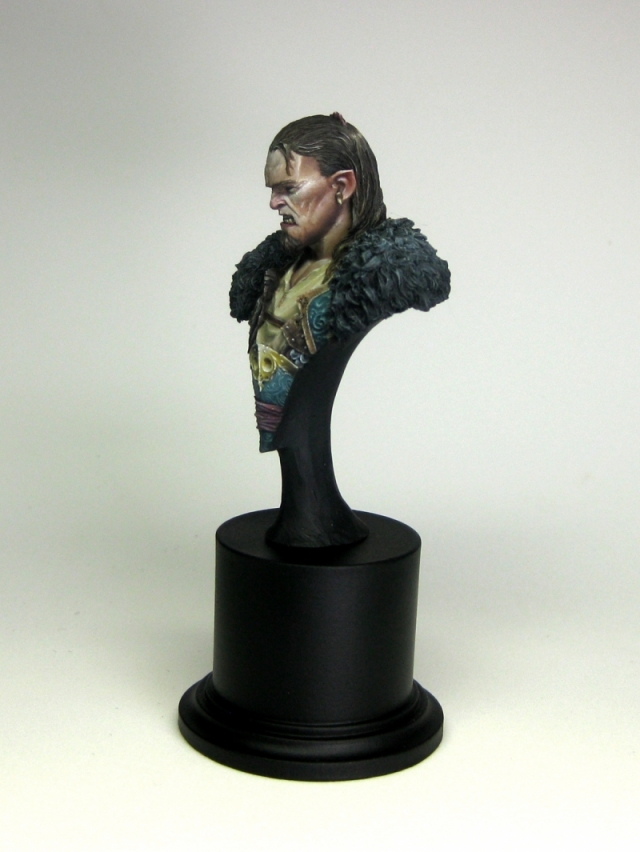
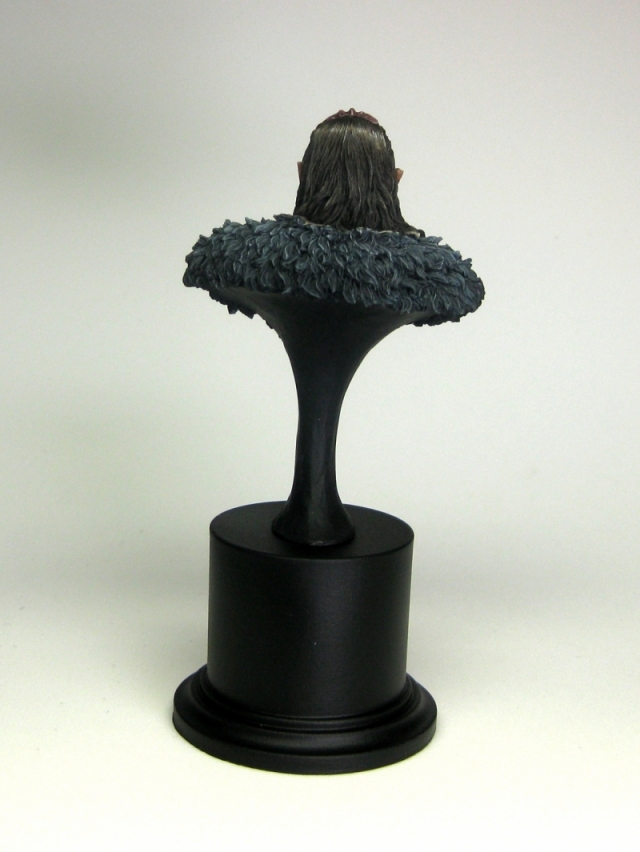
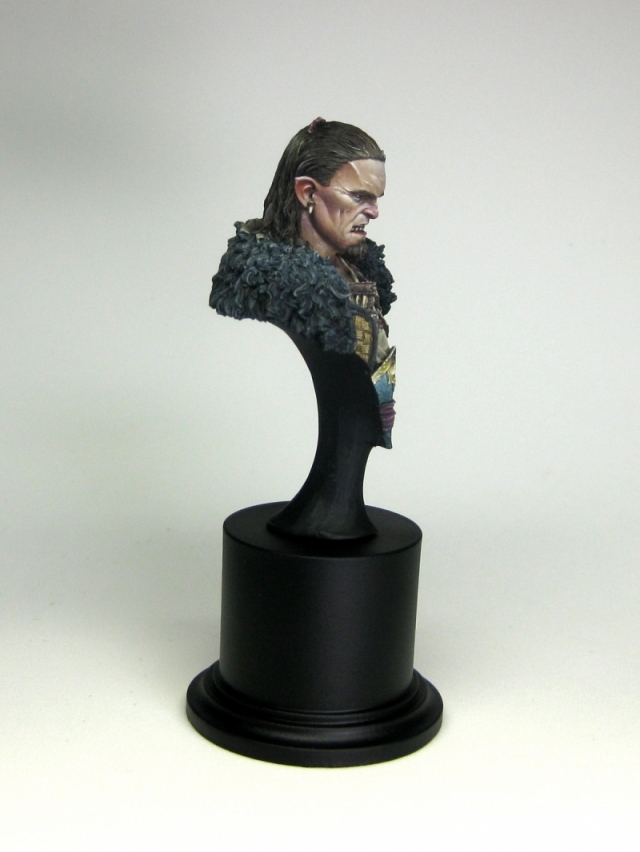
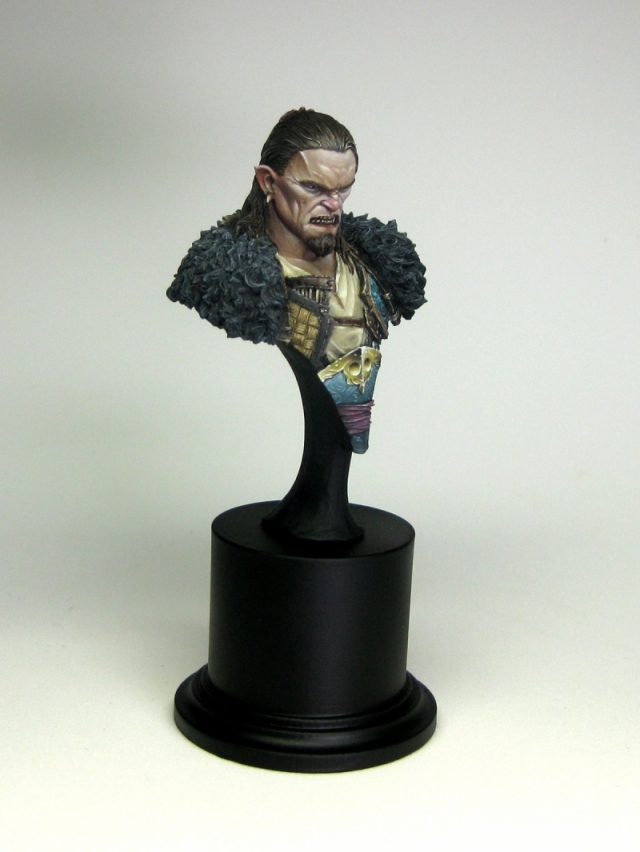
But let me share some uber close photos…. please bear in mind that this bust is 50mm from the top of his head to the bottom of his chest where the belly plate tapers off. In other words, this isn’t a large 1/10 scale bust but one of those miniature painter friendly ones!


Not only was this a really fun miniature to paint but following the tutorial videos added a really interesting aspect to the whole experience. I really felt that I managed to push myself by following the techniques and expanded my repertoire. I think that you probably would too. I found it such a good way of learning that I have picked up a couple more Painting Buddha videos and miniatures to follow along with them.
One video was ‘Random Encounter’ by Fernando Ruiz to go along with the miniature that I bought from FeR earlier this year and the other was the ‘Highland Clansman’ Buddhabox which was a combination of a Young Miniatures bust and a video tutorial by Russian master Kirill Kanaev. I am hoping to do a step by step of one of these two videos in the not too distant future, but more of that in another post!
tl:dr
Watch some painting videos, especially the Painting Buddha ones, and you will learn quickly how to master the techniques.I am impressed.