Many have asked me, "how did you make the Shifting Monolith?" in fact some have asked me to sell it or build them one. So I thought why not share how I did it? After reading this if you would like me to build you one contact me at @HolyHammerHern on twitter or via this blog post and we can talk. :)
The concept for the Shifting Monolith was born from the Warriors of Chaos map in the 8th Ed army book. When I began designing terrain for my tournament The Holy Wars GT, www.holywarsgt.com. I wanted to build tables themed around the armies of the Warhammer world and the Shifting Monolith on the map served as one of the earliest bits of inspiration.
Enough blathering on to the process!
Step 1: Materials
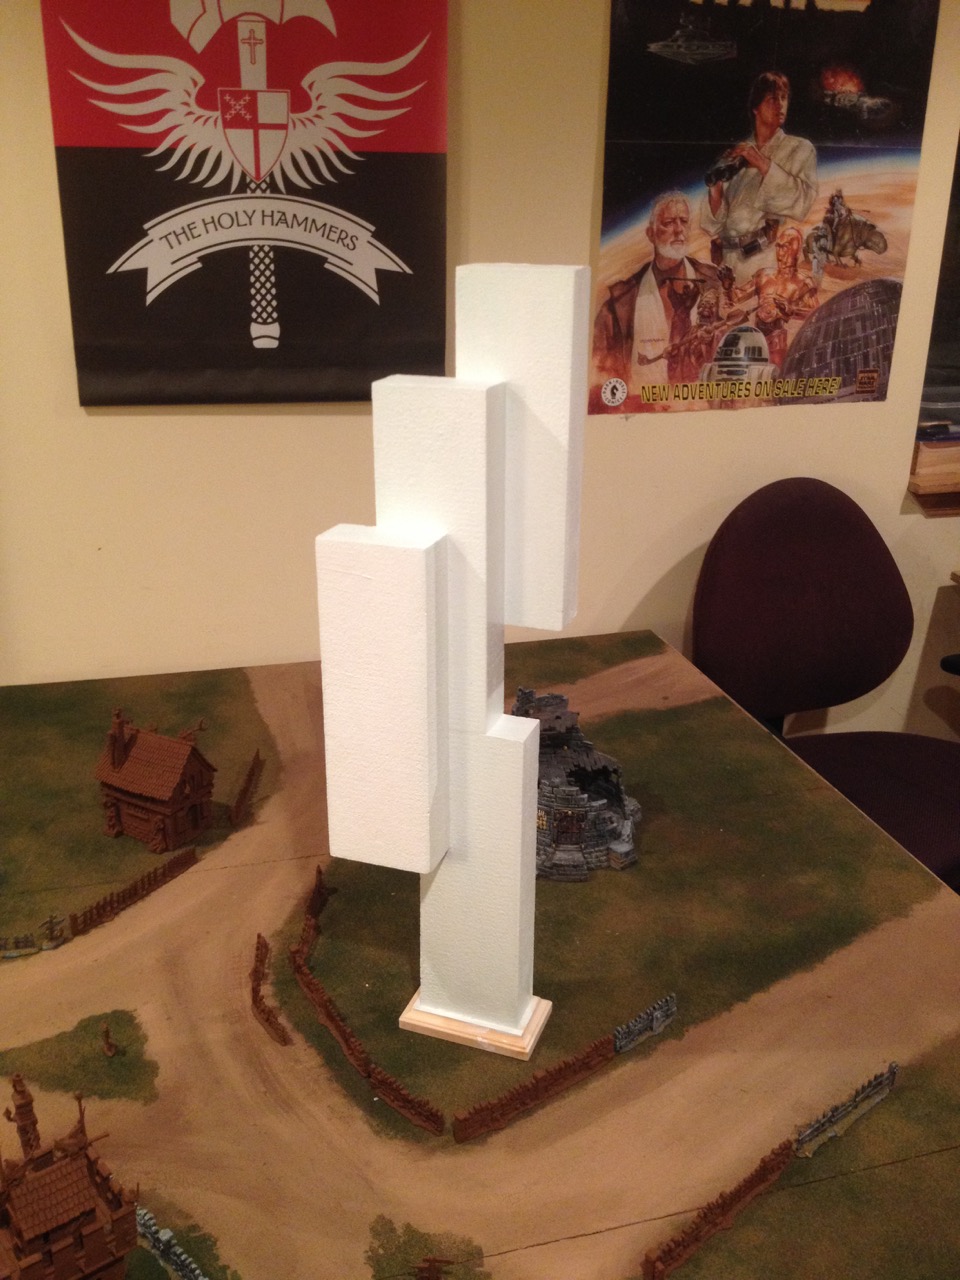
Holy Wars terrain is on an epic scale and I needed to make sure that the Monolith would be icon and memorable. I knew from the start they needed to be perfect rectangles and if I were to cut the foam from high density foam insulation it wouldn't be quite perfect enough so I went with styrofoam rectangles that can be found at stores like Hobby Lobby, Michaels or any craft store. I found mine at Hobby Lobby.

Step 1: Construction
The issue with this type of styrofoam is durability. The rules for the Monolith require players to move it around the table wreaking havoc on the battlefield so it needed to be strengthened to stand up to the rigors of game play. These rectangles of styrofoam are medium density and would need strengthening so I used MagiKote surface coating this strengthens and transforms into a semi smooth surface that can be sanded. This was by far the most time consuming process. It takes many coats to achieve the right surface before sanding. Here's a pro tip, I tinted mine with a bit of green so I could see how the MagiKote was going over the white styrofoam. Made it a lot easier to identify areas I missed and how well the sanding process was going. I could see when I missed an area or need to touch up an area I missed.


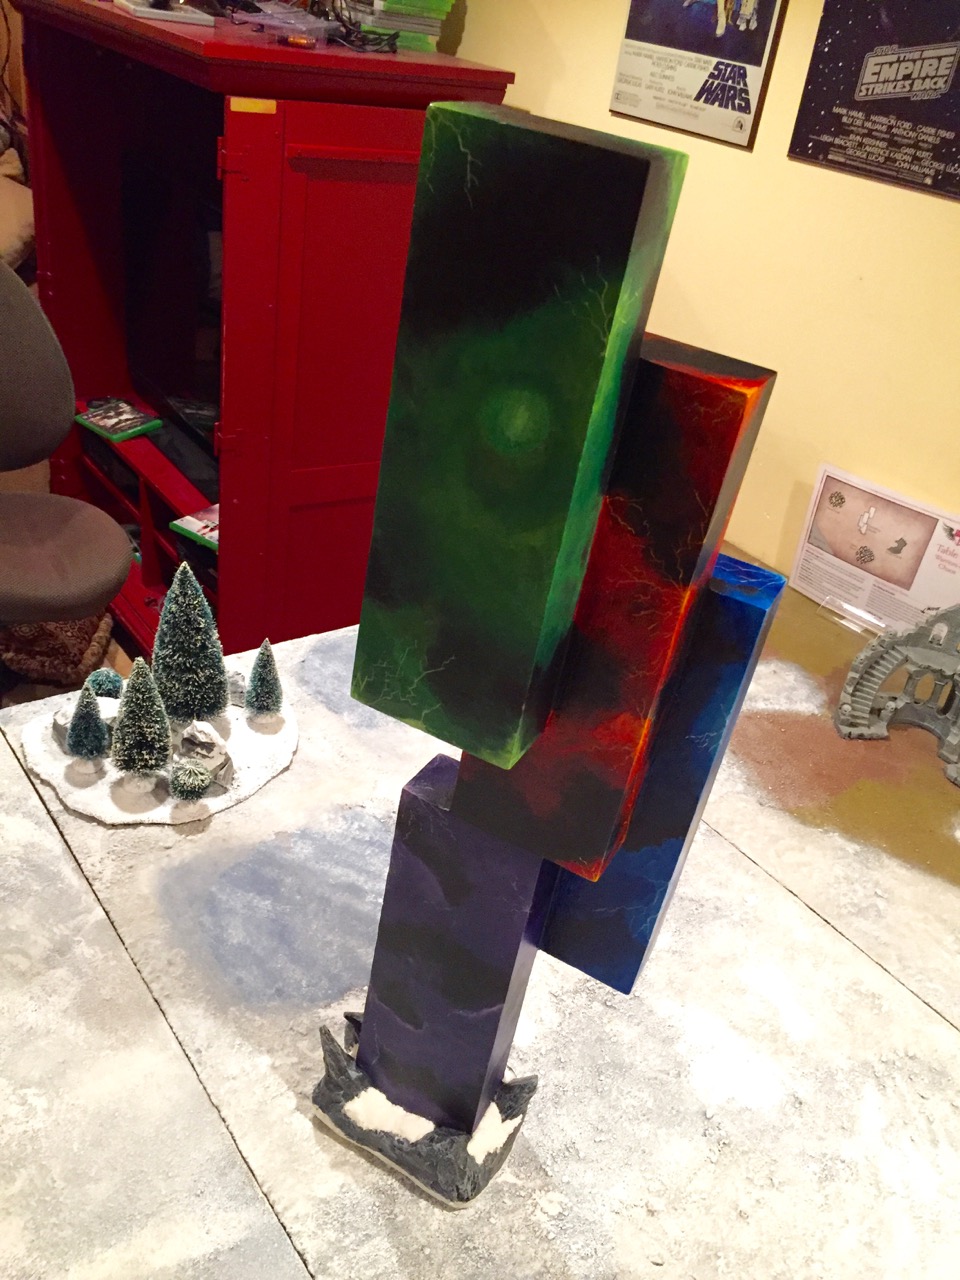
For the base of the Monolith I used a 4x5 block of wood this would act as stabilizer and serve as counter weight. The images below show you the scale of the Monolith.


Step 3: Painting
Painting is always the scary fun part of the process. First I needed to decide which Chaos God would be ascended and so the easy choice was Nurgle after all the love he got in 8th Ed it was a no brainer. I also knew that a typical Monoliths are black like 2001 Space Odyssey but I wanted to have something more creative than black or solid Chaos God colors. I did a bit of research on Nebulas and determined I wanted to create that type of space like gas storms within the Monoliths with bolts of lighting each colored to the corresponding God. Using wet blending techniques and simple hobby paint the whole Monolith was painted in 2 hours! The lightening was added at the end and I was thrilled with the overall results.


Step 3: The Base
After the painting was finished the base needed something added to it and I decided to do rocks around the wood base with a bit of snow. These were built using pine bark nuggets and light weight joint compound. It gave it a nice finishing touch that match the Warriors of Chaos table.


