Morning All,
Today I am sharing the build process for my Knight Acheron. I have to say first off GW the instructions are rubbish! and has clearly been photocopied lots of times!
Anyway this my first forgeworld knight my other knight is a plastic kit. The first thing to do is wash all the parts and make sure all the parts are present. One of my friends has recently had a problem with forgeworld not wanting to replace a missing part without proof of purchase. This was very frustrating after I was with him when he bought it for cash at a forgeworld open day. Anyway after proving he ordered some other stuff for delivery on the same day they relented. So guys advice is keep or get a receipt and check the parts when you get home even if you don't intend to build it in the near future.
The next thing I did because I knew I would do the build over several days is split the parts into sections bag them and label them as can be seen in the first picture below.
The first section I constructed was the body and cockpit, I have to say no matter what I did I couldn't get this to fully line up so in the end I went with best fit and have since filled the minor gaps with green stuff. Top tip for any new folk out there elastic bands! Also leave it a good while to go off.
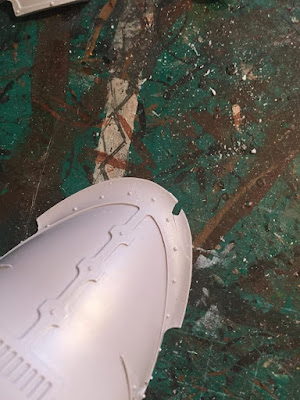
Next I cleaned up all the armour panels although I have no intention of gluing any to the model until after the paint job has been completed. Next top tip be careful around the thin bits of resin as you can see from the next picture. I should not of used cutters in this area. I think gently cutting away with a sharp knife would of been more sensible. I have since fixed this with green stuff and hopefully after painting and weathering you wont be able to tell!
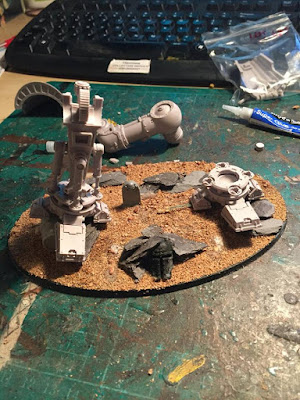
At this stage I then realised I needed to design the base to allow me to start constructing up from the ground. So I toyed with full city fight ruins and so on but then thought I don't always use models on city fight terrain. So I scaled back to the design below and aim to have the one foot stood on the barrel. The fantasy grave stone is more for a bit of fun and will be adorned with one of the code40ker's name for a laugh! The knight head will also be painted to match one of the code players knights.
So from this point on I started to pick up speed as the excitement takes you onwards. First thing was working out the foot on top of the barrel and I actually drilled and pinned the foot to it. Once I had the first foot in place I blue tacked up the legs to work out where to position foot number two. I wanted to ensure the hip joint wouldn't look to unnatural.
Ok so now I got really excited and stopped taking pictures of the process (woops). So the next picture shows all the sub assemblies ready for painting. I will say I used the hairdryer as per the instructions on the cables on the back of the legs. Next top tip "You literally only need it on for 10 seconds tops" any more and it goes very floppy.
Well that is the completed sub assemblies next I will consider a colour scheme as my other knight is Gerantus the Forgotten Knight (who can be found here) I will need to consider whether I go with another freeblade or consider a knight household?
Any questions, tips or thoughts please comment constructively below.
Cheers
DOC
Categories
Recent Posts
- Dwarf Warriors (Part 1) 2025/01/09
- New Year New Results: Warhammer 40k Tournament Results 2025/01/09
- Snorri 2025/01/09
- A Song of Ice and Fire: Brotherhood Heroes Box 1 2025/01/08
- Otty’s Tyranids 2025/01/08


