A wise man somewhere once said, "ask and you shall receive."
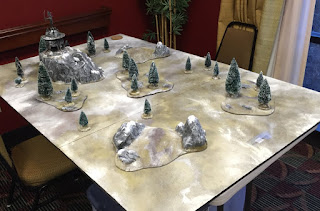
Well, the Twitterverse asked and now they shall receive. When I started Holy Wars many players have told me that their favorite table is the Dark Elf now the Temple of Khaine table. They have always been curious how I was able to achieve the realistic snow effect here are all the steps to creating your frozen wasteland board.
The Materials
Of course, you need a table top. I typically use 1/2"-3/4" MDF the examples you see in this post use both. 3/4" has less chance of warping but is much, much heavier so choose wisely.
1. MDF BOARD
2. PVA Glue
3. Flock
4. Paint, paint and more Paint
Step 1: Sand
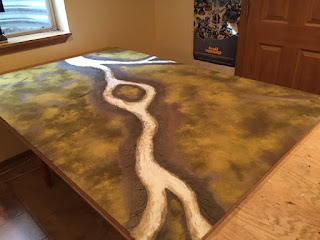
Apply PVA to the table top surface then the sand. Once the PVA is completely dry then seal it with an additional thin coat of watered down PVA a bit thicker than milk. If you want to create pits in the sand then apply this layer just before the first coat of PVA dries you can see an example of this in the lower area of the picture below.
Step 2: Paint
After the seal coat layer is dry you're ready to paint the sand in whatever colors you like. I typically use 2-3 paints wet blending between two colors for the base then a wash and possibly dry brush. It's really important to invest in painting the surface this will create depth and a natural look to the soil.
Step 3: Flock
Once the surface has dried it's time to add in the flock. Using the remaining watered down PVA mixture I apply this randomly to the board typical in 24x24 sections at a time. Then I apply 2 flocks at the same time. For my frozen table's use Woodland Scenics: Yellow Grass Fine Turf and Earth Fine Turf. I hold the shaker bottles about 16-18 inches from the surface this allows them to fall softly to the surface it creates a really nice smooth blended look. I use this technique for flocking all my tables.
This next step in the flocking process is the MOST IMPORTANT of all. You MUST seal the flock with your watered down PVA. If you skip this step the flock will pull away from the board when you do your snow effect and eventually during game play. It's best to use a dabbing technique and not brush strokes, brush strokes will move the flock in unintended ways that you may or may not want.
Step 4: Snow
At this point, you have created a great looking board and now it's the moment of truth. After the PVA sealed flock has dried completely you're ready to paint the snow. Using an acrylic white craft paint I paint the snow in random patterns using a moderate to heavy dry brush technique.
The shots below show the depth you can achieve using the steps outlined here.
You need to trust in your vision and you will produce a board your club mates will want to play on again and again. Good luck and I hope this helps.


