 |
| Balsa Foam armature |
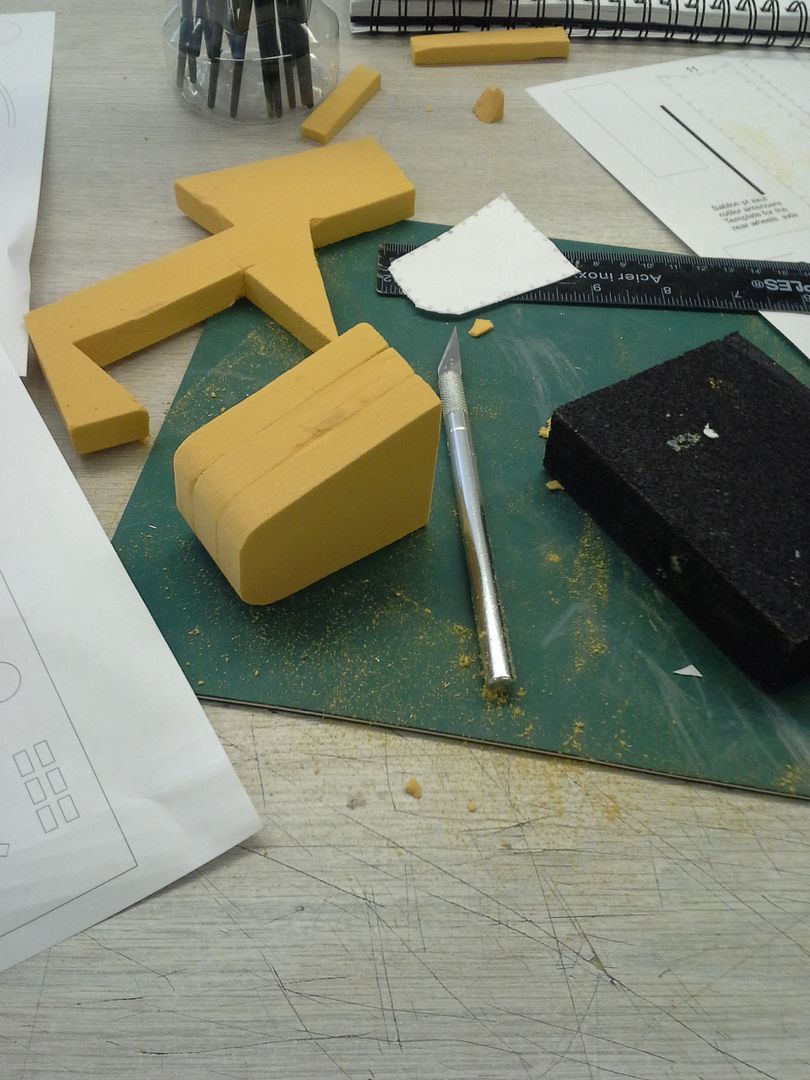
Initially I was struggling a little - I new I could build the general body forms around a skeleton of balsa foam - this material is easy to glue and cut to shape and sandable to give the opportunity to perfect any complex forms or curvature that would be very difficult to build straight away in styrene without the armature.
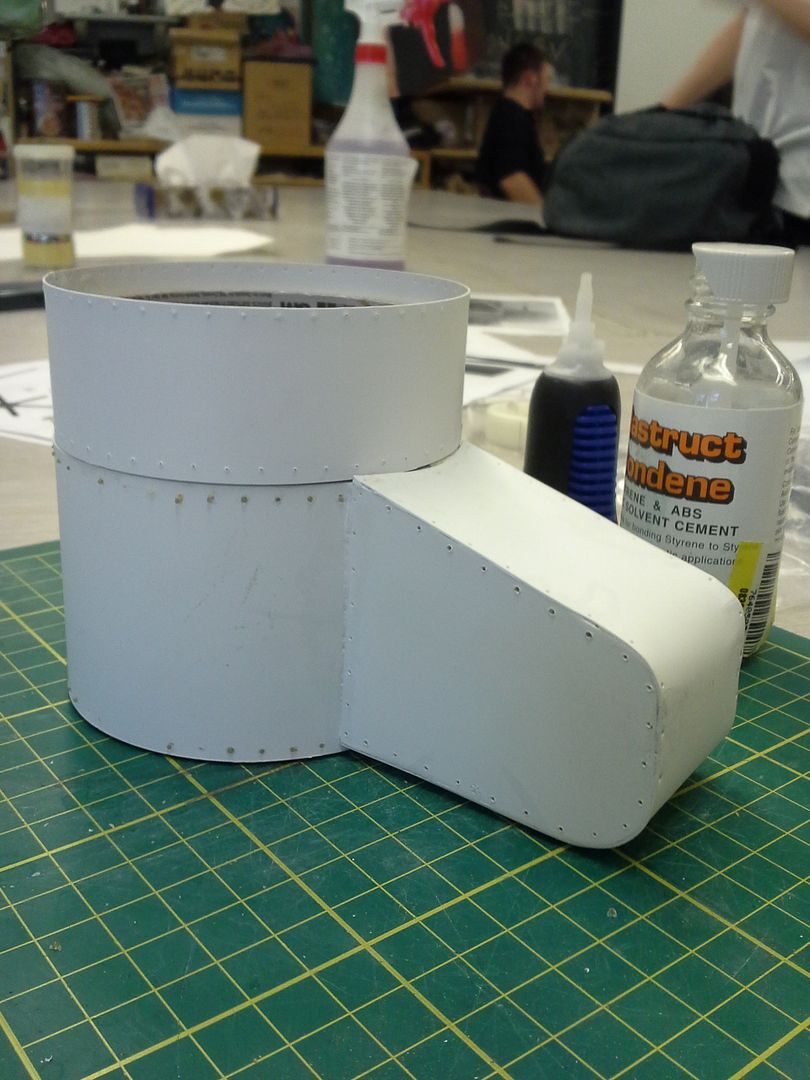
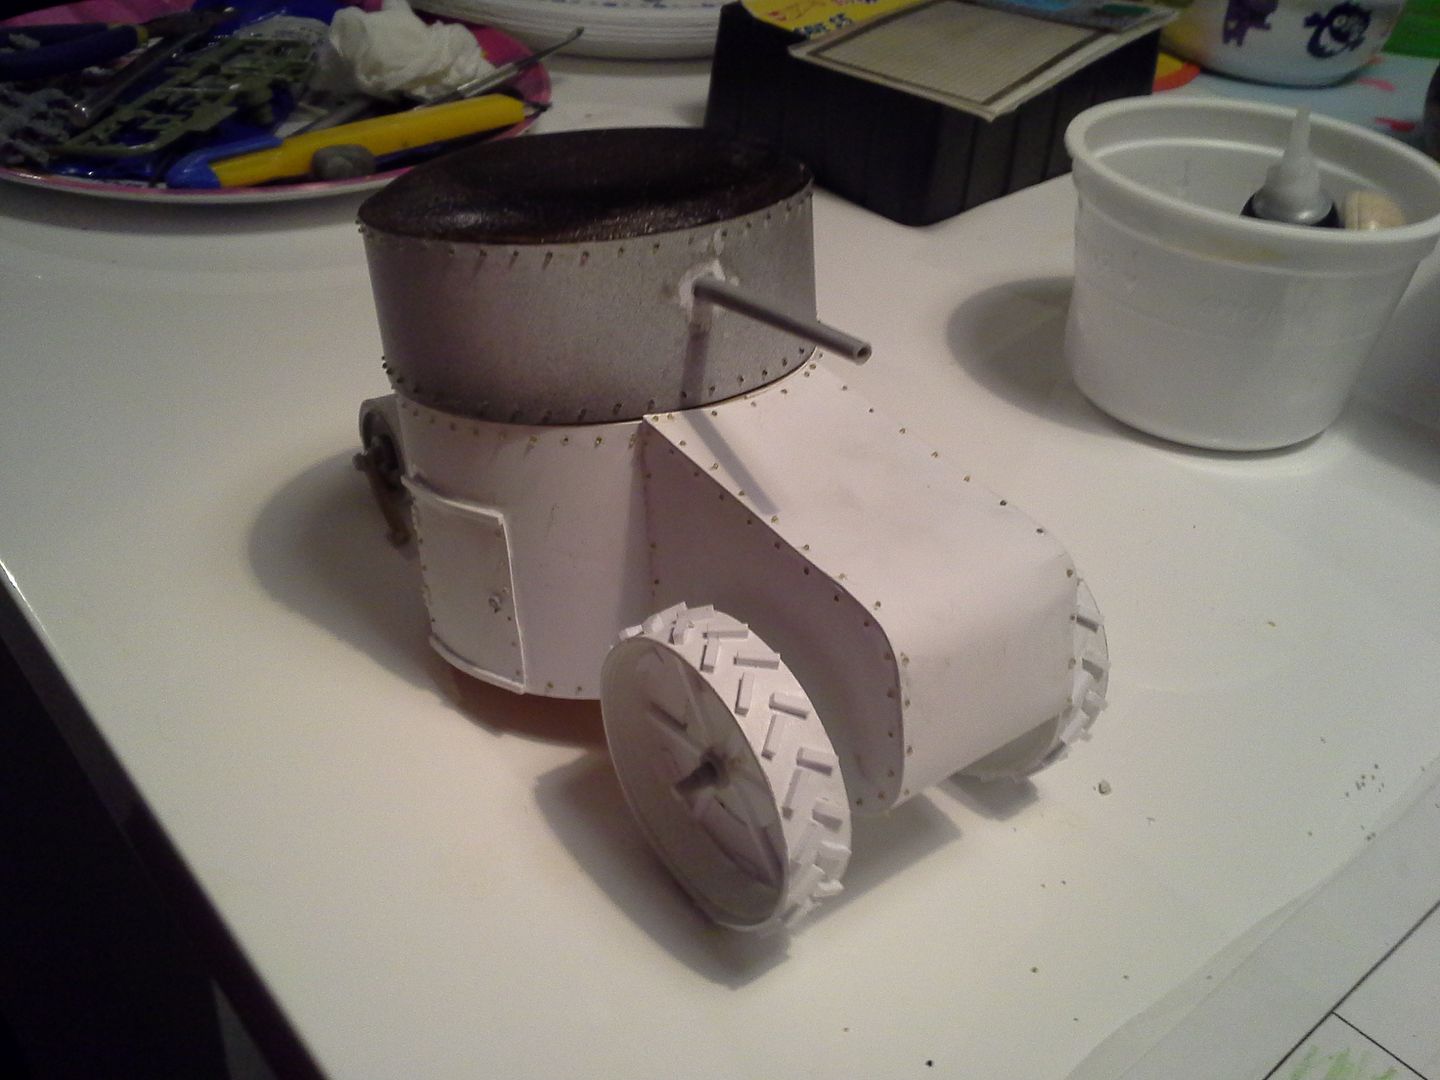
I also had a brilliant idea about how to create strong armatures for the circular central body forms! I too two rolls of tape and removed excess layers of tape until they were both the same diameter the one was a little tall so i slid it through my bandsaw to shorten it slightly. Once that was done it was a piece of cake to clas the armature in plastic using thin styrene and Bondene solvent glue.


I also formed the concrete "roof" out of balsa foam which I sanded and filed into shape. In order to ensure that it would take paint well and to avoid further damage or distortion I used a foam glue that is more or less a thinned pva. It absorbs into the foam and seals it making it stronger overall in the process.


While that was drying I set about constructing the wheels. I hunted down a couple of plastic lids that were the appropriate diameter and then wrapped them in styrene. While those were drying I started chopping styrene square rod to appropriate lengths for the welded teeth-like of the wheels.


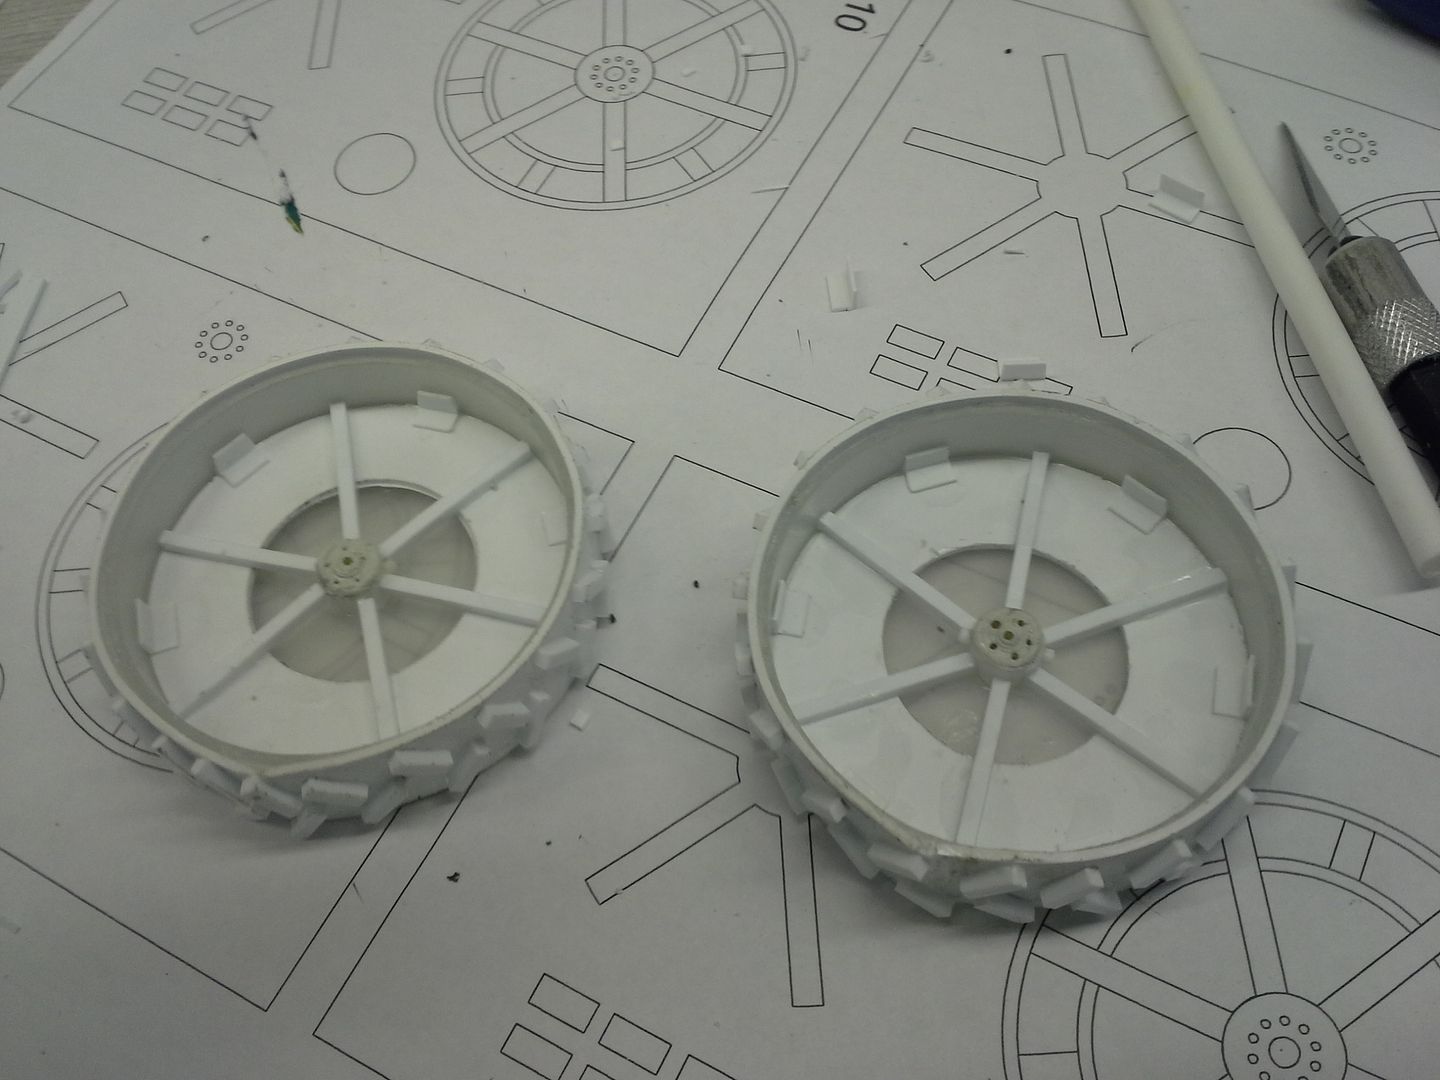
The center Hubs were initially roughed in with Apoxie Sculpt. but i eventually abandoned these in favor of some better representative parts scavenged from another kit.
 Around this time I also cut open a Brita water filter and started separating the beads inside by size. Using a tiny awl I began to punch small divots in the plastic body panels and using an old bent airbrush needle as an applicator
I carefully placed a drop of glue on each indent and then adhered a single Brita bead to each spot. It is slow and patient work but a great way to create rivets on a surface like this!
Once the rivets satrted to go on this really took shape and the overall direction became very clear. I mocked up the appropriate forms for the rear roller and supsension and started on the inital assembly. It was really starting to look good IMHO!
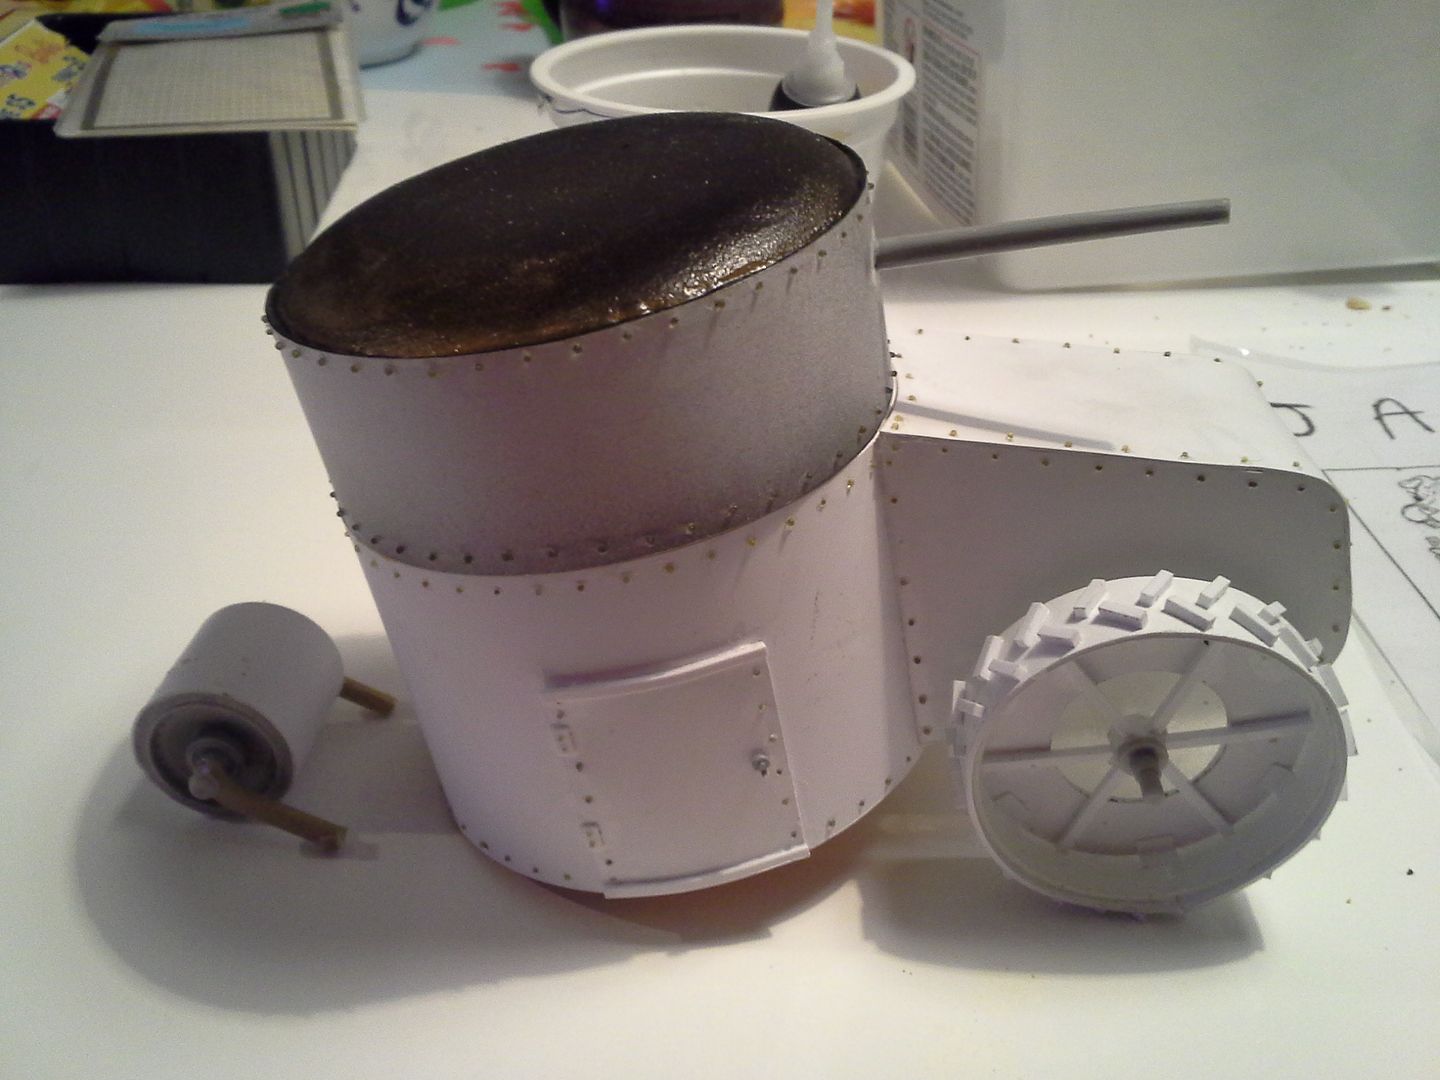
I still needed a way to attach the turret to the hull and came up with an incredibly simple solution that would allow me to position it later once I had figured out the model facing and best compositional lines - I simply used more balsa foam inside the turret and body and a plastic tube as a swivel point. A little apoxie sculpt made sure that it wouldn't move . The alignment was perfect.


From there it was just a little fine tuning around a couple seams and it would be ready for paint!
Next week Developing the Groundwork and Starting the Paint!