 I've used string before on bows, though that's a much more subtle use than you're going to see today. The idea here is to wrap an entire weapon grip such as a long axe shaft in this case, though you could easily apply it to sword hilts, terrain columns, large battlefield weapons like catapults and more. If you read my terrain tutorials, you'll see I often work with real supplies because I feel it adds an element of realism and credibility to your art which brings our miniatures to life.
What I'm trying to change is the basic sculpted leather wraps. As you can see in the photo here, there's a difference.
Wrapping the Easy Stuff
The first (and easy) part is to wrap the open areas at the base and between the hands.
- Superglue an End
- This will hold one end of the string in place where you'll start your wrap. If it can be out of sight, that would be best.
- Wrap the string around the weapon tightly.
- Make sure the loops are tight around the curves.
- Make sure the loops are tight against each other so the model underneath doesn't show through.
- I think I might have wrapped twice in this case. It's a larger beast weapon and it bulked things up a little. You might not be able to do this depending on the scale of your miniature and / or the thickness of your string.
- End the wrap somewhere out of sight if possible and use another dab of superglue to hold the string in place.
- Use a sharp hobby knife to cut the remaining string off.

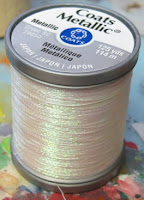
When you're sourcing the string, a small spool will do. Just try to keep in mind the scale of what you're working on. It can actually help source if you bring the miniature with you while shopping so you can get a sense of scale before you buy.
The string itself can be bought from most sewing or cloth supply stores, larger hobby stores like Hobby Lobby / Michaels, etc.
Wrapping the Complicated PartsWhat gets difficult is wrapping the areas of the weapon that don't allow you to get all around it. The solution here is to glue cut pieces of string to the parts of the weapon you can reach.
- Cut small pieces of string using either a knife or scissors.
- Use a small pin to apply a tiny amount of superglue to the area you're about to place a piece of string.
- If possible, (though unlikely) try just a drop of glue on either side to reduce the amount you need to use.
- Use tweezers to push the string in place.
- If you need to, just glue one side of it, then glue the other side down.
- Like with the
If you do it well, you'll have a clean transition from the wrapped areas to the sectioned ones and be able to see some form in the strings you've glued in. Another detail you'll notice here is I've brought some of the string up into the axe head.
Note About Discolouration
Something to be aware of as you're working is that string will absorb the liquid superglue. This will generally darken and harden the string where you glue it, so it won't look as natural. Anything you can do to hide this will help. It also means that the areas you can't fully wrap may not look as nice.
Check in next week to see the finished model.
 | Take a look at my Step by Step page for the entire Hordebloods project. Here you will find each model broken down into links showing each step: Concept, Works in Progress, (for both modelling and painting) and Final Shots |


