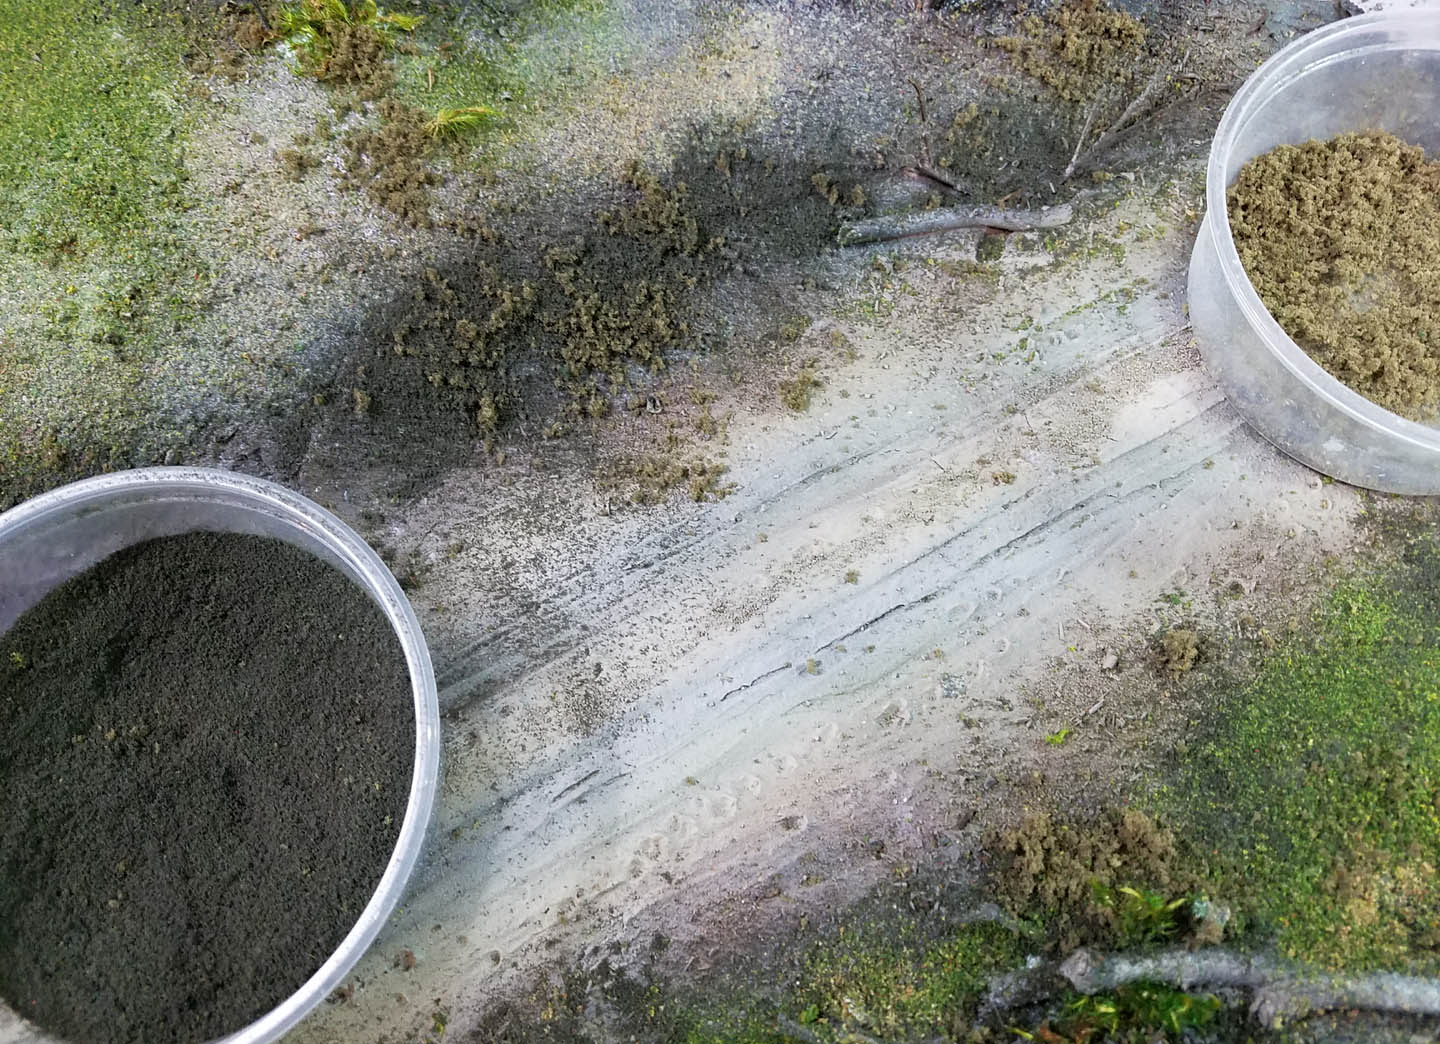
Time for part two of the Display Board project! Once I had the board painted with the Badger Stynlrez primers, I could gather up my flocking supplies and get down to business.
Not only do a I have a variety of colors on hand, but they are also different textures. You can see that the darkest flock is very fine, as that is used for shading. The brownish flock is a bit more coarse, and that will not only keep the board from getting too green, but provide a more practical ground cover texture.
If I use static grass, or static grass tufts, it will make it that much harder to stand miniatures onto the board, which will be getting moved around quite a bit. This is the kind of balancing act that not only happens on terrain, but even more so when doing display boards!
The fallen trees are a good location for some moss. I have also used this in farm fields and on our Barbarossa board to create plants growing out of the rivers and stream banks...
I took wood glue and watered it down enough that I could spray it through this misting bottle... this mix will be used to hold the layers of flock in place.
You can see that I began with the fine, darker flock in areas that I wanted to shade around the logs, and then began to place the brownish coarse flock in scattered batches.
Once I had a decent amount of the coarse flock in place, it was time to add the green flock. I actually had 2 mixes of that flock. One was a pure green while the other had some fine tan flock mixed in. This would make a better transition from the coarse brown flock to a more pure green color without leaving clearly defined "zones" of color.
I have seen that on other terrain boards, and it can be a bit unnatural and jarring!
Where the flock started to reach the sides of the road, I used more of the fine dark flock and the coarse brown. I figured that constant road traffic would either kill the grass near that edge or at least cover it with dried mud.
Again, having a bright green edge on the sides of the road would be visually jarring.
This view shows you what the completed side adds to the board in terms of texture and color. While it would be nice to have flowers, static grass and other touches, I have to keep in mind that at least 45-55% of this board will be completely covered with miniatures!
Here's a better view of how I flocked the sides of the road. I had to make even more 'shadows' and coarse brown texture on this side, as the incline was 2-3 times taller than the other side.
I used the same moss that I placed around the fallen trees to give more dimension to the road sign. That is a natural place for plants to spring up, and it also blended the sign into the landscape.
Both sides of the road are complete, and I even have some smaller plants around the trunks of the trees.
The last touch I will need to do with the flock is to have a little bit of it in between the ruts. I wanted it to be a country road, not an autobon, so time for some glue and flock!
The final episode in the series will take you to the conclusion of the project, where I create some trees and get some water into the ruts for puddles!
If it is possible to pledge any kind of support the Patreon Page, it will make it easier for me to create more tutorials such as this, and also make new terrain videos!


