Time for another update from the depths of the dungeon: With the hero and monster models for my HeroQuest set now accounted for,…
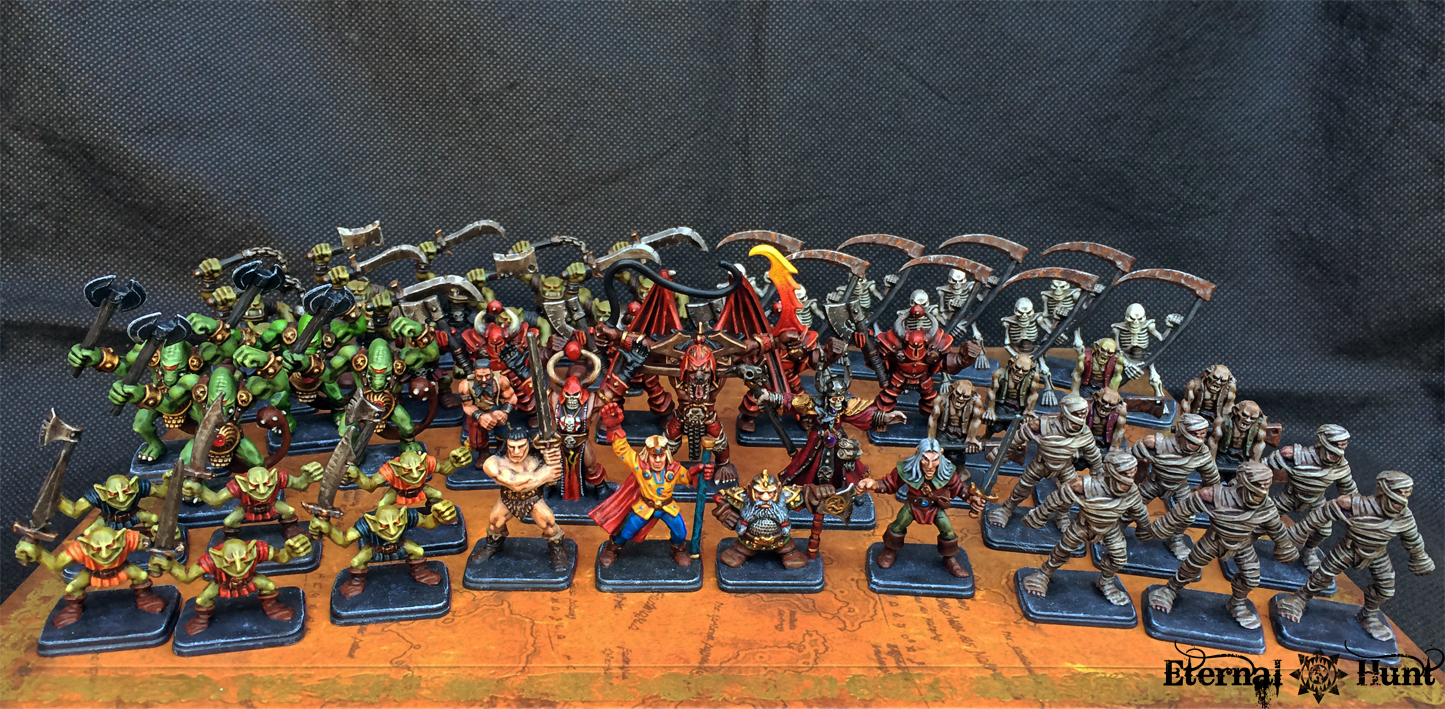
…it was time to turn my attention to the furniture that comes with the game.
Now I have been looking forward to this particular part of my #HeroQuest2019 project for quite a while, both because the little furniture was always one of the coolest parts of HeroQuest, but also because the pieces provide an interesting challenge:
At first glance, the task of painting the furniture seems straightforward enough — even moreso since there isn’t even that much to be painted in the first place: Nearly all of the pieces, save the weapons rack, are made up of a foldable cardboard part and a plastic part that holds everything together and provides some sculpted detail. However, therein lies the challenge: While you may or may not choose to make the monsters and heroes resemble the in-game art (or the Mike McVey paintjobs on the box, for that matter), that choice doesn’t really matter all that much during the actual game, where the models basically stand on their own.
Not so with the furniture, because the art on the cardboard parts is always there, so it makes sense to ensure that the paintjob of the plastic part actually fits the art — or even matches the colours employed. This added a fun little wrinkle to the whole exercise, and one that doesn’t usually occur during 40k painting.
Now you could obviously choose a different approach and replace all of the cardboard with new parts made from wood, foamcore or GS — and, indeed, back when I made a short previous attempt at painting my HeroQuest set, that was exactly what I wanted to do, prompted by Damien Thevenin’s fantastic work, among others (his blog is unfortunately defunct, but photos of his work can still be found on various forums, Google, Pinterest and, in fact, on his Facebook page).
These days I feel a little differently about the cardboard parts of the furniture, however: They are really charming, for one. And the match the high level of the rest of HeroQuest’s graphical presentation. So I decided the cardboard parts deserved to be preserved — which, in turn, would require a bit of “Trompe-l’œil painting”, so to speak, to make sure everything fit together from a visual standpoint.
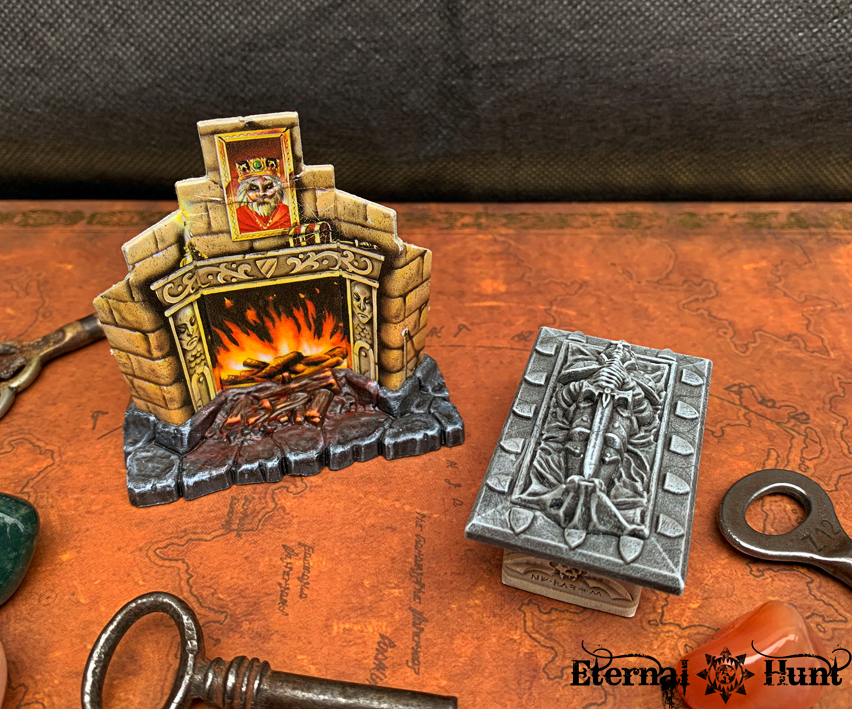
I started with something that I knew would be fun, namely the fireplace and sarcophagus:
I actually made a previous attempt at the Sarcophagus, inspired by a similar piece created by the aforementioned Damien Thevenin. Here’s the stock (unpainted) sarcophagus next to the one I built up using foamcore and some extra bitz:
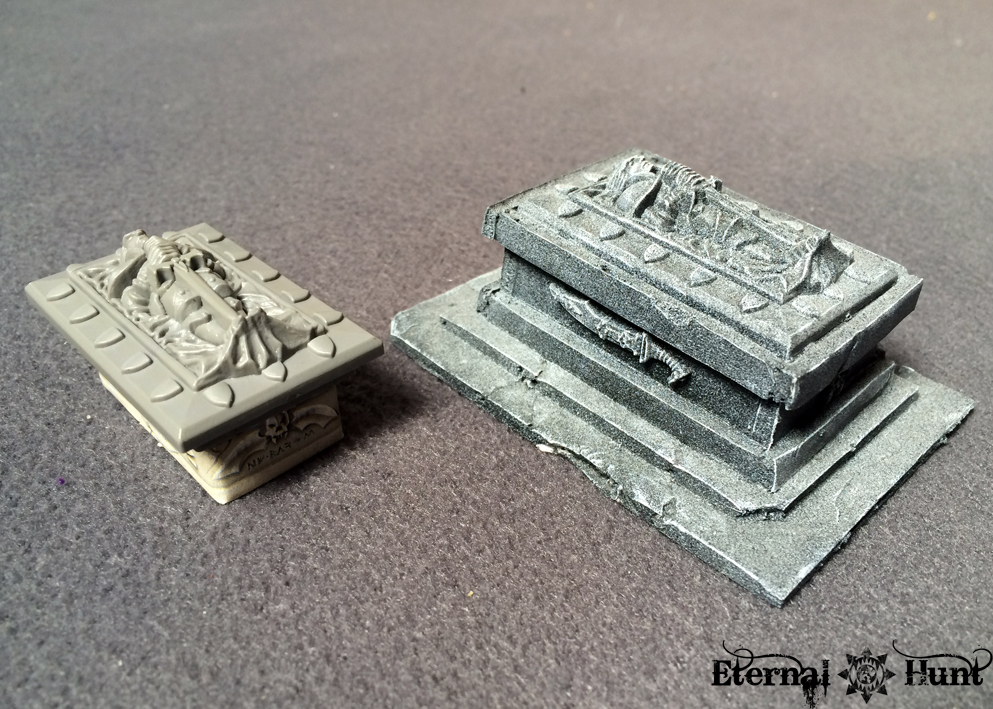


I still think the built-up piece works rather well — I am only a bit miffed in hindsight that I didn’t give more care to the actual paintjob…
So my second attempt at painting the sarcophagus ended up being a bit more conventional — but also more involved, with the actual paintjob carefully built up over several instances of careful drybrushing. Take a look at the finished piece:
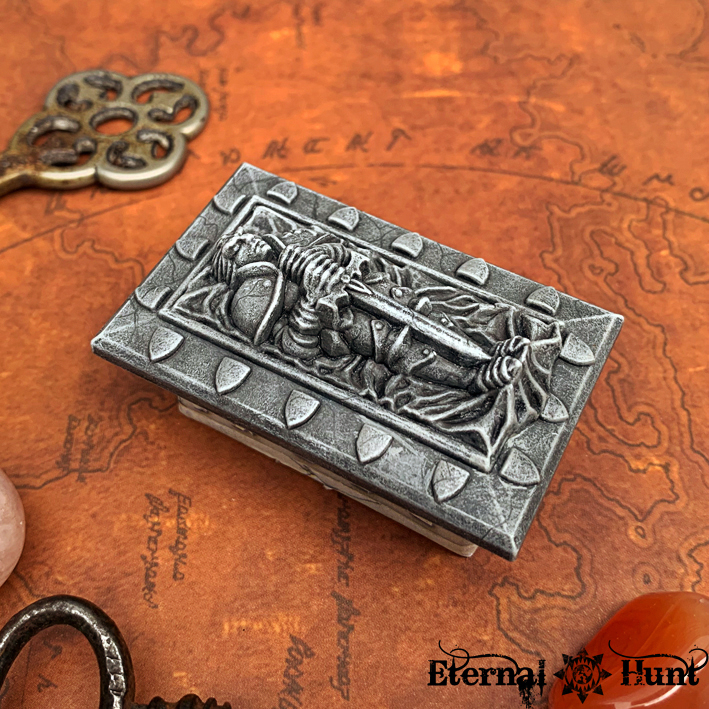

When I was happy with the colour, I added a few lines here and there that might be cracks, veins or fault lines in the stone — they were simply drawn on using a pencil, an idea stolen from a marble base my buddy DexterKong created using a pencil a while back.
The technique worked pretty well and seems like it should warrant further exploration at a later date…
The fireplace was great fun in that it contained a bit of a “special effect”. Seeing how the logs that are part of the sculpted plastic bit are actually a bit farther away from the roaring fire burning in the background, as it were, I decided to go for the look of logs that are starting to catch fire, with their edges beginning to glow. It’s an effect I’ve had to improvise, but I am still happy with the outcome:

I also added several layers of Bloodletter glaze to the stone floor, making it look as though there were heat radiating outwards from the fire — an effect that already came in handy back when I built the base for my Daemon Primarch Angron conversion.
So with the first two pieces successfully completed, I decided to jump right into a bigger task and tackled the bookcases, cupboard, treasure chests and tables next. All of these use the exact same wooden tones for the carboard artwork, so it definitely made sense to paint them back to back:

Now seeing how the plastic parts on these pieces of furniture are so relatively small, you wouldn’t suspect them to be a lot of work, right? I thought so too, but finishing those pieces did take quite some doing!
Fortunately enough, my friend Annie helpfully pointed out that Valllejo’s Parasite Brown is a surprisingly close match for the wooden tone appearing on the cardboard pieces — this made my life much easier during the painting process!
So let’s take a look at the results. We’ll start with the bookcases and cupboard:
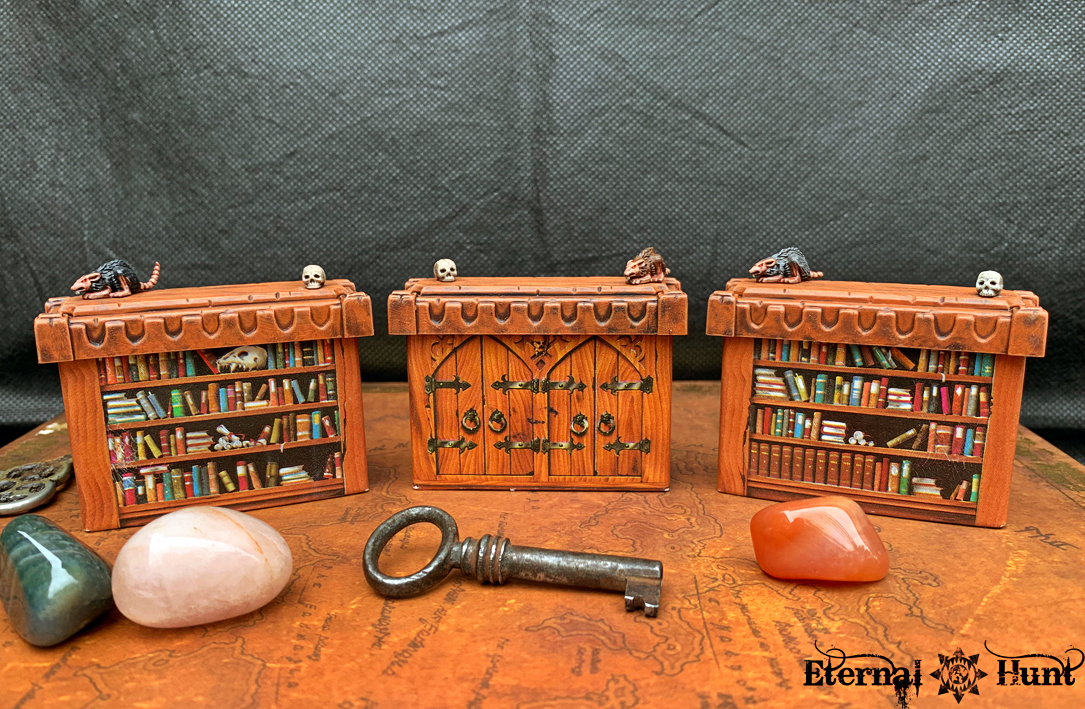
The Parasite Brown basecoat really did most of the work here. After adding some Strong Tone wash, the wood on those bookcases was drybrushed, although by being very careful and deliberate about it, I made sure that the bristles of the drybrush actually created an effect similar to woodgrain — a bit of a happy accident, admittedly 

The relatively straightforward way of painting the wood left me with enough time to focus on some of the smaller details, such as adding some character to the rats perched on top of the bookcases and cupboard:

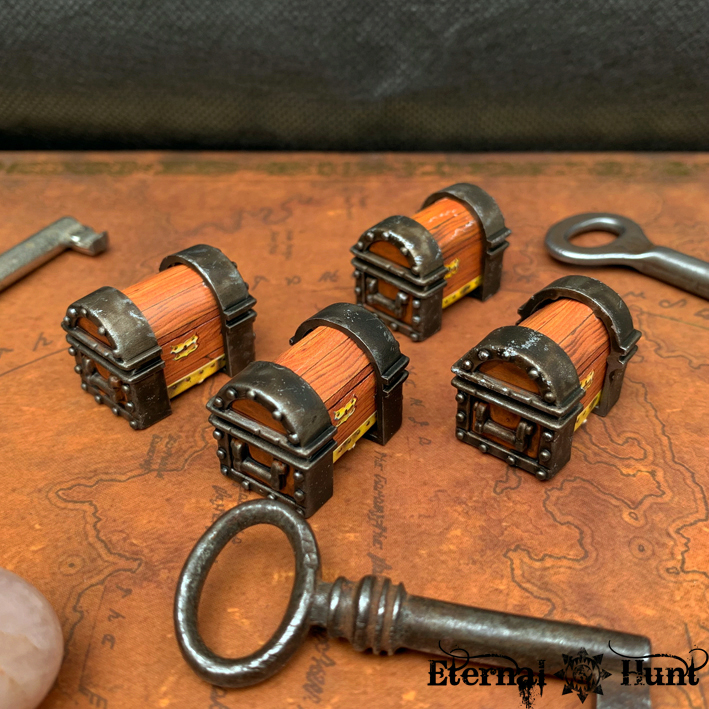
Next up were the treasure chests, which should have been the easiest part of painting the furniture, but did take far longer to complete than they had any right to. Once again, I used Parasite Brown for the wood and contrasted it with heavily blackened and worn metal fittings (created by undercoating the metallic area with Leadbelcher, then going to town on it with a heavy wash of Dark Tone and Vallejo Smokey Ink. Some scratches were then sponged and painted on).
The tables followed the same formular, although they were interesting in that they allowed me to experiment with painting on some freehand suggestion of woodgrain. You should even be able to make it out in the pictures below if you squint
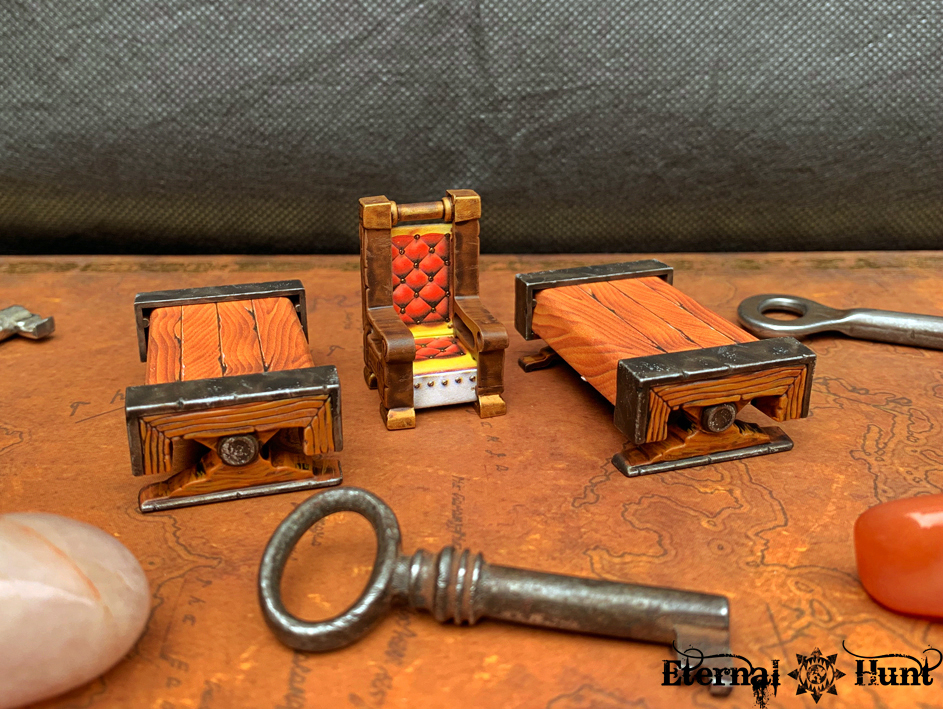
Oh, and as you can see, I also painted the little throne. This has always been one of my favourite pieces of HQ furniture, but it turned out to be really straightforward to paint (a small accident with a pot of brown paint notwithstanding…):

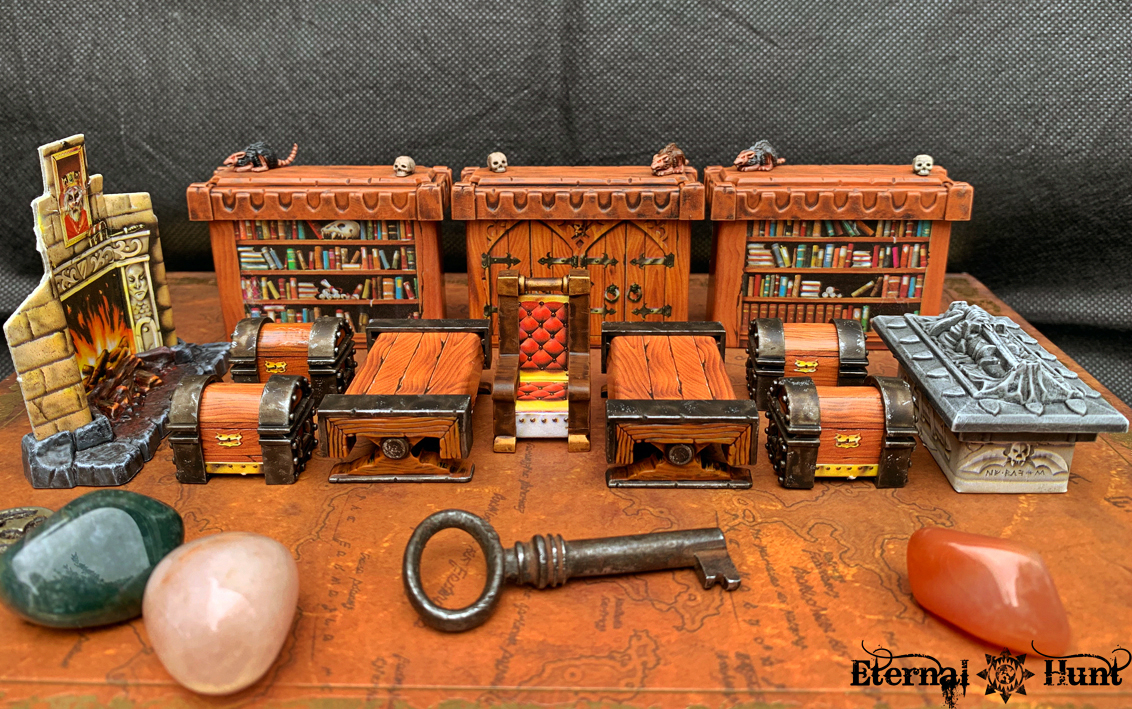
Working with these pieces has also made me (re-)discover what HeroQuest already taught us in the gender-stereotypical toy landscape of the 80s and 90s: That it’s perfectly okay to play around with little furniture if you feel like it. Seriously, those pieces are just begging to be used for little vignettes:
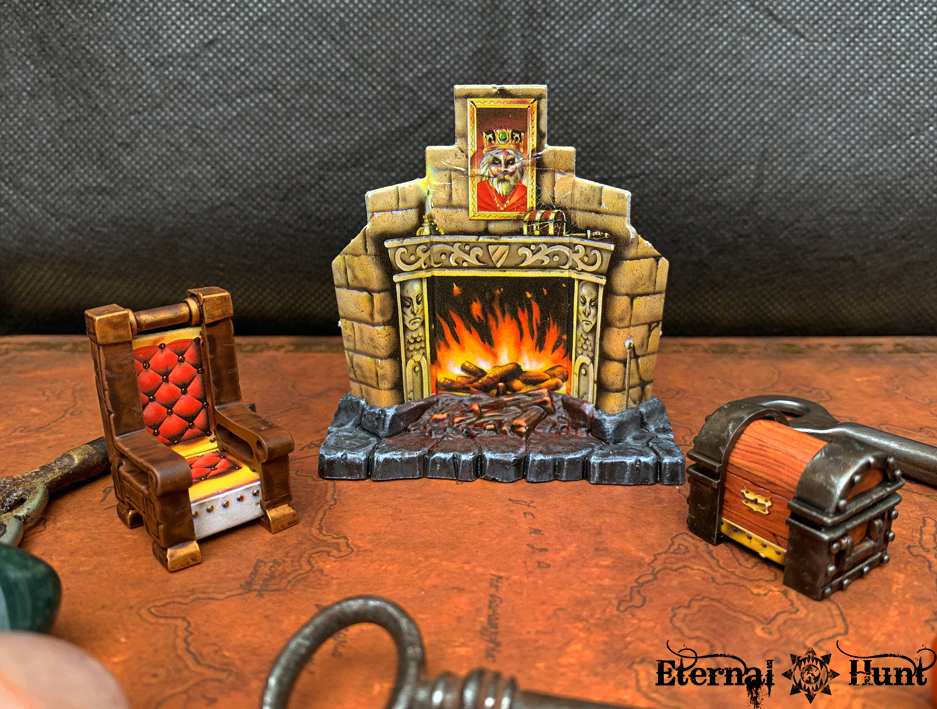
Ah, yes: There’s nothing like a comfy chair next to a roaring fire, and with treasure to plunder already in sight — this is the life!
Now all of the above actually adds up to quite a collection of finished furniture, if I do say so myself. Take a look:
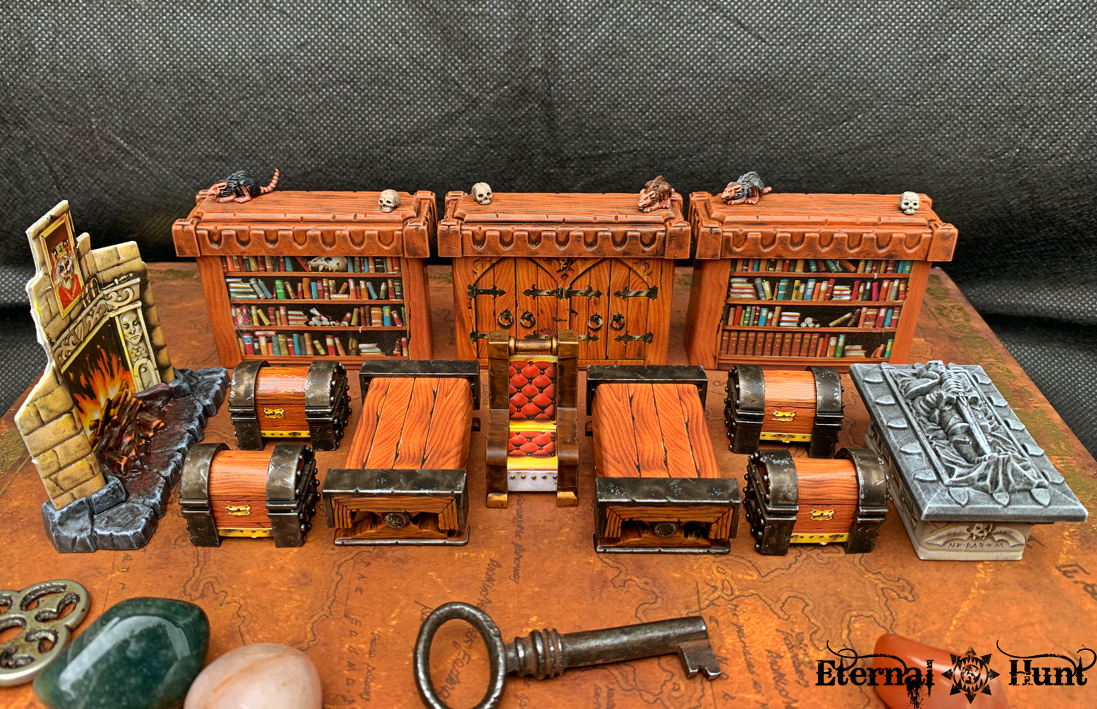
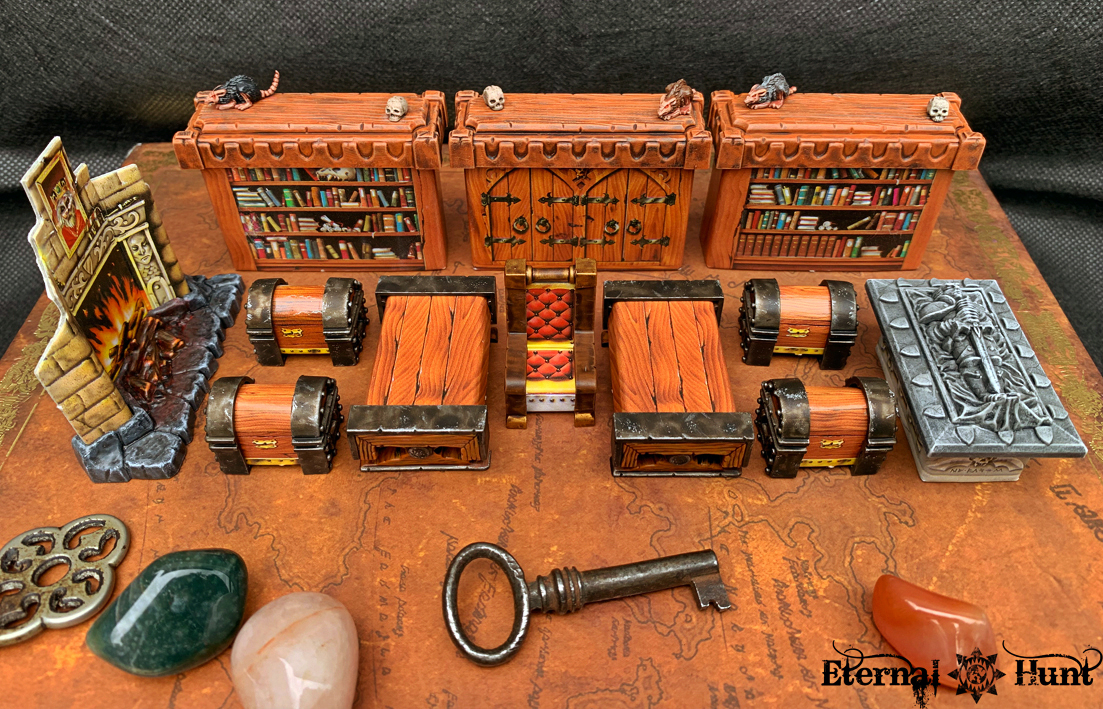
This leaves only four unpainted parts, and seeing how each of the remaining pieces is one-of-a-kind, this should make the home stretch of the project rather enjoyable. At least that’s what I hope! 
On a partially related note, I have recently upgraded to a new phone, and of course one of the more important things was to figure out whether it was any good at taking miniature photos — so what better test run than to set up some mock HeroQuest game situations? Anyway, I thought you guys might enjoy these as well, and they seem like a nice capstone for today’s post:


For now, these shots are merely a staged affair, but at this rate, it won’t be long before I actually get to experience the fully painted game in earnest — keep your fingers crossed for me!
And with that, it’s back to the painting table for me! Please feel free to let me hear any feedback or comments you may have! And, as always, thanks for looking and stay tuned for more!
