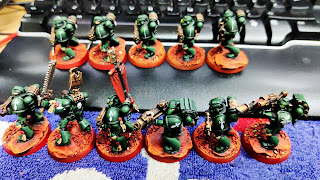
This is how I start them off with a central line of VGC Stonewall Grey
Then I flesh out the sword. I create a small triangle on the top left of the blade [the left of the handle]. I then do a longer triangle, weighted to the bottom, for the left of the blade. Then I repeat that on the right had side. I do a perpendicular line between the two diamond shapes, as the crossguard. Then two perpendicualr guard ends
Here you can see 8 of the wingless swords ready to go. I had some reservations about how hard this would be before starting[it's been a while]. I'd definitely recommend that this is a great 'save point' if your patience and concentration levels start to slip. Breaking things down into chunks is a great way to help overcome what might feel insurmountable.
The wings are next and the key here is the ends of the crossguard, as they both form a shape to curve the wing down and then follow the blade. It should stop parallel to the widest part of the blade, but you'll see I've gone longer in places. Two reasons for this - I hadn't paid too much attention to the actual symbols so hadn't spotted the end point. Also, they can look a little stumpy, so on occassion I did just extend them a bit to make the shape make sense. I then try to do the top most feather. This should be horizontal, parallel to the bottom of the shoulder pad. But you will notice that mine will angle up. Again, this is because I didn't pay attention to the actual symbol and also because it is quite difficult. So long as they match on either side it doesn't really matter.
You then have to fill in the two middle feathers. I rotate the figure in my hand a bit inbetween them, to ensure the angles are different. You do not want parallel line in this situation, they rotate perpendicular to the arc of the wing that goes round the crossguard ends.
Alterntavely I've seen people paint the wings like two solid fan shapes and then cut into it twice with Caliban Green [here it is for Deathwing and Brush and Boltgun have a great video that explains this approach. There's a clear advantage to this - you only have to cut in with those three green lines and the outer edge of the feathers will be smooth, whereas min all look a little sketchy.
As you can see the results are 'chunky', not perfect but I am happy with them. Despite that variety in them and some of the sketchiness I like them.
I don't know why they appeal to me. My brain is telling me they're not perfect, in some respects not even close to what the symbol should be but I'd describe them as having an earnestness about their execution - unapologetic. They're genuine and it just goes to show you shouldn't be afraid to freehand.
You don't have to be perfect, just take your time, take as much care as you can and the results will exceed your expectations because you know you tried. Anyway, these are getting close now. Some highlights on these next, pick out some more highlights elsewhere. The eye lenses are mostly done, just need the white dot highlights. Blessed verdigris needs to be applied. Should be done in a week or so [although by the time you read this they could be complete...], although my son is back from uni now so a little less hobby time than previously.


