Fury’s Finest had another painting competition. This time the theme was “Heavy Hitters”. And I enjoyed the last two competitions (Honey Badger & Crimson Dynamo) so much that I figured it’s time to try again. At the very least I’ll push myself to get better and learn something. 
For Crimson Dynamo I learned how to make a snow base and a cool melted effect. For Honey Badger I played with casting a figure in resin as part of the base. This time I wanted to try something along the lines of destroying the base.
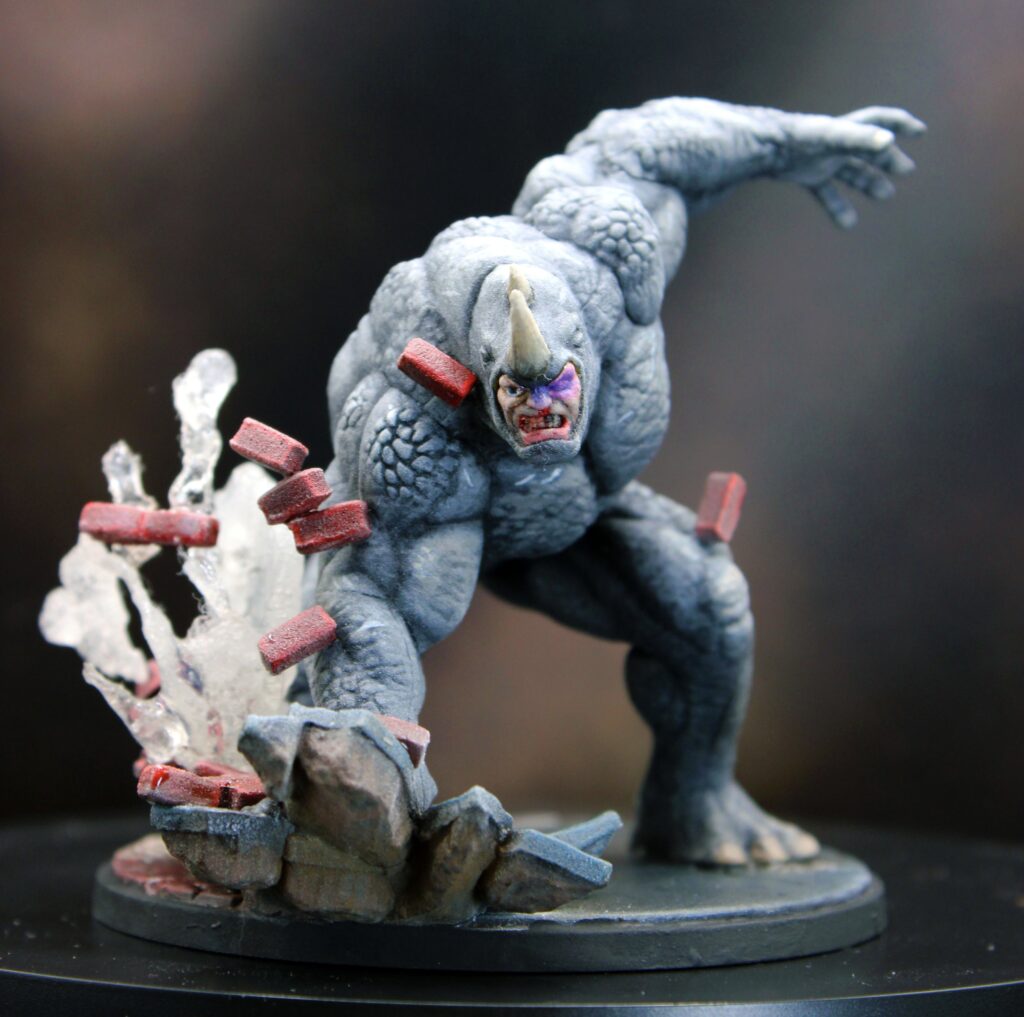
I love building custom bases for my miniatures. Adding extra effects to a base can really make your miniature stand out from the crowd. And I received Rhino on my birthday so I had the perfect heavy hitter ready to go. 
Finding Inspiration
The trickiest part was crystalizing the loose idea of “rhino smashes something” into an actual cohesive idea on the mini. I started by doing some research and Rhino and seeing what techniques and comic panels I could learn from.
I found lots of cool examples of Rhino throwing a trashcan, Rhino stealing bags of cash from the bank, Rhino smashing a traffic light, etc. I looked a dozens of Rhinos on the Facebook groups and Discord servers. Eventually I came up with the idea for Rhino to smash a fire hydrant (which came in the Apartment Building also on my birthday!).
The key that helped me select that idea was that I realized I learned a lot about resin working with Honey Badger so I figured I could continue working on those skills. This time though I’d try to shape the water like it’s exploding upwards.
Did I have any idea how to do this? No. But I figured I could figure it out on the way.
 - I asked for some advice from one of my favorite MCP painters, Polda, on an MCP Discord and he pointed me to an incredible tutorial:
Seeing this example helped me realize it was possible  and I was off to the races building Rhino.
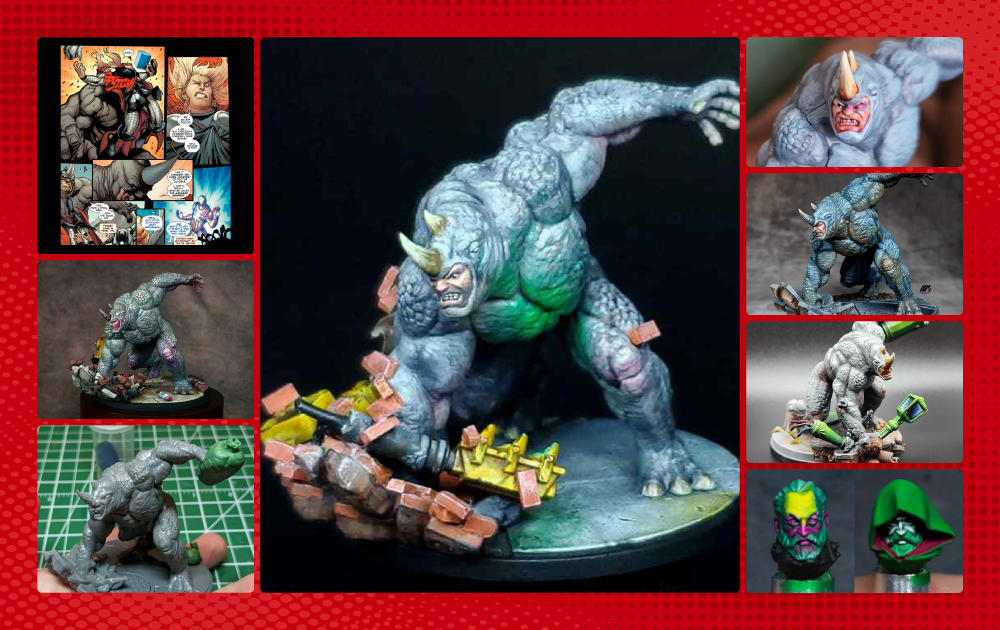
Assembly
I typically like to build the model in it’s entirety and then paint the model. I know sub-assemblies are really helpful for painting different components, however, I also play with my models and they have to withstand regular gaming wear and tear. So I prefer to use plastic glue to make sure the model is as sturdy as possible.
Superglueing paint to paint is just asking for the model to break when you’re using it. Definitely not my favorite.
However, I had a very busy summer schedule and I knew I may have to paint Rhino first and then figure out the water effects and the base second. So I did actually paint in sub assemblies.
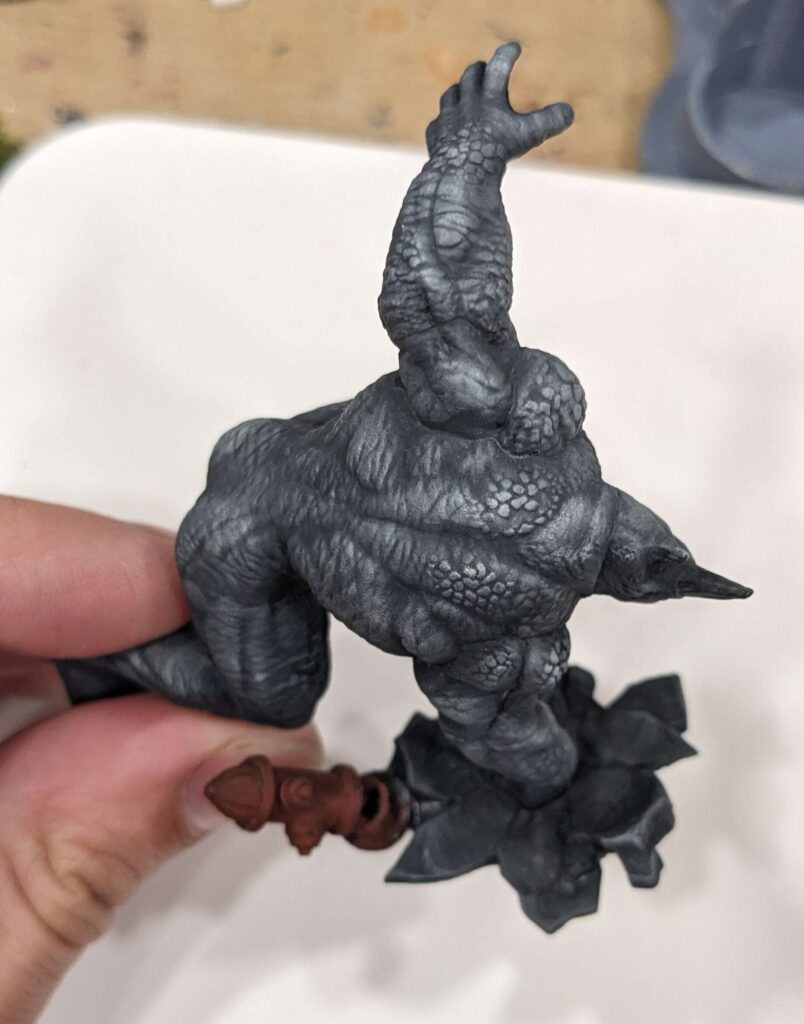
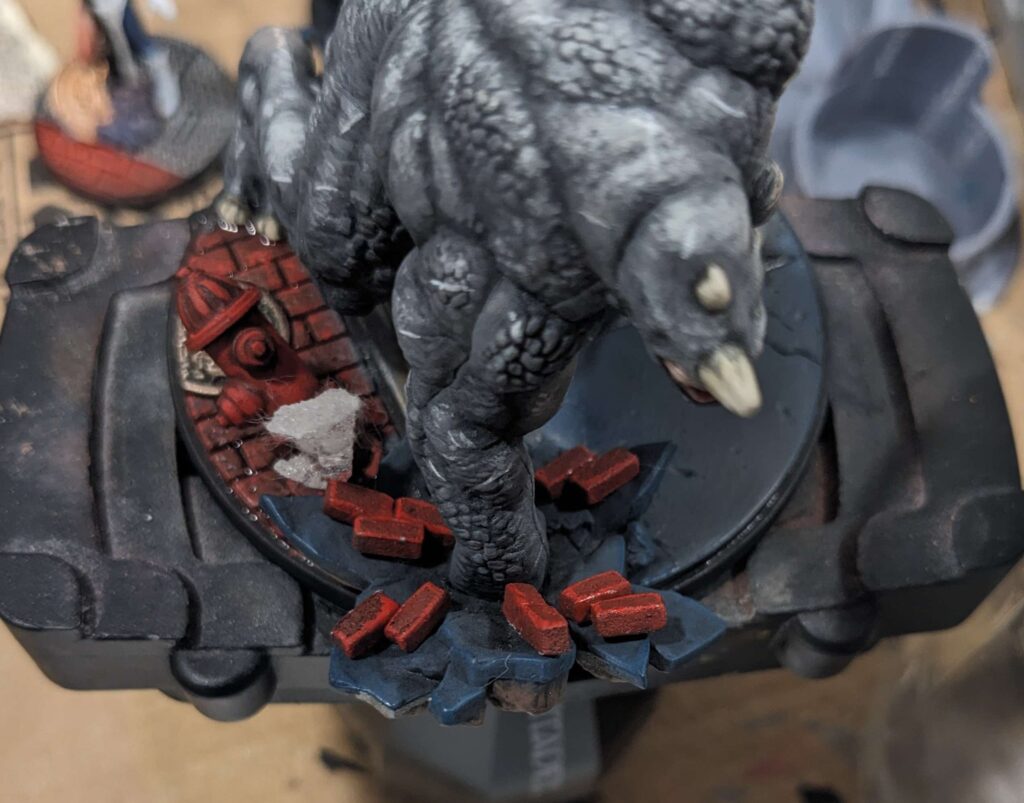
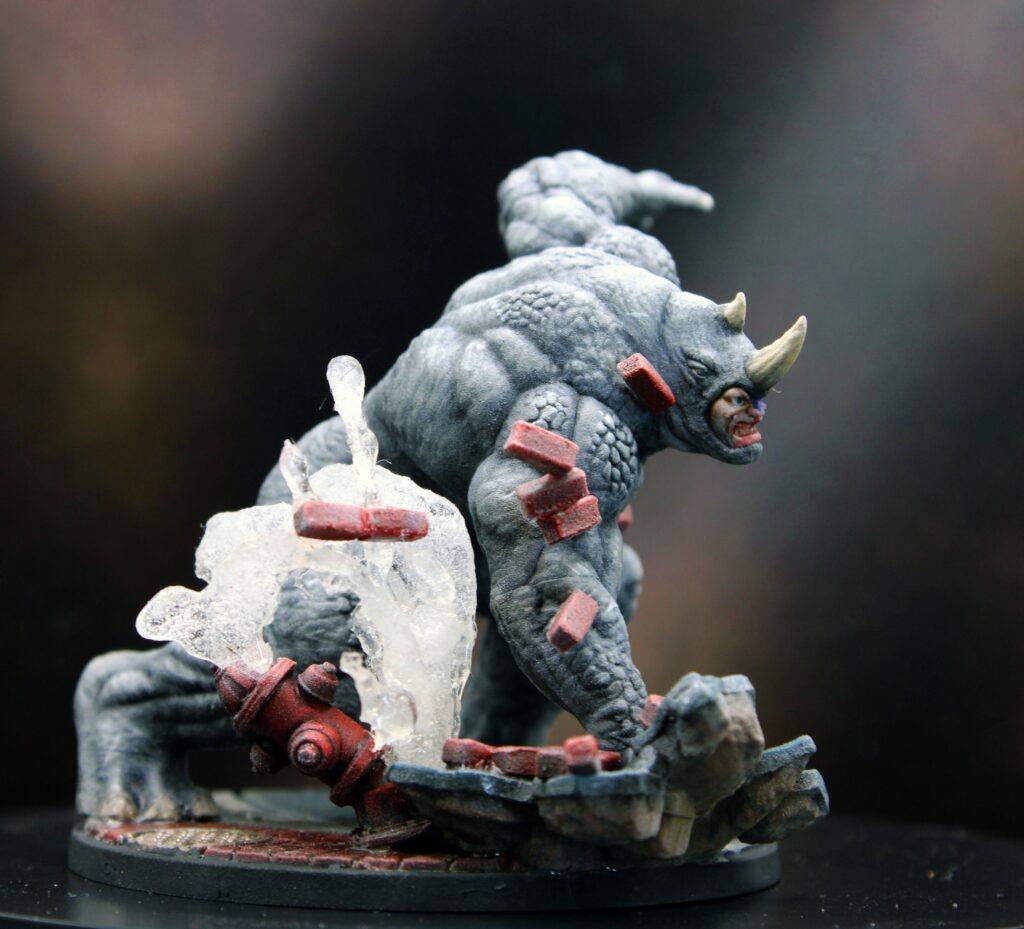
I really like the fire hydrant behind Rhino’s fist. I don’t want to obfuscate any of the details when looking at Rhino’s model. The water shooting up should still be very visible even if the hydrant is behind the fist.
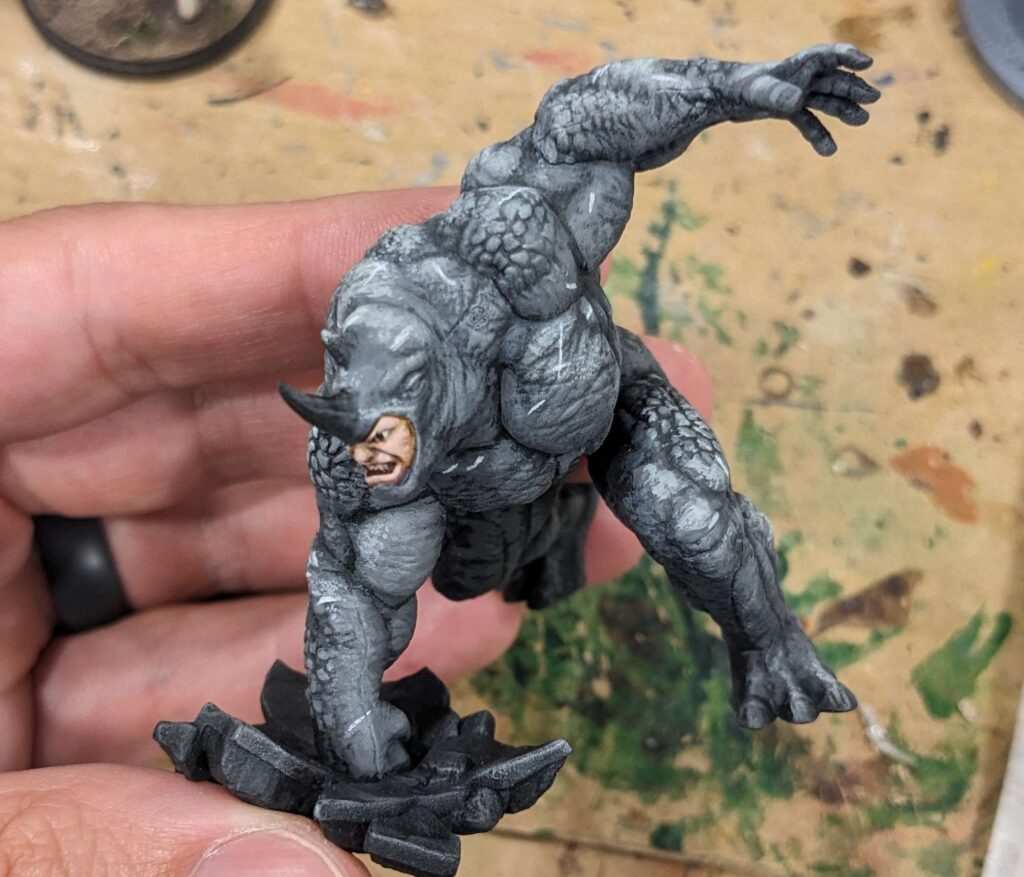
Painting Rhino
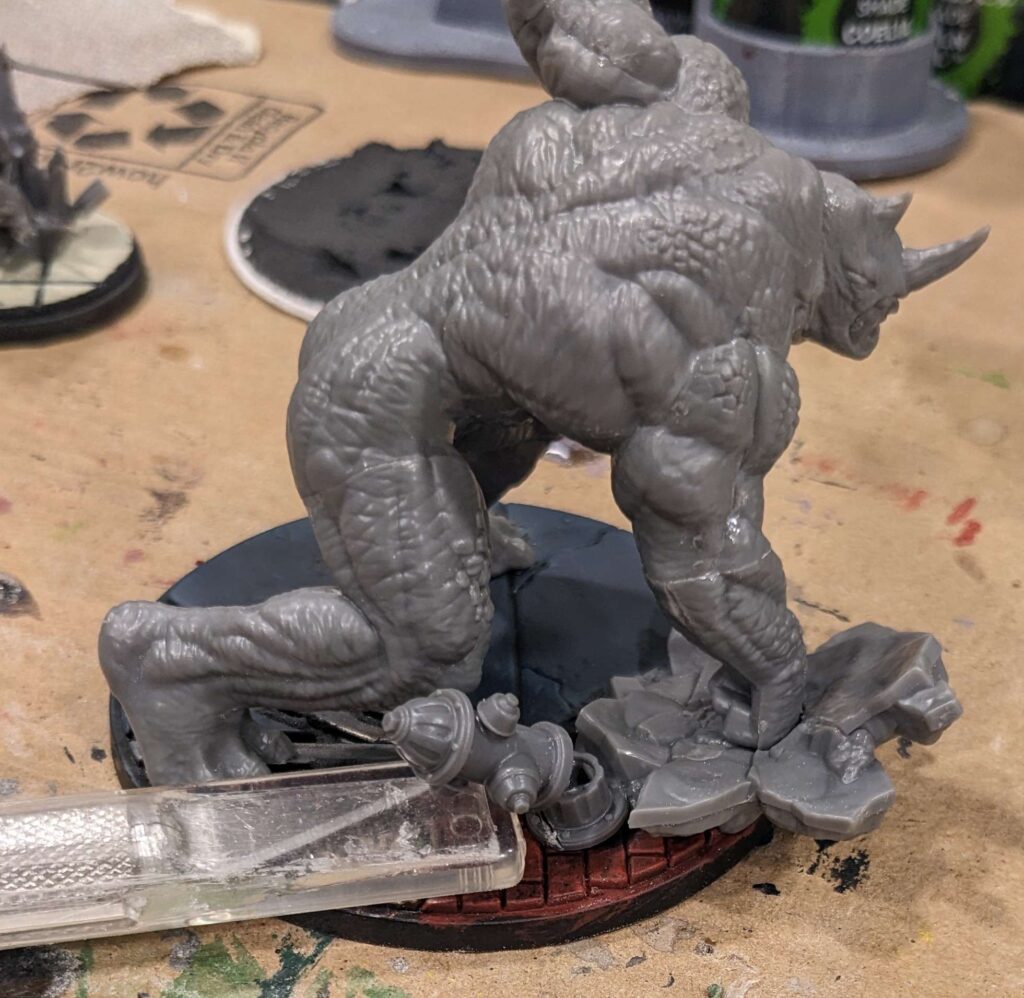
I wanted a quick win so I started with the base. And I used a little bit of blue in the base so that there’s contrast between the straight grey color of rhino and the blue-grey of the asphault.
Now it’s time to start on Rhino.
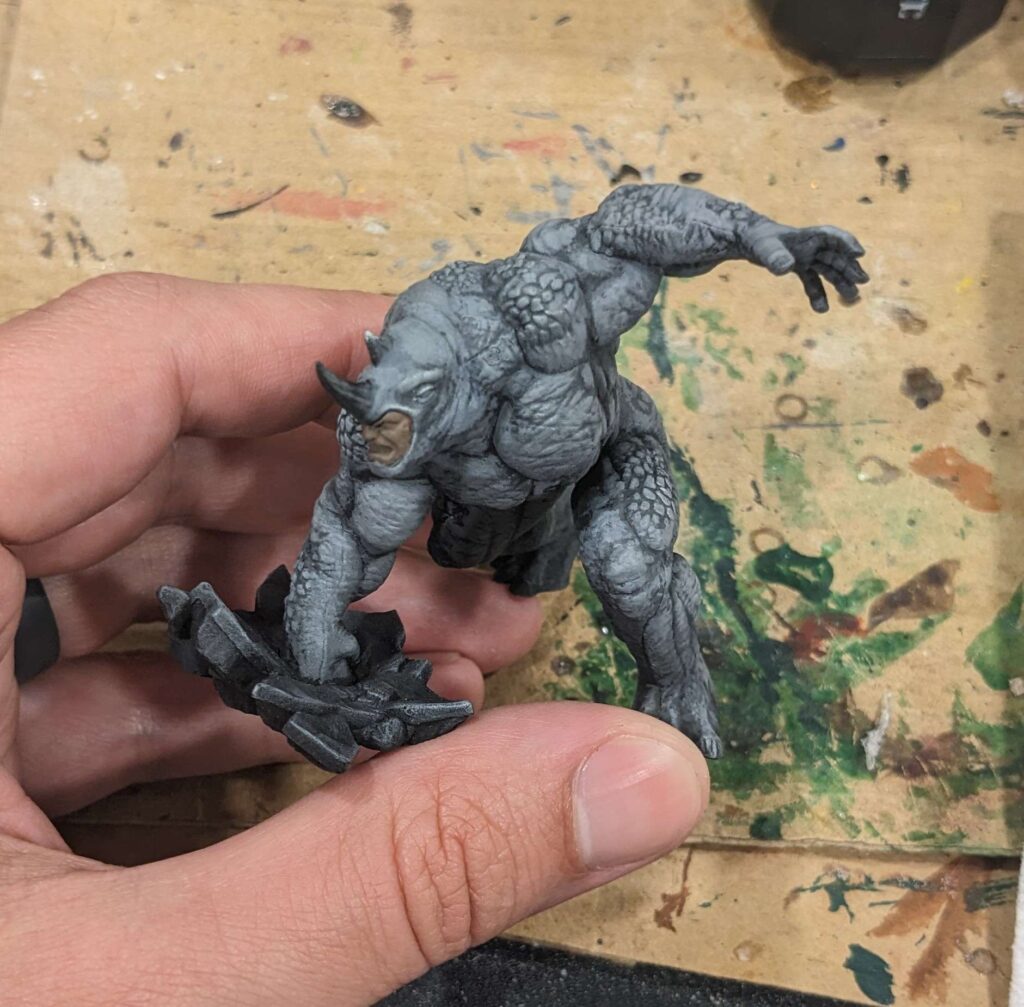
And then it was time to start working on some other details like the face, horns, hands, knees, and also some battle damage.
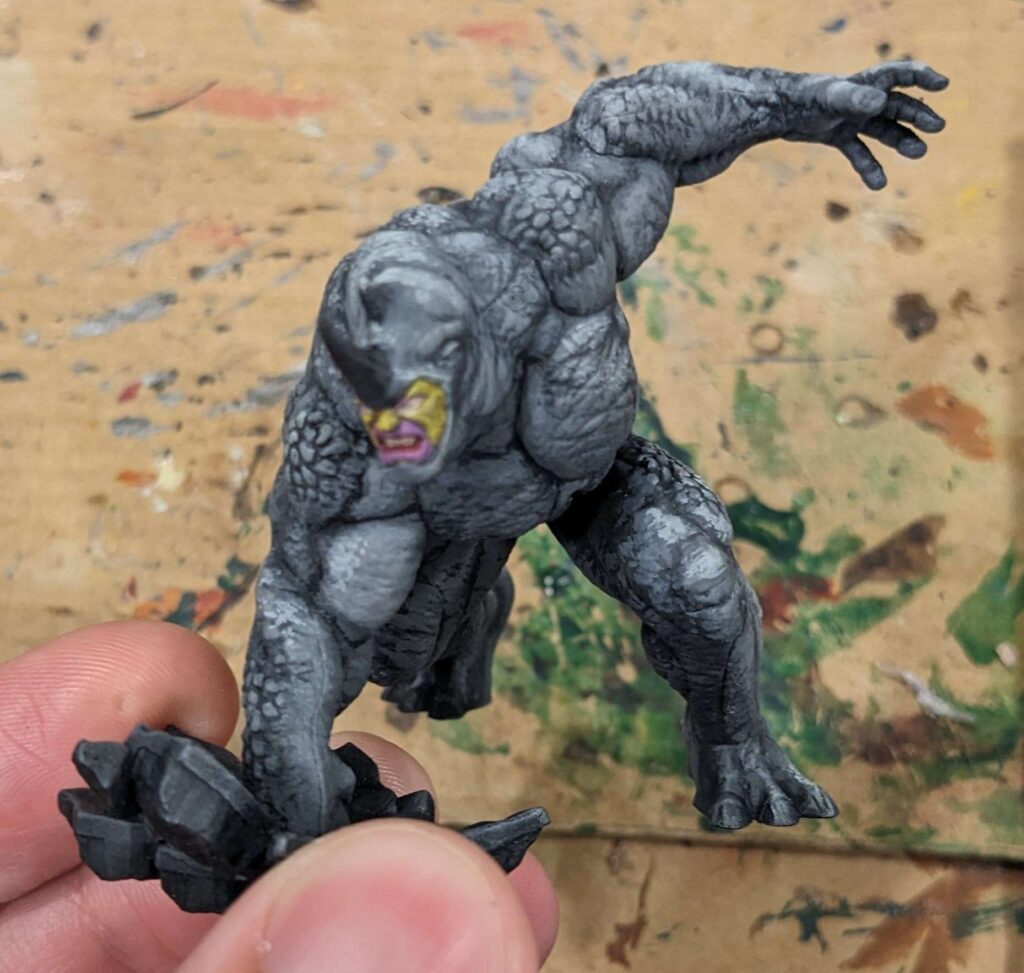
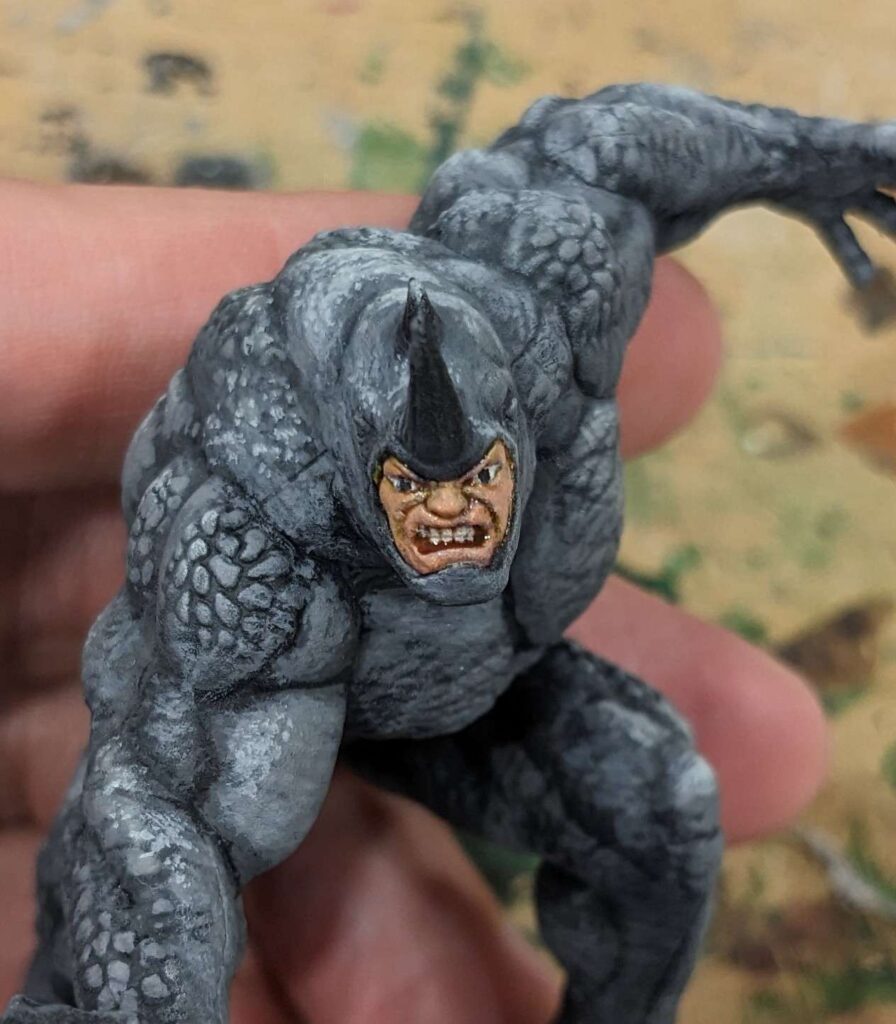
Adding Battle Damage Effects
Rhino hide is very tough and leathery. It should have scratches and scuffs all over. I painted these on with white using a fine brush.
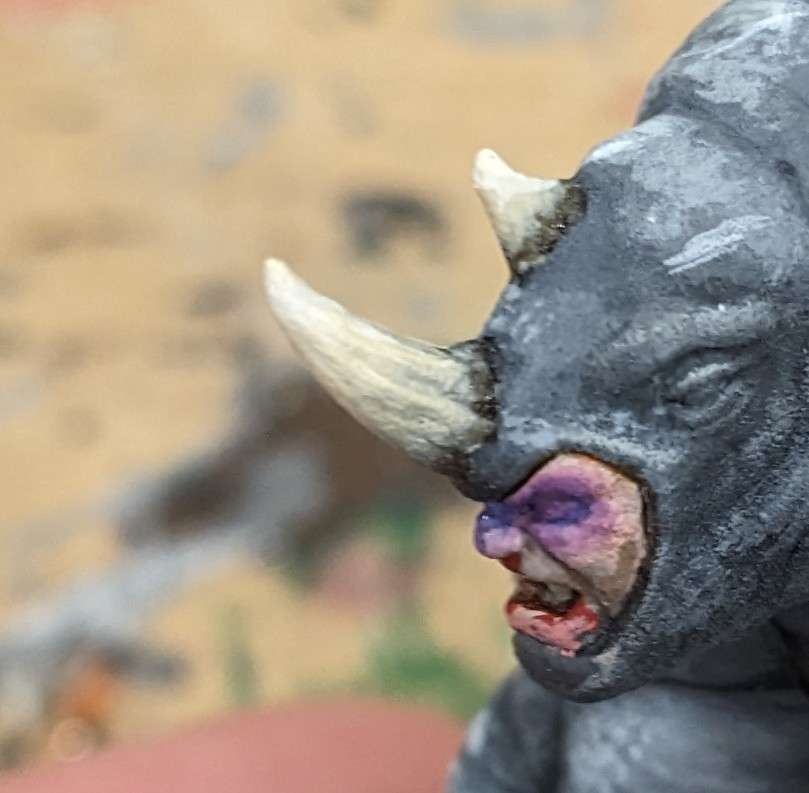
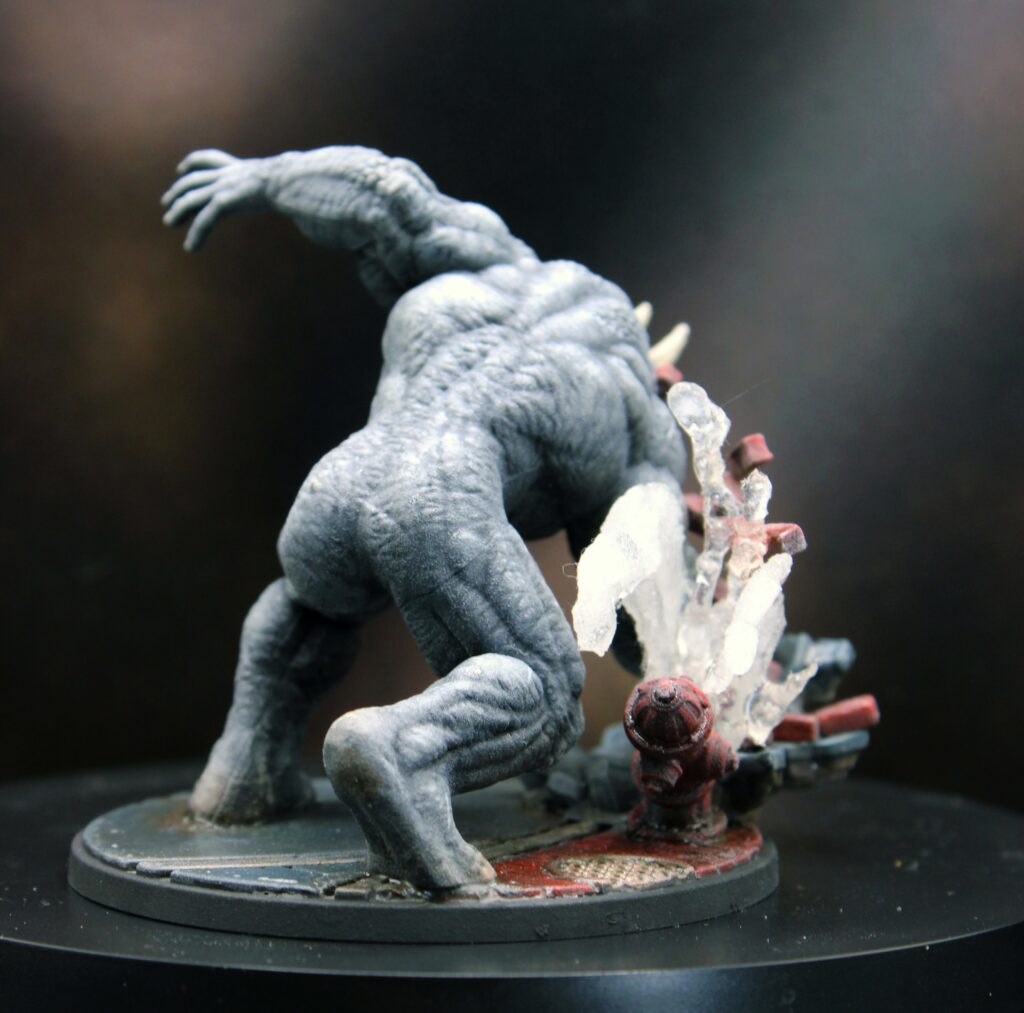
One of my favorite details was adding a black eye to Rhino. He just seems like a guy who gets punched a lot. And he typically fights someone like Spider-man who doesn’t seriously would him but would fling something into his face to slow him down.
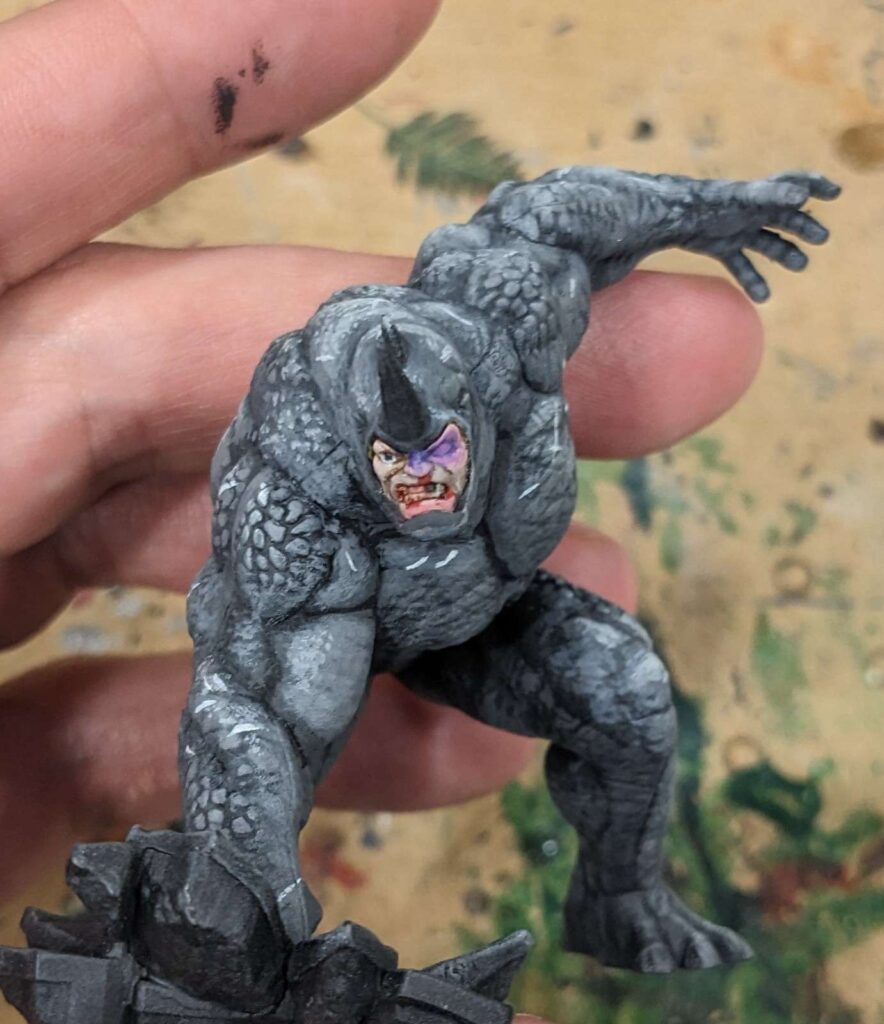
It was a surprisingly easy detail to paint. I just used purple to paint over the eye. And then added a little dark purple on the bridge of the nose where I imagine he was hit. Then add some red coming from his nose leaking into his mouth. To finish the effect paint a single tooth black.
You can’t forget to give Rhino a good horn.
Now it’s time to varnish the model to protect it from wear & tear. And I should do this before I add clear water effects in case they get frosted. What could possible go wrong…
Panic Over “Frosting”
Despite my best preparation I did have some “frosting” on the miniature. 
Frosting is when your model gets coated on a whiteish material from the varnish. You can see it below. I added water on the left side of the base and the frosting effect goes away. On the right side of the base you can see all of the frosted details.
I used a brush on Satin varnish from AK which seemed to fix most of the frosting. Truthfully this happened a day or two before I had to take photos so I was hustling as fast as I could and giving each layer time as much time to dry as I could allow.
{{FIXING FROSTING}}
In the end I mostly fixed the frosting but it did take away a little color vibrancy. I notice it especially on his face and on his base. The street color was blue-er before the frosting. 
Creating Water Effects with Resin
Now onto my favorite part of this miniature! The water effects.
I actually started this pretty early. Every few nights I would experiment with water effects. I tried a few different types of cotton and stretched it over an old yogurt container (washed of course). I dripped the resin onto the cotton and then the next day pulled out any drops that looks good.
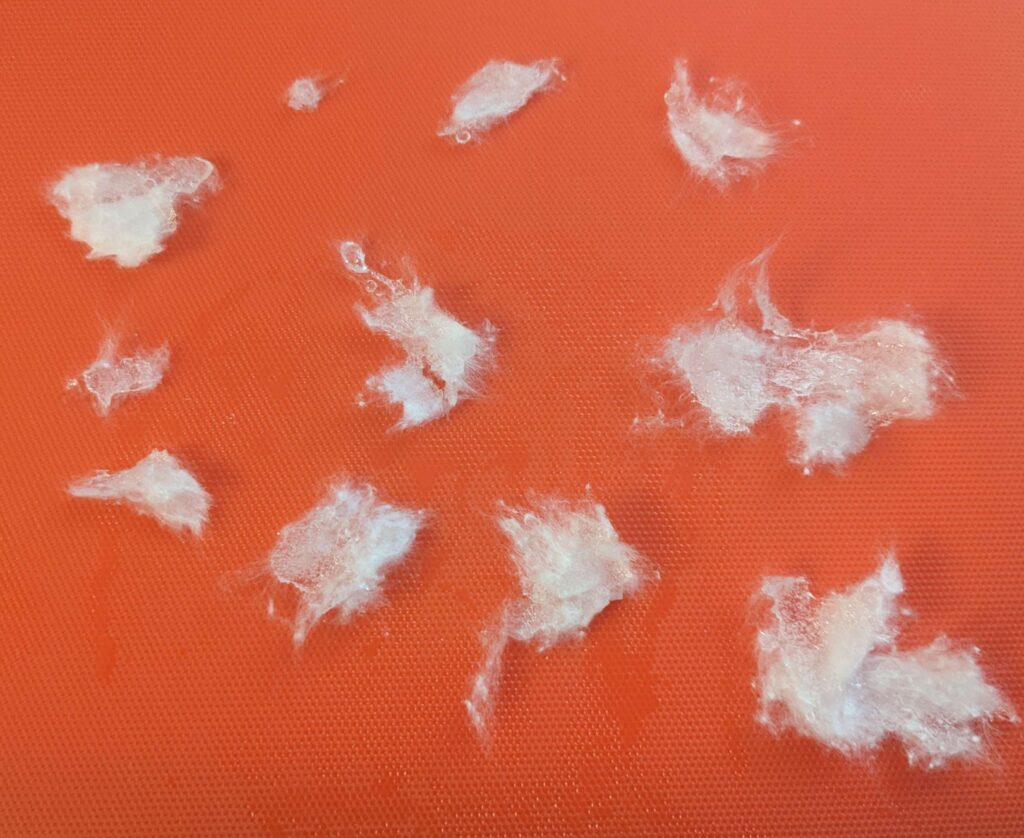
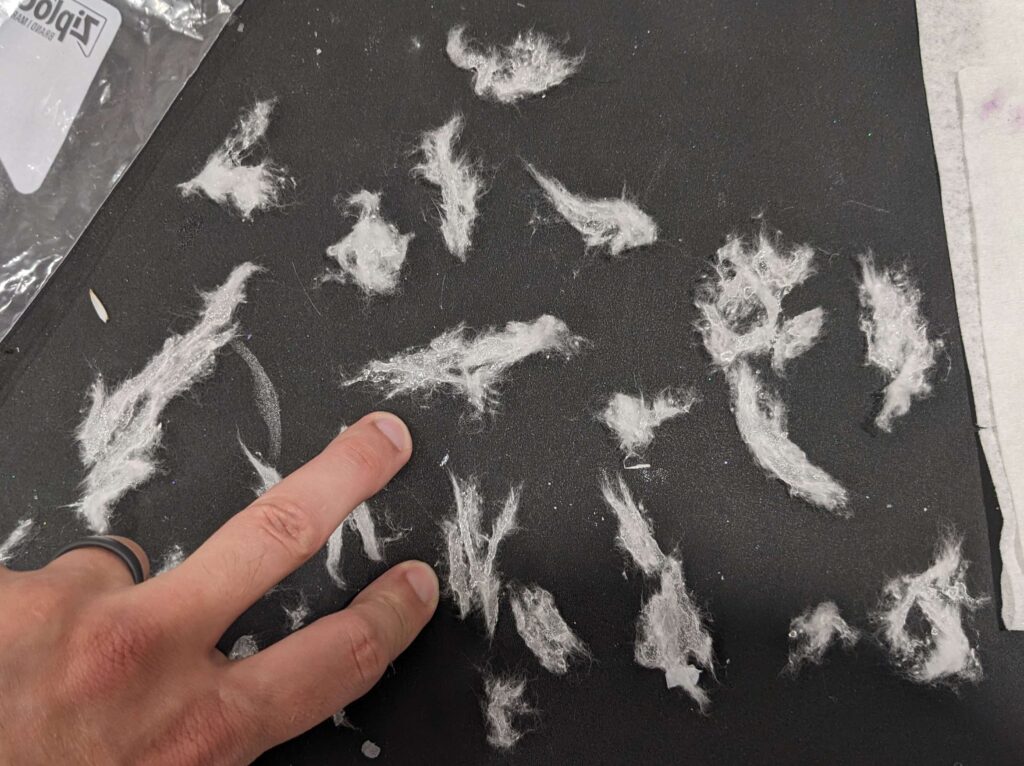
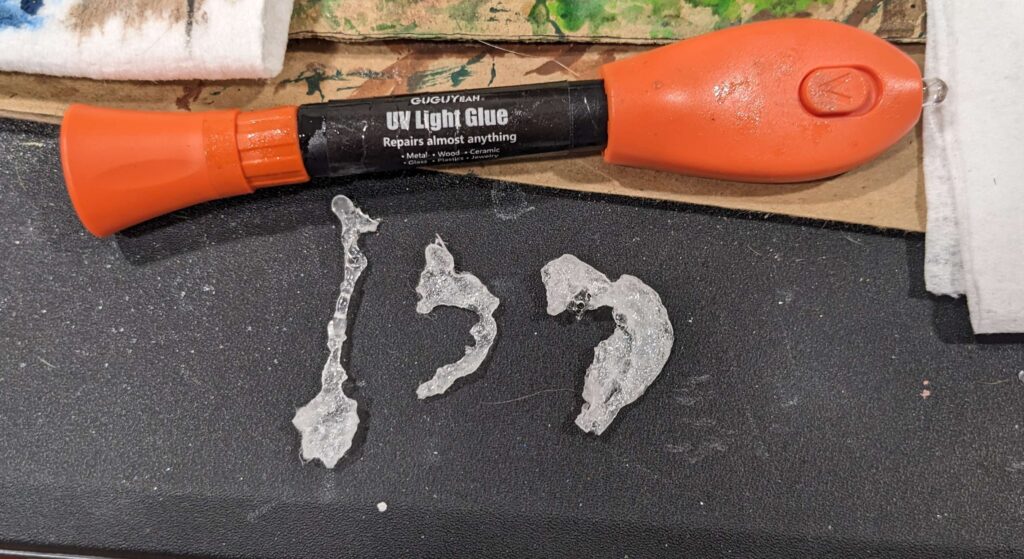
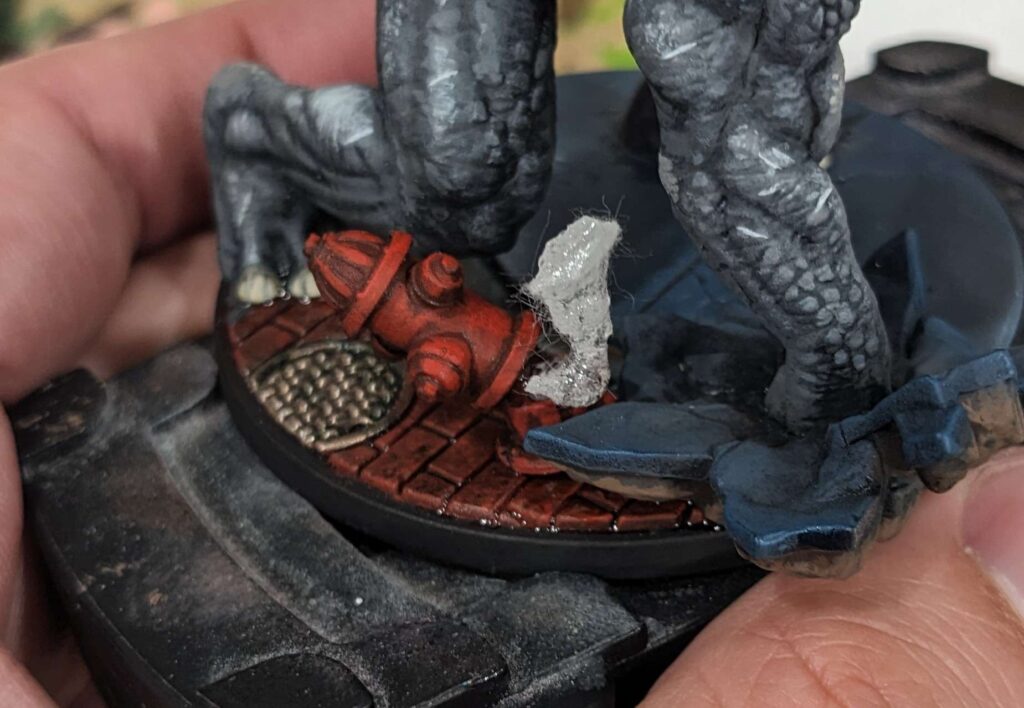
I used the starting water effect and the three good water effects as the center of the water effect. I used UV resin to glue them together and I’d also spread UV resin over the hardened resin and try to flatten any fly-aways from the cotton into the resin. Then use the UV light to harden it.
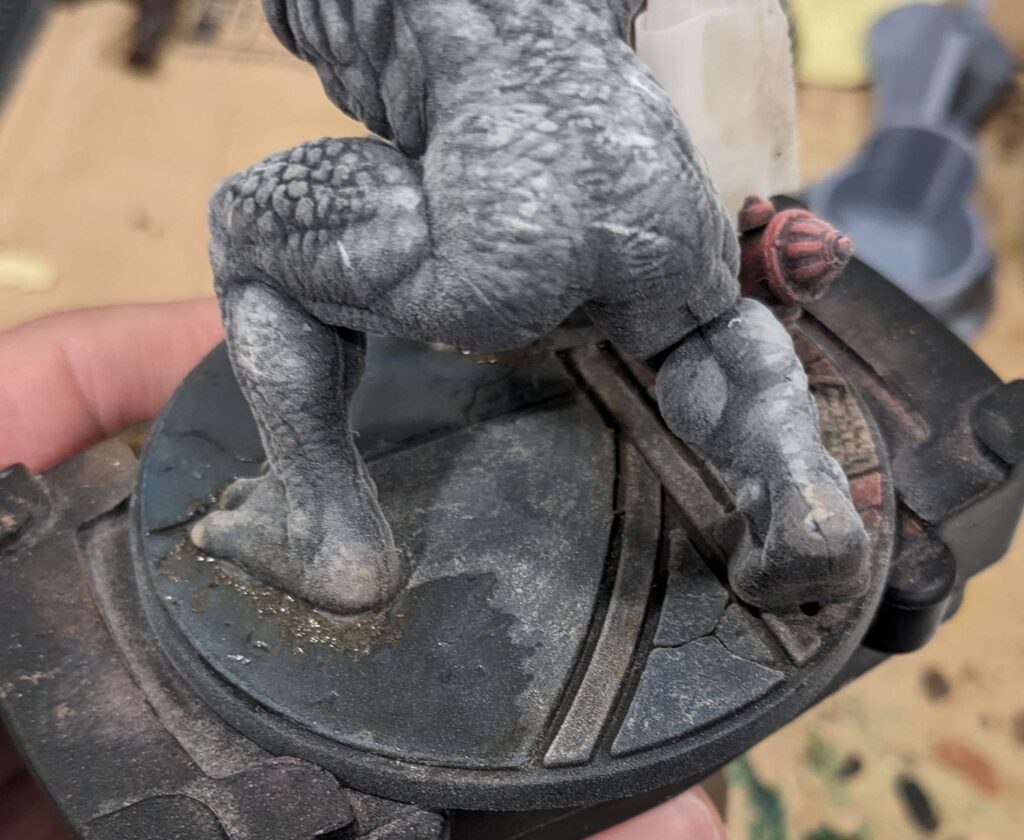
Add Bricks
We’re so close! Now it’s time to add some exploding bricks to Rhino.
Bricks are actually incredibly easy to create. You need a rectangular hole punch and thin foam. I used Fiskars 1/4 Inch Hand Punch, Rectangle.
I primed them Doombull brown and painted them red and called them good enough.
Finished Rhino
In the end here’s what I submitted to the contest.
Final Thoughts on Rhino
Overall I’m really happy with Rhino. It was fun to add a bit of exploding effect to Rhino. The base model is great. I’m just highlighting what’s already there. And the water effects and bricks added a lot to the model.
I did have a panic and freakout over the frosting. 
I’m seriously thinking about only ever using brush on varnish in the future. Frosting a miniature you just finished is a horrible feeling.
Appreciation 
I need to show some appreciation to my friend Mark who takes great photos of my miniatures, Polda who shared some awesome ideas and videos for making exploding water, and my buddies who I showed the miniature to to get feedback as I went. Thank you all.
The post Painting Rhino for the Fury’s Finest Painting Contest appeared first on Patricks 40k Hobby.