Oh boy, where to start…? It’s been a rather eventful couple of days, from a hobby perspective, and I have been through a veritable rollercoaster of emotions. So what happened?
Everything started when I finally decided to paint my converted Chaos Knight: This has been one of my biggest hobby projects so far, and so it has taken me a little over a year to work up the courage to paint him — well, that and I pledged him as part of my vow for the ETL IV event over at The Bolter & Chainsword, with the deadline later this week.
So, anyway, I was finally prepared to get this big boy painted, right? Just so you remember, this is what the finished conversion looked like (the entire project so far has been chronicled here and here, for your edification):

The situation was already less than optimal, though: All kinds of work related shenanigans had left me with precious little time for painting my vowed models — and also happened to kill much of my hobby drive, at least when it came to painting. So with under a week left to complete my vow, I still tried to make this happen. So I grabbed the model as well as a can of Chaos Black and Leadbelcher each and headed outside to undercoat the model.
The black undercoat worked like a charm. Then came the silver. Now some of you may remember that I even used a dedicated test model to make sure the Leadbelcher spray worked as intended (in fact, that test model then spawned an entire gaiden project of its own). So I was pretty sure everything would work out just fine. So after both the black and silver had gone on, the model ended up looking like this:


Seems nice enough, doesn’t it? Only when I picked up the model afterwards, I realised that, due to an unforeseen (and inexplicable) undercoating mishap, the whole model now sported a very gritty, almost sandpapery texture (you can just about make out the effect in some of the pictures). The only part of the model that escaped this problem was Baron Harrowthorne himself (undercoated five minutes prior, using exactly the same spray can, to add insult to injury):
As you can probably imagine, my first reaction was sheer panic: It seemed like I had just managed to ruin a 100+ Euros model, and one I have spent many hours converting, at that. But after thinking things through, I realised that I didn’t just want to give up quite so fast: If there was any way to save this model after all, I wanted to find it!
So I started experimenting: The first thing I did was to take a tootbrush to the entire model in an attempt to take of some of the worst grit — before that, handling the model would leave some silvery pigments on my hands every time! With some of the texture brushed of, the resulting look wasn’t all that bad, really: The silver had a pretty nice gunmetal look, and while that certainly hadn’t been planned, I was confident that I would be able to work with it. So I started washing the entire model with Army Painter Dark Tone and hoped for the best.
However, it turned out that whatever had happened had also messed up the way the undercoat reacted to other paints: The most imminent consequence was that it took a lot of wash to actually darken the silver to a point I was happy with. And I was also pretty apprehensive about how well other colours would work on top of this rather funky undercoat.
Here’s what the model looked like with the black wash and some first red and bronze parts blocked in:

A closer look at the head reveals the sandpapery effect:

Fortunately enough, it turned out that it was easy enough to add other paints on top of the undercoat:
And, like I said, it took *a lot* of wash to suitably darken the undercoat: Compare the main body with the chaotic heat outlets (yet unwashed) in this picture:

But while I was still worried about whether or not I would manage to salvage the model, it did start to look a little better with the first details in red and bronze:

So I did the only thing I could and continued painting. One thing that put at least some of my worries to rest was that all the Knight’s armour plates wouldn’t have the same problem, so even if the skeleton retains some of the gritty texture, adding the armour plates on top will make it somewhat less noticeable.

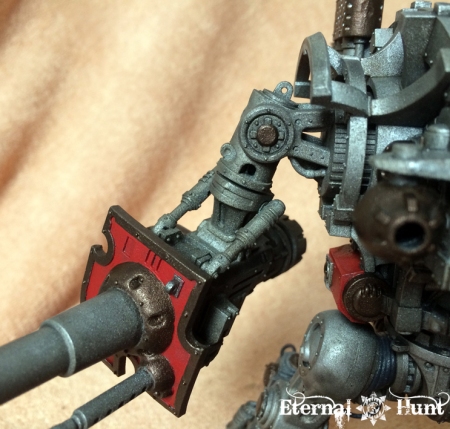
I also felt that I might just as well try and make the effect work to my advantage — after all, the rather blunt gunmetal look worked pretty well in some places, making the metallic parts look like the heavily worn chassis of a machine that has been in service for a long time. The bad news was that other areas ended up looking more toylike because of the undercoat. This was especially noticeable on the arms, for instance:

So I spent a lot of time covering various parts of the model with different washes to add some depth to the metal and to create areas where grime and oil would have built up over the millennia. Jeff Tibbetts’ wonderful thread really became a lifesaver for me, because not only has Jeff gone for a fairly similar look for the metallics on his Knight, the Queen-Bee, but his thread is also chock-full of fantastic advice for weathering a model of this size. So I stole what I could from his thread and tried to simplify some of his especially cool recipes for use on my own Knight — and it started to work: The judicious use of washes and drybrushing slowly added more and more depth to the model and helped making the problems far less obvious:


I also needed a little quick fun to keep me going, so I actually finished the head a little early:
The engine compartment was also starting to look as oily and grimy as it should:
So after about a week of frantic painting, here’s what I have right now:
It’s actually slightly frustrating that all of the photos are looking so similar, when the model in front of me looks so much better than it did before — but the camera just eats up some of the more subtle touches. I guess it cannot be helped.
Anyway, I think the “skeleton” is actually nearing completion: All the red and bronze areas have been finished, and I’ve done a ton of weathering on just about every metallic surface: I’ve added some rather subtle verdigris to some of the bronze parts, but most of the time has clearly been spent working on the silver, using a combination of GW Typhus Corrosion, Vallejo’s Smoky Ink and various GW washes to create the aforementioned buildup of grime.
So here’s a couple of closeups for you:
The engine compartment, now with added verdigris:

The various weathering effects really work together rather nicely now (I tried not to go overboard with the verdigris effect, because I didn’t want the model to look to “colourful” because of it). Plus I’ve also taken quite some time to make the leg pistons look fairly realistic, as per JeffTibbetts’ wonderful tutorials:


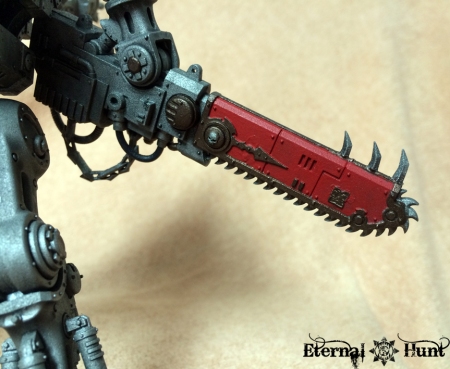
And finally, what may be my favourite detail at the moment: I painted the small vials on the sword arm so they looked like liquid was sloshing around inside them – something I borrowed from JeffTibbetts yet again! It really make sense though that those vials would contain some liquid lubricating the chain of the big sword or something like that:

Not GD level painting, certainly, but I am stupidly happy about having managed to pull this off. I may lack Jeff’s patience, attention to detail and dedication, but some of his ideas were fortunately easy enough to adapt to my own, rather slapdash painting style ;)
And before I wind up this post, let me show you the latest addition to the model: The Knight’s mostly completed pilot, Baron Harrowthorne:


So, like I said, it’s been a bit of a rollercoaster: At first, I was convinced that I had ruined the model and was just about ready to just throw it away. But looking at it now, I think I may just have managed to turn this ship around. The problems created by the fuzzy undercoat are not nearly as noticeable now, and I am actually legitimately excited to continue painting this model! It may take longer than I had originally planned, but I think I’m getting there.
If you have any feedback and suggestions, I’d be happy to hear them. As for the eventual fate of my Chaos Knight, I’ll keep you posted ;)
As always, thanks for looking and stay tuned for more!
EDIT: Jeff Tibbetts has thankfully reminded me that everything to do with his spectacular Knight project can also be found on his blog, which I would recommend you subscribe to ASAP. Thanks for reminding me, mate!
Filed under: 40k, Chaos, Conversions, paintjob, WIP, World Eaters Tagged: 40k, baron harrowthorne, chaos, chaos knight, chaos space marines, conversion, counts as, daemon knight, gilgamesh, imperial knight, khorne, khorne's eternal hunt, kitbash, knight titan, mishap, painting, paintjob, WIP, world eaters


