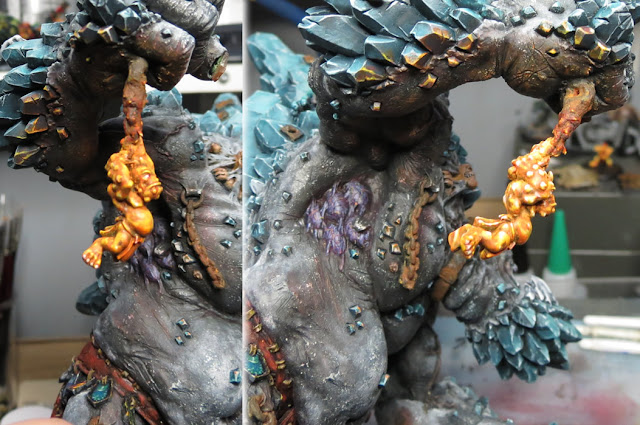
Last week I covered how I painted and gel'd the special effects for the whelps on my Elemental King project. The thing about some special effects, like fire, is that they can cast light which has to be taken in to consideration. Today I'll demonstrate how I achieved that on the Mountain King. I've also covered Object Source Lighting previously.
The tricky thing about OSL is always that there's no going back. Here you have a nicely painted object and then suddenly it's time to paint over it all and dramatically change how it looks. It's intimidating. But also rewarding.
So, read on to learn how I use just a few paints to turn the fire elemental whelp on a chain into a sort of lantern for the King.
Start Natural
The first thing to notice is that I've painted the areas I was OSLing the exact same way as the rest of the body. This creates a more natural undertone for the lighting to paint over. If you want the lighting to be extra strong, or you're lighting a dark surface, start with white paint.
Using Colours and Lighting
Essentially, I began with darker reds and oranges to create the outlying lights and moved to orange and subtle yellows for spot lighting. Keep in mind that fire dances about, so your highlighting doesn't have to be uniform. Allow some "flickering" in your brighter highlights. Something like a spotlight or the hue of an alien sun would both create different light effects.
The other thing with lighting is the surface the light is shining on causes complications. Smooth armour and weapons is easy, but a large arm with flexing tendons and bulging muscles creates a lot of trickery.
Pigments (Weathering Powder)
I haven't written about them yet, but I got some of Massive Voodoo's neon pigments. I used a little of them to rub into some of the highlight steps, which you can see in the top-right of the pictures below. I've had great success with them in specific situations, but didn't find them making a big difference here.
Reflective Surfaces and Lighting Brightness
Read these two statements:
- Any objects that reflect light, such as the crystals, will be brighter than duller ones like skin.
- Brighter lighting covers a smaller area and duller lighting diffuses over a larger one.
You can see how that appears below. The lighting on the skin is there but greyish, however it covers a wide area. The crystals have bright highlighting into the yellow and orange, but cover a small area.
Distance
As the light source gets further away from the object it's lighting, all you end up with is a darker hint of the stronger highlight. Pictured below, you'll see softer red in the shadow beneath his raised arm and a little onto the leg below.
Highlighted - Final Photos
Below is a close up of the completed arm. You can really see here how painting the surface first, then layering a highlight above lets the look of the skin really seem to be highlighted.
And a close up of the side of his body.
Don't think I forgot about lighting for the smaller molten whelp. Again, notice how layering the lighting over the normal skin really lets the skin texture show through.
Here are the final shots of the lighting with a proper back drop once everything's completed and varnished.
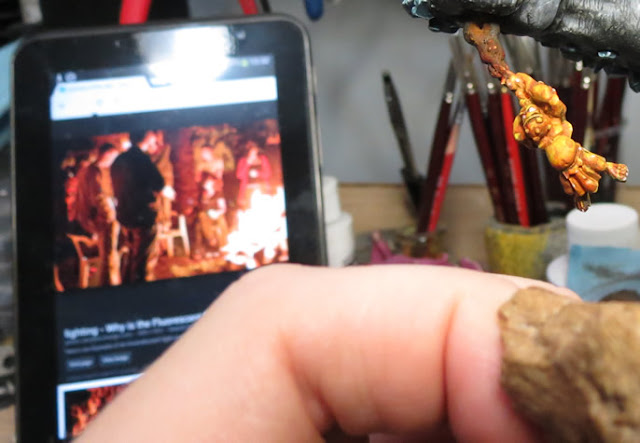
Use Reference Photos
As always, I often use reference photos from Internet as a guide when attempting to simulate real and / or new techniques.
 | Take a look at my entire Hordebloods project. Here you will find each model broken down into links showing each step: Concept, Works in Progress, (for both sculpting and painting) and final photos |


