Last Wednesday I was lucky enough to play Pash (@kingpash) at the ELG club in Edinburgh when I was through for a wee business trip. We had a great game using the latest #SCGT comp pack. I had a crisis of conscience on the run up to the game, I had played Mike (@stuntymike) a few night previous to test my SCGT list out, I found it to be dreadfully boring to play with and against so radical change was required! The original list can be found here:
So I decided to try something a bit left field with a Maneater Star (#ManGutStar) rather than the customary Ironguts, a gorger and a stonehorn. The List was an absolute blast to use and I would thoroughly recommend trying something similar! Here is what I ran:
Slaughtermaster
LVL 4 (Maw)
Armour of Destiny
Ruby Ring
Dispel Scroll
Great Weapon
Bruiser
Great Weapon
Heavy Armour
Talisman of Preservation
Iron Curse Icon
BSB
Look out Gnoblar
8 Ironguts
Musican
8 Ironguts
Musican
7 Maneaters
Stubborn, Immune to Psych
Command, LoG
Standard of Discipline
4 Great Weapons
4 Mournfang
musician
Stonehorn
Sabretusk
Gorger
I think after a chat with Jon Pugh (@pughjon) I think I went a bit over board with the great weapons on the Maneaters, 2 on the musician and standard bearer (since they cant die until last) is probably a better shout and an extra hand weapon on the champion to give him 6 attacks seems pretty awesome, more than a Tyrant!! Much less points too, although I would still be tempted to put a great weapon the champion to put out 5 strength 7 attacks!
The Gorger and the stonehorn didn't really preform to their maximum but I think that was due to some poor judgement on my part and some bad rolling too! I think I'm definitely going to keep them in my lists just for the fun they bring!
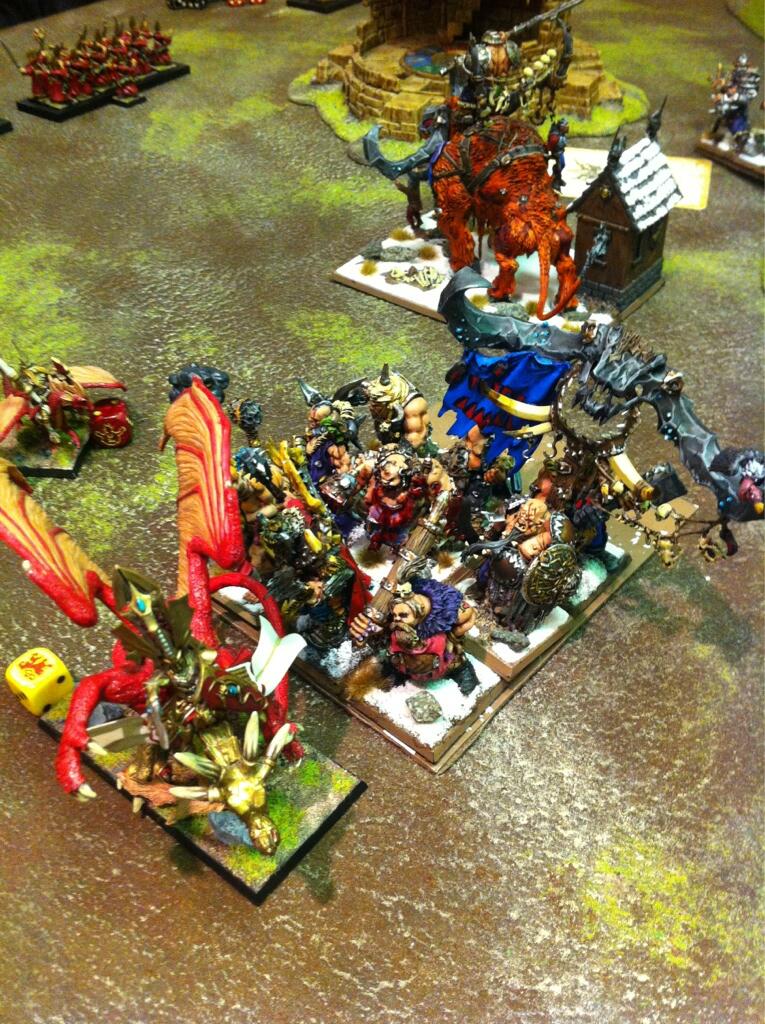
So Pash was using High Elves which I haven't played with or against since 6th edition (may have even been 5th!) so I was quite excited to see how they play vs Ogres. Dorian (@vigadeath) has as you know just started painting a beautiful High Elf army so I was keen to learn their ins and outs. Pash was playing with a really lovely army with a dragon theme (his eagles were all mini dragons) led by a stonking big Star Dragon riding Prince. I was scared senseless of the big gribbly since I didn't have an ironblaster or beasts magic to deal with him. The model was really nice too, it wasn't a GW one but fitted perfectly in the army. I think Trevor Moffat (@trevs_twit) painted the army and he had done an amazing job on the army especially the reds and golds!
Here is Pash's List:
Prince
Enchanted Shield; Vambraces of Defence; Warrior Bane; Star Dragon; dragon armour.
Noble
Helm of Fortune; Guardian Phoenix; Great Eagle; great weapon; dragon armour; Battle Standard.
Mage
Silver Wand; Ring of Fury; Level 2 Wizard; High Magic.
Mage
Ruby Ring of Ruin; Level 2 Wizard; Lore of Light.
12 Archers
Musician.
12 Archers
Musician.
12 Archers
Musician.
14 Archers
Hawkeye; Musician; Standard Bearer; Banner of Eternal Flame.
17 White Lions of Chrace
Guardian; Musician; Standard Bearer; Banner of Sorcery.
7 Sword Masters of Hoeth
Bladelord; Musician.
7 Sword Masters of Hoeth
Bladelord; Musician.
Great Eagle
Deployment
I set up fairly centrally with a sabre tusk out on my right flank. The Maneater Star set up behind the mounrfang who were right on the 12" line. One Irongut unit deployed to left of the mournfang, the Stonehorn set up to the right of the Mournfang and the final irongut unit was positioned off to the right of the stonehorn. This final unit of Ironguts was deployed to swing around the large tower centred in the battlefield. All of these units, except for the Sabretusk, were deployed within 12" of the General, BSB and all the Maw Spells. The Gorger was naturally deployed as an ambusher.
Pash massively out deployed me with far more drops. He dropped his archers across the centre of the board with one unit off to my left. The two mages went into the two central archer units opposite my stonehorn and mournfang. The swordmaster units were each deployed on opposing flanks, one unit deployed to swing aroud the tower. The Whitelions were deployed just off centre on my left. His great eagle was placed on my far right to counter the sabretusk. Finally his Star Dragon and BSB were deployed directly opposite my Mournfang and Maneaters.
Spells:
Ogres: Bone Crusher, Spinemarrow, Trollguts, Tooth Cracker, Ruby Ring of Ruin
(Ogre Lore Review here: http://paint-hammer.blogspot.co.uk/2013/01/magic-lore-review-lore-of-great-maw.html )
High Elves:
Light: Banishment, Burning Gaze, Fireball (Ruby Ring)
High: Shield of Saphery, Flames of The Phoenix, Curse of Arrow attraction, Fury of Khaine (Bound)
Turn 1 - Ogres
I won the roll off to deploy first and surged forwards 12" with the mournfang, maneaters and ironguts. The stonehorn did not march so that it could fire its harpoon launcher in the shooting phase. The sabre tusk darted forwards but I place it badly allowing Pash to get a flank charge with his eagle. In retrospect I should use my tusks more sparingly and worry less about the panic tests they cause when within my 12" bubble.
I got a decent 7 power dice in the magic phase, first off casting bonecrusher on the eagle BSB, which Pash let go. Though he was toughness 4 (damn eagle monstrous cav!) I still managed to cause a wound leaving him on 2 wounds. I then tried to cast a few other spells but were all dispelled, including the ruby ring.
In the shooting phase I fired my harpoon launcher at the Eagle BSB, hitting and wounding! He failed his re rollable armour save but passed his 5+ ward, drat!
Turn 1 - High Elves
Pash declared a swathe of charges, his whitelions hit my ironguts, his eagle hit the flank of my sabretusk and the dragon and eagle BSB charged the mournfang. Both Sword master units moved up their respective flanks and the archers all shuffled about to get better shots.
In the magic phase he reveals his multitudinous magic missiles and kills off a few ogres from the right hand irongut unit leaving me with 6 in the unit. I then dispell any other buffs.
The eagle breaks and runs down the sabretusk, the white lions and ironguts smack 7 bells out of each other and remain locked in combat, I think we caused 11 each! The headline fight in the centre goes predictably badly for me and the mournfang lose 3 of their number, break and are run down by the dragon. They did manage to crucially wound the star dragon once! The BSB elects to hold and is out of the charge arc of my Stonehorn. The Stardragon was not so lucky and its overrun leaves its flank wide open to a charge from the Maneater Star.... This was really unlucky as just 1 more inch would have saved the dragon!
Turn 2 - Ogres
Naturally (being the orge that I am) I declare all the charges I can; the maneaters hit the flank of the star dragon and the stonehorn thunders towards the archers, they fail their terror test and just remain on the board by 1". The stonehorn attempts to redirect but cannot reach the other unit and instead ambles forward 5". The 6 man irongut unit preforms a sneaky manoeuvre and swift reform to double back round the tower. I was less committed than pash so would waste fewer turns getting back into the fray. With Ogres higher movement they can pull things like this quite well! The gorger also turned up and presented a head ache! With the amount of shooting and magic missiles there was no safe place for the starved ogre monster. I opted for dropping him on the left flank behind a unit of archers in the hope it could grind them down.
In the magic phase I only get off +1 toughness on the Maneaters, the rest is dispelled.
Combat sees the whitelions and ironguts knocking seven bells out of each other leaving 8 white lions and 3 ironguts. The Prince challenges me but I decline and send my bsb to the rear rank. The price and dragon then cause two wounds on the slaughtermaster and kill a maneater aswell. In return the monstrous number of strength 7 hits kills the star dragon outright, the prince breaks and is run down. Really unfortunate for Pash as his star dragon shouldn't have been in that position due to a poor overrun and a maneater unit with great weapons really is a very hard counter to a star dragon!
Turn 2 - High Elves
So after the loss of his general and hardest hitting unit he has to make some manoeuvres to rectify the situation. The sword masters on my left charge the flank of the irongut/white Lion combat sealing the ogre's fate. The eagle suicidally chargers the rear of the right irongut gut in the hope of holding it up. The other swordmaster unit reforms to go back around the tower. The nearest archer unit attempts to swift reform to face the approaching gorger but fails! The Eagle BSB flies back to the safety of his own line and the rest of the archer units jostle for a better shot.
In the magic phase pash gets of a few missiles, notably causing a wound on the stonehorn but everything else is dispelled.
In the shooting phase not a lot happens as are either at long range or wounding on 6s. The white lions and swordmasters wipe out the ironguts to a man, overrunning and reforming to harry my maneater's flank. The eagle is predictably cut into pieces by the irongut unit which reforms to move into a better position.
Turn 3 - Ogres
The Gorger charges the archer unit on the flank but is ridiculously unlucky and dies to a stand and shoot reaction, pash rolled six 6s to wound!!! The stonehorn, hoping to better its enraged little cousin, barrels into the archer unit with attached mage which passes its terror test.
I managed to cast +1 toughness on the maneaters and regen on the surviving ironguts, thus regaining the lost wounds on the slaughtermaster. I really noticed how much this makes slaughtermasters on Maw exceptionally hard to kill!
No shooting to speak of so in the combat phase the stonehorn kills 6 archers on the charge, another with the rider and then only 1 with the thunderstomp, crucially meaning the unit was still steadfast. Naturally they held and even managed to cause a wound on the massive beast. This meant that the swordmasters could charge the monster's flank next turn... Had I just rolled 1 higher on my thunderstomp roll then the game may have gone differently!
Turn 3 - High Elves
The stonehorn is charged by the swordmasters in the flank. The eagle BSB flies over to provide leadership to the main battle line. Some more reforms of Archers and the white lions and other swordmaster unit jostle around. Pash places the spare swordmaster unit to misdirect my maneaters and ironguts.
Pash doesn't get off too much this turn except a single magic missile on the ironguts as I use my dispel scroll.
The Stonehorn is unfortunately cut down before it can strike, ending its mini rampage, the swordmasters and archers reform to face the on coming ironguts and maneaters. This was a turning point in the game!
Turn 4 - Ogres
In my turn the Ironguts and maneaters both charge the misdirecting swordmasters. I get off a few buffs to protect me from shooting. I really find casting a lot of spells at their basic value is the best way to play ogre magic phases 9 times out of 10. You reduce your chance for miscasts and force your opponent to split their dice and lessen the impact of a dispel scroll on a magic phase. Also a lot of the time you don't need the bubble buffs going off and it is more efficient to cast on a single target. More spells mean more wounds gained back through the lore attribute too!
Obviously the 7 sword masters are crushed into pulp and die to impacts alone, I reform to make the final march towards the high elf lines
Turn 4 - High Elves
A wee bit more archer and white lion jostling occurs and pash kills another irongut and a maneater to shooting and magic.
Turn 5 - Ogres
I move up as fast as I can to get to grips with the archer units. I roll a big magic phase, get off a few buffs and crucially kill the BSB with Bonecrusher. This spell really was great for me in this game, rolling high on hits and high on 6s to wound, the no armour saves really is a huge help! The slaughtermaster loses a wound to lore attribute but regains it after another spell.
Turn 5 - High Elves
The final few white lions and swordmaster unit charge the ironguts. Some more shooting and magic results in a few more dead maneaters. The slaughtermaster and BSB absorb alot of the shooting shrugging it off thanks to their high toughness and ward saves.
The whitelions and swordmasters take a heavy toll on the ironguts who in return kill the swordmasters. The combat is a loss to the ogres but they are just steadfast and hold.
Turn 6 - Ogres
The maneater unit charges into one sacrificial archer unit (the mages bailed out last turn), once again I get off a few buffs regen and toughness. Stupidly I didn't put regen on the ironguts which they would have needed to survive the white lions. The white lions wipe out the last few ironguts and reform to face the rear of the maneaters. The maneaters obviously kill the archer unit but roll a poor overrun.
Turn 6 - High Elves
Pash has the last turn and takes the cowardly (but wise) elf way and doesn't charge the maneaters with the white lions, instead opting to bombard the remaining ogres with magic and shooting. When the dust settles only 1 maneater, the slaughtermaster and BSB remain standing! Knowing that there would be no reprisal he also bailed out his mages to sit close to the maneaters, if they had blown up through a miscast then I would have suffered the ill effects instead of his archers! Tricksy elves!
Result - Draw 10-10
Despite having only 3 models remaining I held a huge number of points in those models, meanwhile Pash had two full units of archers, the remnants of the white lions and 2 mages left standing. Having killed his BSB and General I had picked up as many points as I could.
I certainly learned loads in this game and really enjoyed the army list waaaay more than my last one. It may not be the most competitive but all the fun elements make for a great game for you and your opponents, who says that Ogres are dull?! I really think a decent tournament general could take that list with a few tweaks and win consistently, it has less bad match ups and more tactical options. The lack of an ironblaster (or two!) is probably seen as a concession but I'm always disappointed by them. Maybe it is because I face so many cannons but they always die too easily and sometimes don't have decent targets. What will cause people head aches however is the massive amount of S6 and S7 attacks and buckets of wounds in the list. It will crack armour really well and can be buffed up in strength to just wreck 1+ armour units.
All in all I had a great game with Pash and hopefully we can settle our grudging draw in the future! Also I really can't recommend the ELG emough to anyone looking for a thriving gaming club if you live in or around Edinburgh! The guys there really made me feel welcome, many coming up to say hello and have a chat, really a great club! You can find more details here on their website:
.jpg)
.jpg)
.jpg)