
First order of business is to identify parts and dry fit everything... and I mean everything! I can't stress this enough.
Here I've found the stringers for the stairs and set them dry into the sockets.


There is a slot on the back wall that accepts the Catwalk. When in position it settles securely onto the stringers. The fit is tight enough, and the snap effect pronounced enough, that I am positive this is intended to be a one-time operation. This really exemplifies why the dry fit is such an important step.

On the plus side these steps were loads easier to build than the usual system Antenocitis Workshop uses. they also are very broad and it looks like models with modest bases could actually stand securely on them!

I started by dry fitting all the steps to make sure they didn't need any adjustment and to note the way they fit was supposed to work. From there it was gluing the top step and the bottom step into position and then placing the stringers and Catwalk in position before everything had dried.
Once that step had dried I added in the remaining steps and leveled them as I went. The notches are a little shallow so its easy to get something just a bit tilted... you can see through he bay door that the center step droops a bit. This got adjusted after the picture.
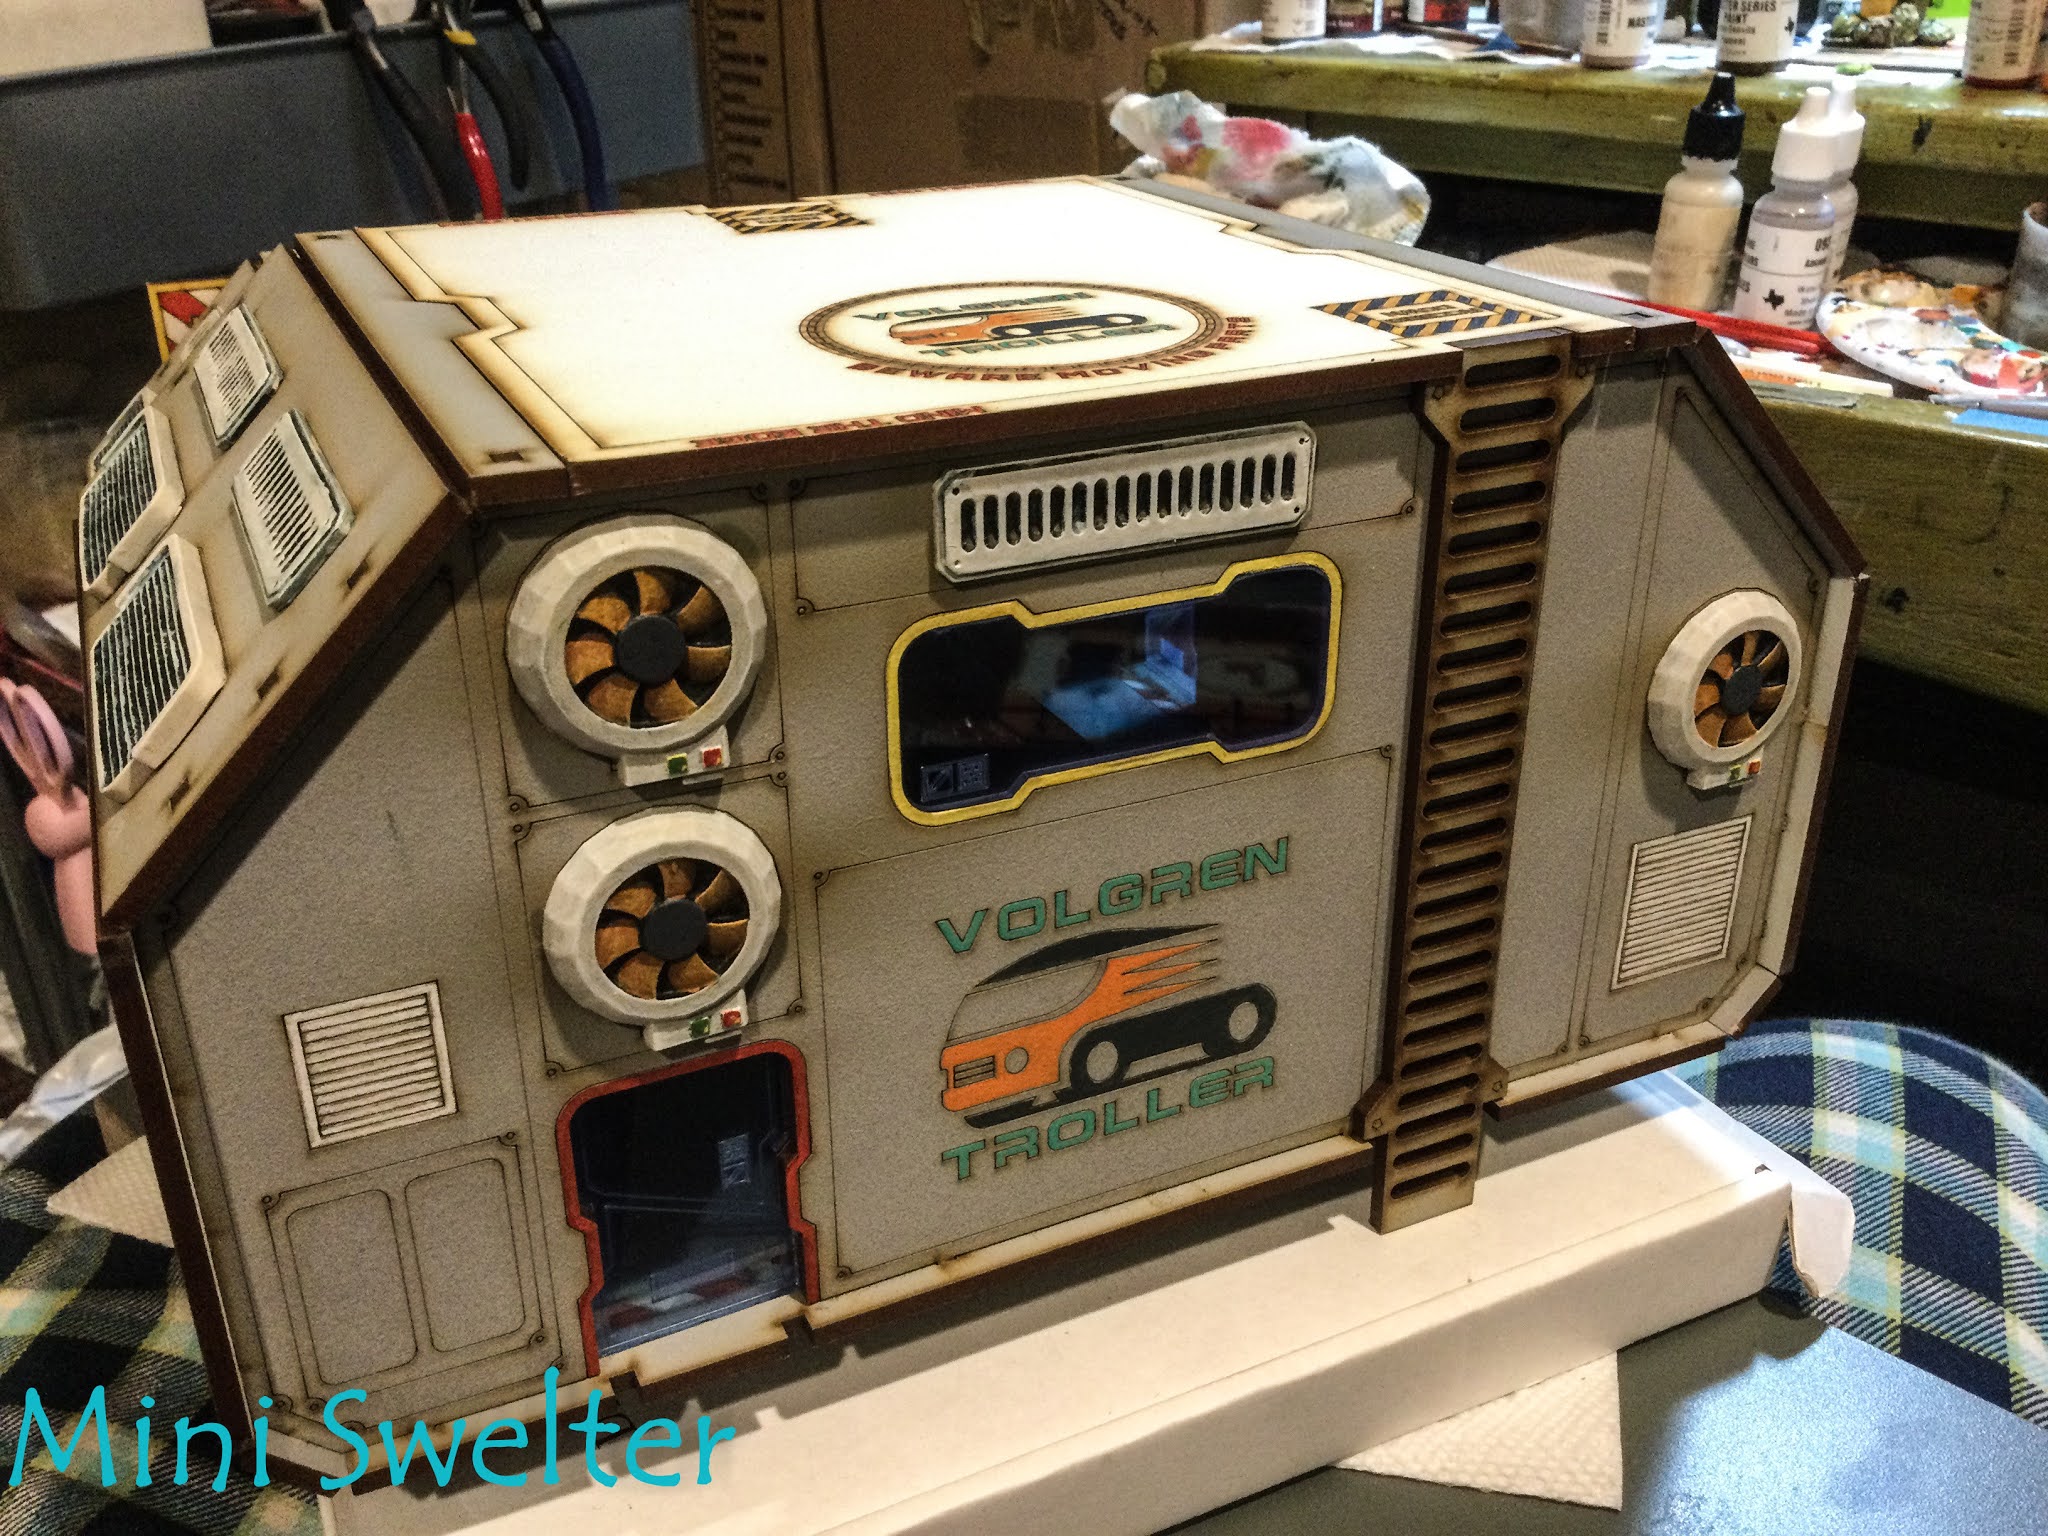
A view of the adjusted steps through the regular door.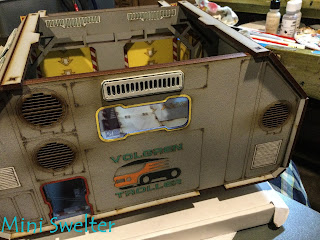 With the interior wrapped up it was time to look at the exterior details. Here you can see that a resin vent has been added. The upgrade kit also included resin replacements for the two lower square white vents but these were not perforated and I ended up liking the way they looked when painted so will save those bits for another project.
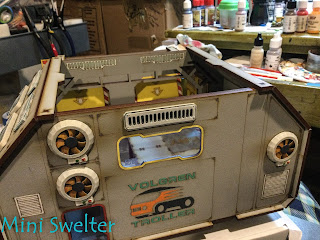 The large resin exhaust fans are in position. The slotted MDF remains as is on the inside and would have looked fine on the outside but the resin caps are very nice and help with the flatness that MDF designs tend to have.

A view of the adjusted steps through the regular door.


At this point I began dry fitting the ladders and made a major discovery!
The ladders extended downward well below the level of the floor...
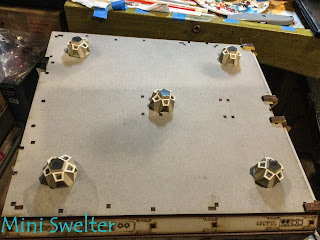 ... which allowed me to finally identify what these bits were! These are part of the Hab X Booster packets. Apparently the boosters are for lifting the Habs off the ground and allow for cool stairs etc...

I got these Boosters for all the Habitats but now have to decide which buildings can take them. Habitat 3 for example is a small living quarters Habitat that can be stacked on top of other Habitat types via an MDF clip arrangement. In that case the Booster doesn't get used.
Fortunately the Larger Habitats like Hab 5 will all take them so there is not decision to make... on with the Boosting! Now that the building is boosted those pesky ladders fit perfectly. Another victory for the dry-fit!
There are three ladders. This long one, a shorter one that is affixed between the Bay Doors, and a very short one that allows access between the shorter roof and the taller section. These ladders interact very much with the removable roof panels so care needs to be taken when fitting and gluing these into position. Pay particular attention to the fit of the shortest ladder as one of the roof panels has to be able to slot in under it and the other panel slots in from the side. Just be sure that the lower roof panel is not obstructed, or accidentally glued in... either condition would be a major fail!
The other two ladders can be seen here under clamps.

The other two ladders can be seen here under clamps.
The bay door ladder has a tight fit between the bay doors and should be used to help position them. I did not do this and ended up having to shave a bit off the back side of one of the lower tabs to get a flush fit.
For next time... non-functional exterior acrylic rod lights, possibly some functional interior (key fob style) lights, and some odds and ends like resin covers for the etched power couplings.
Other than some weathering, all that will remain is to make some decisions about the various doors. Non of them are "working" doors and are either stood into place, held in place by compression, or Glued in place. At the moment I'm leaving these unglued and will revisit them if that doesn't work out in practice. When the range was redesigned one of the big revisions was to replace the non-functional acrylic "Hologram" doors with working MDF/acrylic doors, many of which have a structure that implies a small airlock.