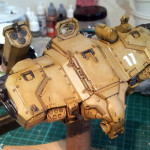
Well last night I finished applying the oils. It took way longer than expected and I’m still getting used to working with the oils (slow drying time = be careful where you put your fingers!). The best thing about the oil paints is how they can be used in very thin, transparent layers to tint the colour underneath.
As mentioned in the last post, I’m using AK Interactive AK-121 OIF & OEF wash for the bulk of the shading/grime and applying thinned black oil paint for vents and metal areas.
In order to add some interest I decided to fade the upper panel surfaces with white oil paint and give that tired desert operation look. I just dotted on a few spots of white oil paint and then used a large brush to spread them out and blend evenly. The white paint has also given those panels a very matte appearance, making the contrast between them and the glossy un-faded panels very start. Once the model is given a coat of flat clear it should all look much more uniform.
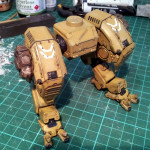
As you can see I started some assembly. I’ll complete the assembly after I’ve done the flat clear coat, so that I can weather it all in a uniform manner. I’ll wait a couple of days before the clear coat – you need to ensure that the oils have cured sufficiently first.
So the processes left are:
- Flat clear coat
- Paint optics
- Grease and oil stains (have to be done after the clear coat so that they’re glossy)
- Dust weathering (pigments, etc.)
I secretly sat the torso on top of the assembled legs and it looks really exciting! Can’t wait to see it come together! I do need to start work on a base for it though – I have a simple dirt and concrete base in mind.
