I really enjoyed painting Crimson Dynamo for the Fury’s Finest painting contest. I didn’t do as well as I hoped but I learned a ton and had fun. So when they announced the next painting contest I immediately started brainstorming.
The theme for S4 of the Painting Contest with No Name is a 2-threat. Any 2-threat character will do. Lucky for me I only had one remaining 2-threat to paint and I happened to get the box for my birthday. And she also is a member of the Weapon X affiliation which I want to build up and eventually play. So this was perfect timing.
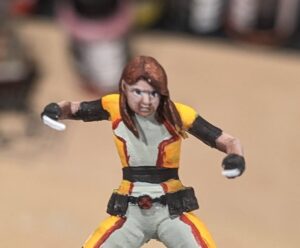
Experienced MCP players probably know who I’m talking about. But if not, she’s one of the funniest characters in the comics, Honey Badger.
Finding Inspiration
The first part of any project is to get a good idea of what you want to do. That meant I had to do hours of labor “researching” the character… 
That’s a lie. I just watched X2 and took a couple pictures of the Weapon X facility. I want to include some floor tile and maybe even a backdrop for Honey Badger.


I absolutely love this surgical tank room. I like how the tank is almost perfectly clear on the sides. There’s only a little circle on the top and bottom of the tank. This gave me an idea that I could experiment with resin. I’ve tried it before with disastrous results. So I’m hoping this one will go better. 
Assembling Honey Badger
For assembly I wanted to start with the tank. That’s the most complicated part of this whole build. Honey Badger herself will be 100% AMG. And due to a failed resin pour almost 2 years ago I’ve always wanted a second crack at it. But I wanted to master the resin pouring first. And build something around the resin after it’s already set and I can’t mess it up. 
Casting Surgical Tank
First things first I want to find the right scale for MCP. So I tried a couple options and realized that a 6×3 lego form will likely fit.

Knowing the approximate right size I can use this 6×3 brick of legos as a negative and create a mold around in.
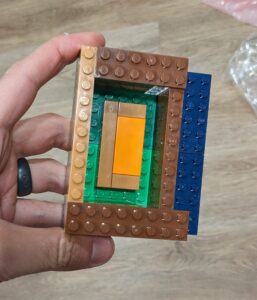
LEGO MOLD PICTURE
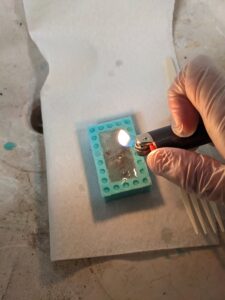
Now that I have the mold it’s time to start pouring resin and seeing if I can actually get a clean resin pour. I’m also going to try to include a plastic miniature to see how it looks captured in the resin. Here’s the first try:
And after this first resin pour boy am I glad I tried to figure out the resin first! Because the resin is pretty disappointing.
After this experience I really wanted to know what I did wrong. I did use the lighter to pop surface bubbles. But the whole resin piece is filled with bubbles. 
At that point I remembered you can surround your resin pour into a hot water bath. The extra heat helps the bubbles move through the resin and escape. I also wanted to try adding a little green wash to the resin. I want that surgical tank look from X-2.


And the results look so much better! There’s a few bubbles but it looks 100 times clearer. And I like the green shape to the water.
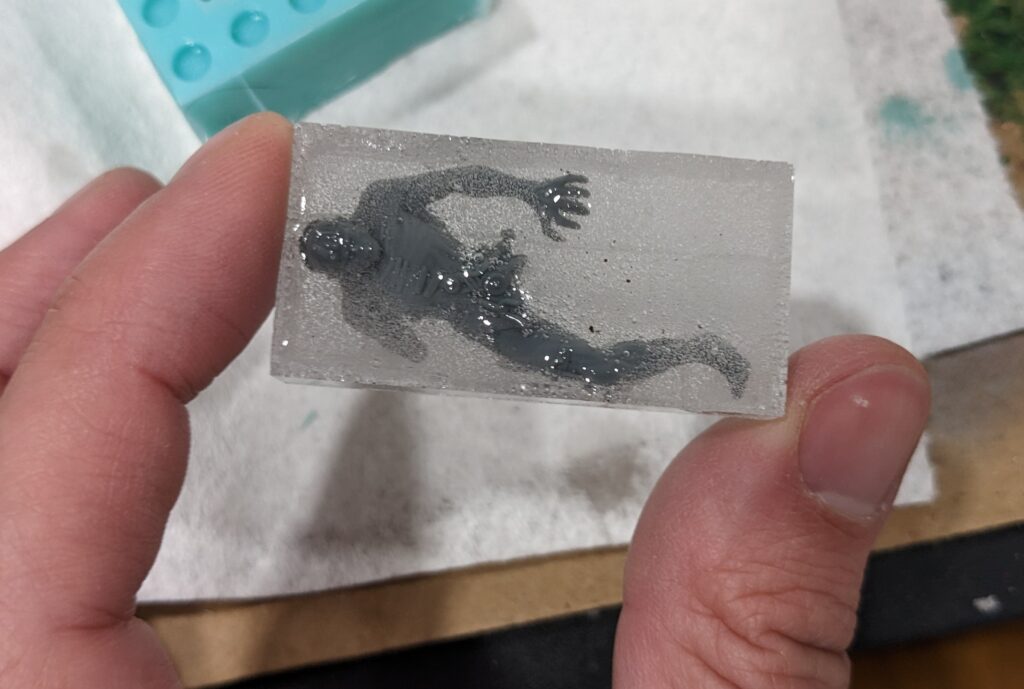
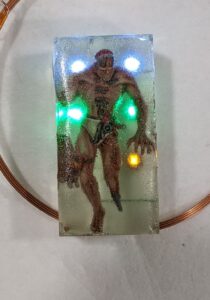
I figure there’s one more test I want to do. I want to paint the figure in the resin and see how that figure looks. So I paint up a test piece quickly and start the 3rd pour. I noticed a problem immediately. The figure float to the top of the resin. So unless I do the resin pour in two stages. Or I attach it to the bottom somehow the figure will float to the top and not look submerged. I also used a little too much green.
Alright. I think I finally have it. Here comes the last try. I paint the figure to a higher quality, mix the resin, and pour.

It isn’t quite the shade of green I wanted. But the figure inside looks great. The resin pour is done. That’s the first big milestone for the project. 
Wireless LEDs
Now I can build the tank around the figure. Awesome. The first step is to figure out how I’m going to light this miniature. So I grab some wireless LEDs and play around with the colors and placement.
I tried a few different colors and in the end went with white LEDs. I used my 3rd resin pour as a test piece from this point forward. I build a base around the test piece and the wireless LEDs. Then I transferred the base to the final resin piece.

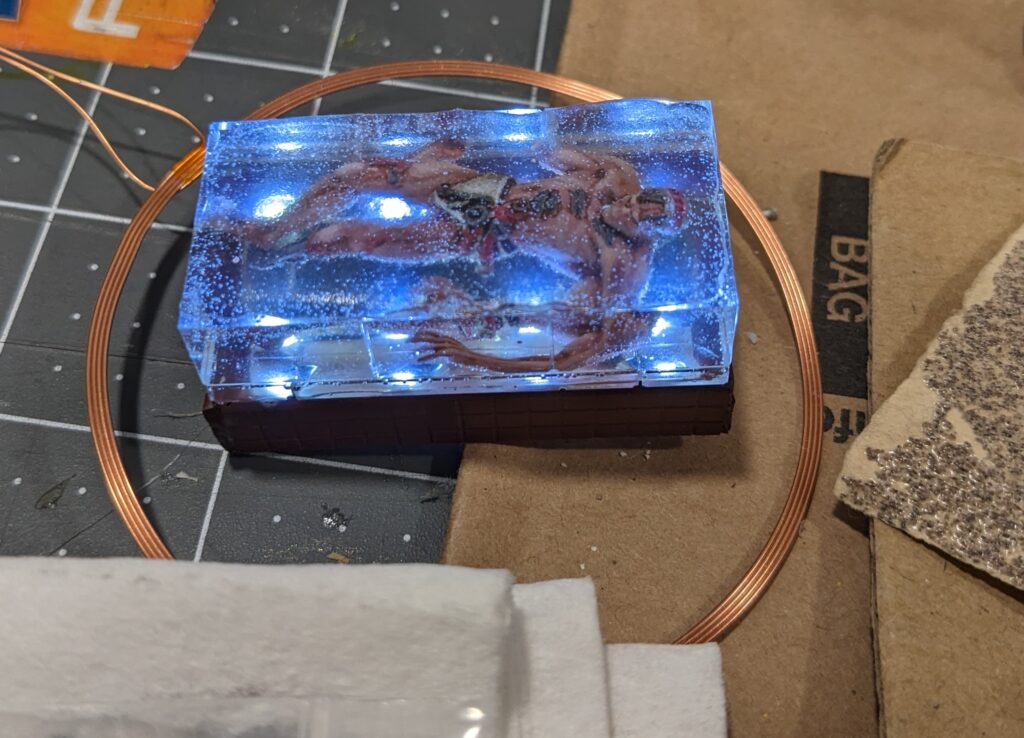
At this point the tank is mounted to the base and has LEDs hidden underneath. That’s pretty cool. But I still have to assemble the frame around the tank.
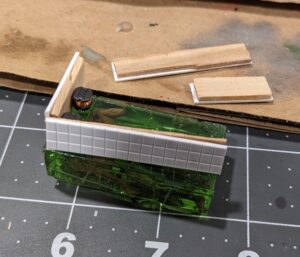
Building the Tank Frame
I had to take several trips to the store to get different sizes of plasticard to show off enough of the surgical tank so it looks realistic and cool but not too much that it hides the detail inside the tank.


In the end I couldn’t find the right plasticard to make the tank I wanted. So I found some mesh sheets meant for embroidery. These are thicker plastic that is solid enough for Honey Badger to stand on and looks like it’s thick metal bars meant to keep the subject inside the surgical tank.
If this was a pure diorama I would have kept the bars off the top of the tank. But because I still want to play with this piece I want to make sure Honey Badger is centered on the tank.
Painting Honey Badger
It may not be clear but this whole process of the 4 resin pours, attaching wireless LEDs, building a base for the tank, and building a frame for the tank took weeks! I like learning how to do this part of the hobby but I’m not necessarily good at it and it takes me forever.
I only had days until I had a work trip lasting all the way through the end of the contest. So I only had days to finish painting. 
Experimenting with Crackle Medium
I picked up some crackle medium at my friendly local game store on Black Friday so I figured it was definitely time to figure out how to use that.


Painting the Face First
With the Crackle Medium drying I really need to take some time to paint the actual model! And I had just watched Ninjon’s YouTube video about painting the face first and figured it was worth a try.
This was my first attempt at a face. Close but not quite what I wanted so I was able to keep filling in basic colors on the suit and then take another stab at the face. I wanted to add the scars to her face and add some eyebrows.
Painting the Rest of HB
Honey Badger is a pretty small and simple model. I really enjoyed the vibrant yellow and grey shadows in the white. As always I find painting black tedious but I did an okay job with this miniature.
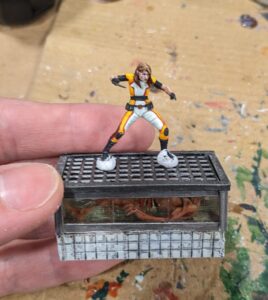
Final Photos
My friend Mark helped me take photos.  (Thank you Mark!)
After all of this work here’s the final result.


Final Thoughts: Painting Honey Badger
I love that I was able to take a very simple 2-threat character and add a very special base to her. And if I ever decide to make a Weapon-X affiliation we’re starting off strong! I have no idea how to follow Honey Badger though. But that’s a problem for another day.
I did make some mistakes in this contest. The biggest was managing my time. And this is hard to explain so I made a timeline to explain this visually.
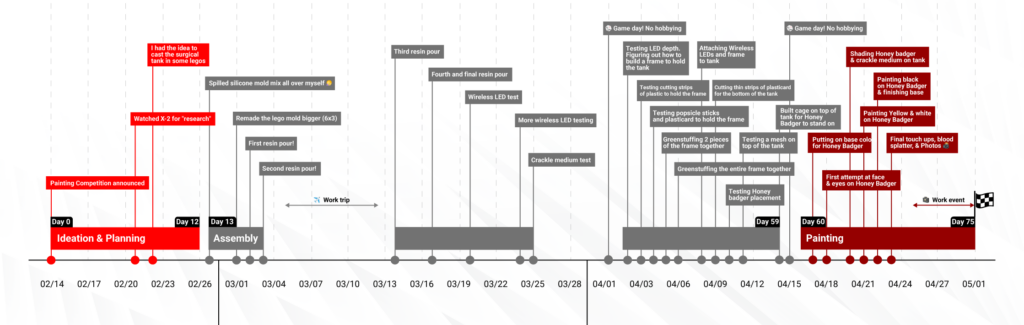
I had some work trips which used at least 2 weeks of time and a few game days where I didn’t hobby. Excluding a work-trip I spend 2+ weeks just assembling this model. And that’s a lot of time because I only had a week to paint the model. I’m happy with the paint job but I know I could have done better with another week of time.
One other mistake I made was confusing crackle medium with chipping medium. I kept looking up tutorials on chipping medium but I actually own crackle medium. 
Next time, by following the proper instructions I’ll be able to do a much better job. 
Thank you Fury’s Finest for running the painting contest. I’m proud of the model and looking forward to the next one. 
Thank you to Polda who gave me some hobby advice on this miniature. 
The post Painting Honey Badger for the Fury’s Finest Painting Contest appeared first on Patricks 40k Hobby.