It’s been quite a while since I last posted about building terrain, but since the weather has picked up considerably in the meantime, it is now time once more to go outside, hit the tool shed or garage and build some wargaming terrain!
The funny thing is that I am pretty spoiled when it comes to terrain nowadays: There’s some exquisite terrain over at the FLGS, and stuff like Neil101′s stellar Arrke board, most of the stuff used during this years Inqvitational or Chelnov’s unbelievable Sisyphus Complex have taught me that my own meagre efforts at building terrain are already outdated by a pretty huge margin. I am also pretty convinced that I could do better nowadays, but some of my early recipes should still have some merit, especially to those of you who have been putting off building their own terrain for one reason or another.
I already discussed quite a while ago how easy it is to make some reasonably convincing ruined buildings out of foamcore. Buildings like those will also allow you to fill up quite a huge gaming table. But you probably don’t want your entire terrain collection to consist of simple, bombed out hab blocks, do you? Well, here’s the good news: Building bigger and more sophisticated structures can be almost as easy. This two-part post will take a closer look at that!
Everything started with my desire to build a larger building that was to serve as some kind of centrepiece on the table: I wanted something decidedly bigger than one of my ruined hab blocks, but maybe not quite as gigantic as a cathedral. So I decided to try my hand at a temple-like building housing a monument to some glorious achievement or other of the Imperium of Man.
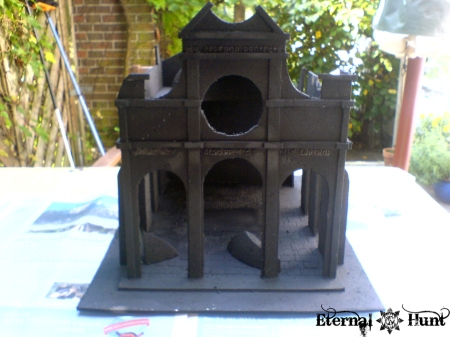
The great thing about this project was that the building’s basic construction was still very much a rectangular box with four walls meeting at a 90 degrees angle. Still, the building ended up looking pretty imposing nonetheless. Take a look:

The most impressive part of the building is its façade, but this part was actually pretty easy to get right: I just drew a suitably impressive design on a piece of 3mm strong foamcore, then cut out all the arches and recesses with an exacto knife. Pieces of the same thin foamcore were then used to add projections to the wall and give it some depth. And I also added an inscription using alphabet noodles.
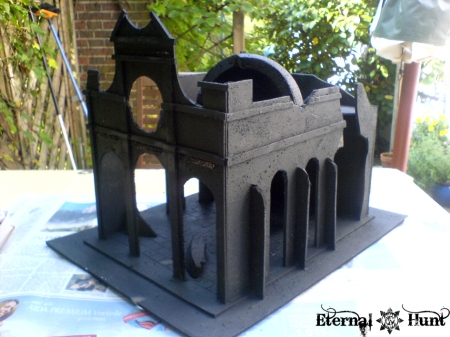
Here’s a view that shows the rest of the building:

The side walls are a very easy construction, with just a number of archways cut out of the foamcore I used. And a thicker kind of foamcore was used as a base for the whole building. The whole construction was very easy to put together, using PVA glue.
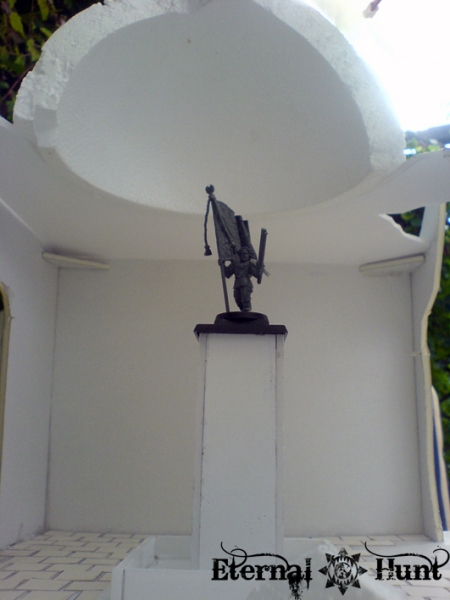
The dome you can see on the roof of the building was a readymade styrofoam shape I bought for a song at the DIY superstore. I placed it to be exactly above the monument inside the temple, a mockup of which you can see here:

In order to make the building look suitably damaged from artillery fire and the ravages of war, I cut sections out of the side walls and dome. Pieces of the dome were then glued onto the floor of the building, to make it look like they had fallen when the dome was partly destroyed.
The most fiddly part of the basic construction was the floor: I cut a lot of identical square shapes from the cardboard of a cereal box and used them as stone tiles to make up the temple’s floor. Glueing them down took a while:

As you can see, I drew some lines around the damaged wall sections to mark the areas where the floor had been damaged as well. On these areas, I didn’t use any of the floor tiles or at least made sure they looked damaged enough.

I also made sure the roof would be removable, in order to facilitate access to the building’s interior. This was achieved by adding a very simple foamcore construction underneath the roof that was stable enough to carry the roof when it was placed on top.
Here’s the interior with the floor tiles in place. The empty area in the middle marks the spot where the removable monument is supposed to go:
You can also see a part of the construction holding the roof in place at the bottom of the picture.
And here’s the same space with the monument’s basic construction in place:

So the next step was to get the whole building undercoated — definitely the hardest part of the whole exercise! I prepared a suitable undercoat by mixing black and white acrylic paint, some PVA glue and some fine bird sand (to add some texture to the paint and make the building look less like it’s made of foamcore). This kind of paint is really easy to mix and very cheap too. It also works as a sealant, making sure the foamcore’s foam interior doesn’t melt away, once you start using spray paint at a later point.
I won’t lie to you: Getting a building this size undercoated takes some doing (and a pretty large brush). And, please, don’t go using your expensive Citadel brushes for this, you hear!
Here’s the building, partly undercoated:

Oh, and another important thing: Make sure to mix enough paint, because there’s nothing worse than having to make some more just for the last corner of the model — I am speaking from experience here… ![]()
Anyway, this is what the building looked like after undercoating:


As you can see, I didn’t paint the areas with the inscription or the empty spot for the monument. This was due to a number of reasons, actually:
I was afraid to damage the inscription with the brush, for one, plus you don’t want any grains of bird sand on those letters: They will have to look like metal later on, so any residue from the texture paint would destroy the illusion. The empty space was left unpainted because the monument should be easy to place, and that wouldn’t work with the floor all roughened up and uneven from the texture paint.
So the final step was to use black spray paint to touch up the unpainted areas as well as any places where the white foamcore was still showing through. This only took a couple of minutes. Afterwards, the whole building was nice and black:


And with that, the basic construction was completed. In the next installment, we’ll look at the additional details, the construction of the monument itself and the rest of the paintjob.
Until then, as always, thanks for looking and stay tuned for more!
Filed under: 40k, DIY, Terrain Tagged: 40k, building, DIY, foamcore, Imperial monument, painting, quick and easy, terrain, tutorial, wargaming on a budget

