Day 1:
I have to admit, I had a ball painting last night! This is a combined update as I had completed a couple of steps last week. My two test subjects are an old Rhino I hastily put together a couple of years ago to test a horrible batch of VGC Dark Green, and a Predator chassis I broke the sponsons off and couldn't be bothered repairing.
1) Undercoat in Vallejo Black Primer (Iwata 0.35mm) @ 20 psi
2) VMA German Grey @ 20 psi, no thinner. I applied this coat all over both tanks, leaving the bottoms pure black (though there was a little more overspray than I would have liked).
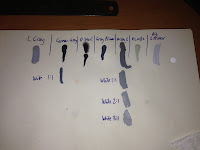
Now I got to this point, I wasn't sure if I should skip straight to edge pre-highlighting, or paint another transition coat first. Looking at my range of VMA greys (pretty much the whole range offered), I painted some test patches - I was looking for a grey that was close to the Polyurethane Grey Primer used for top-down highlights in BuyPainted's videos, since the actual primer is way too grainy to use. Here's a pic of the test patches:
As you can see, even VMA Light Grey is a fair bit darker. Oh well, I figured since I have two tanks, I'll try both methods.
2A) VMA Medium Sea Grey @ 20psi, no thinner. This was painted at the top of the sides and top panels as the final transition coat, but only on one of two tanks. Sorry about the slightly blurry pic.
3) Edge-highlighting: VMA Light Grey @ 20psi, no thinner. I used a piece of art paper as a hand-held mask and sprayed the edges of all panels on both tanks. Again, sorry about the blurry pic, though you can actually see the difference in transition coats better in this pic than the last.
4) VMA Black @ 15psi, no thinner. This pass, I carefully sprayed the panel lines and dark edges. A bit messy, but that's ok as the colour coat and wash will tone the variations down later anyway.
4) VMA Olive Green @ 20psi, no thinner. The colour coat.
Side shots:
Side shots:
Three-quarter shots:
Next Steps:
Ok, next up I need to decide if I'm spraying a 2nd coat of green (I think I will), then varnish, wash, highlight (if needed), varnish, weather, varnish.
Closing Thoughts:
First off, I have to admit that the dramatic reveal at the end when you spray colour over a greyscale tank is thoroughly enjoyable! I was very happy with how much I've improved by airbrush control, and after a couple of minor stuff ups where I was way too close to the model, I found I could accurately paint a black dot over a rivet from six inches away with almost perfect accuracy.
Secondly, I can't see much difference at all in the tone between the tank with 3 transition layers vs. the tank with 2; perhaps you can? I'll probably skip this step just for the sake of time saving moving forward.
Finally, I think I sprayed too thick - as you can see, the edges of the tanks ended up quite a white-green. Whilst this doesn't look terrible (a LOT of painters edge highlight), I just don't much like the tron look that so many vehicles end up with. The question really is; if I spray a second coat, will it diminish the pre-shading to a point where it's invisible? If I don't, will the washing and weathering process tone it down sufficiently to tie it all back together?
I'll have to sleep on it :) Overall, though, I felt the experiment has been hugely successful so far. Just for shits and giggles, I'm also planning on painting a Dark Angels logo on the top of the Rhino. It's been done to death, and I'm not convinced I'd use that particular logo for my real army, but it'll give me an opportunity to practice complex masking. I might even try the hair-spray + sea-salt technique on that or another white logo as well.
Until next time, happy hobbying :)
