Continuing on with yesterday's article.. we follow along with the rest of the face. Eyes, mouth, and then the leather bracelet.
So the eyes were the next real section to tackle here though. Thankfully when we began to work on it, Raffa was just sitting down to do a quick tutorial on it with the rest of the class. I was lucky enough to catch parts of it and some shots of him giving examples to the class.
Using his own eye as an example and trying to get people to understand how much white is required around the eyes for different type of moods. This one above being more of a passive, or asleep mood.. and the one at the one below being more for an active and startled look.
That or a lusting look while staring over at Roman.. it was in German this explanation so take which ever reason you wish.. both could be true :)
For mine though, since we had more space to play with, we again tried a few different things with it. First though was to get a proper reference shot.. so I adopted a move from the pop starlets of America and took a selfsie? Selfie? A shot of myself with my camera..
Apparently I was doing it wrong as Raffa photobombed me in my own Selfie.. selfsie.. whatever it is called..
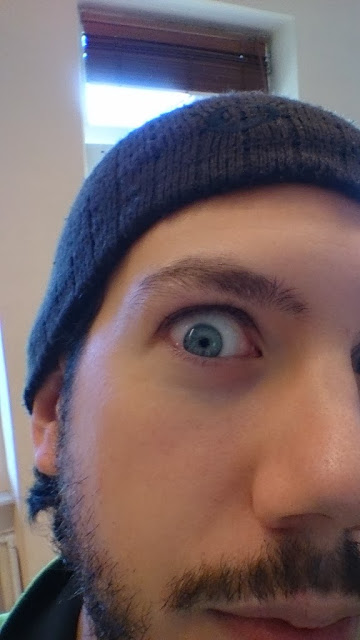
Creepy man in woods clothing shot of Raffa.. focus was on the eye.. but I had nightmares that night due to this photo..
Anyways.. it was from here that we looked at how to make the eyes really come together.. and I had Raffa's eye on my cell phone on the desk as reference throughout the process.
Creepy? Yes. Helpful? Definitely!
I used it to get a better understand of the light and shadows on the eye. And to also work some redness into the corners ( we were all running on minimum sleep at this point so red, tired eyes were everywhere! Where is the ClearEyes guy, Ben Stein, when you need him eh? ). So I could make some really creepy, angry, psycho eyes for this Dwarf Slayer bust.
Lots of attention was put to the curvature of the iris, and how actually it is not outwards bending so much as inwards? Crazy theory stuff followed here that not all has sunk in.
You can see the pre-work in this photo above. Where I tried to get the circles as circular as possible. Adding more and more red to the edges, etc as needed to get them to look as real as I could.
They were then glossed over a few times to give them the glassy look. Personally I think they are creepy as all hell.. it is why this photos is now my cell background photo.. scares those that open it when I am not looking :)
Area also tackled here was the mouth. Where the tongue was much easier than I thought it would be, but again just a base, a quick highlight, and then lots of gloss varnishes afterwards!
And this is as far as I was able to get before I was literally exhausted from painting this beast of a bust. Exhausted from the learning through those boys at Massive Voodoo, Exhausted from painting so much over an 11 day period to such a high level, Exhausted from actually just holding this bust for long periods of time when needed.
What is next though? Well first and obvious, finish this beast of a bust. Why? Easy answer there also.. UDock, the company that created and produces this bust, has offered me an interesting deal! They like the paint job so much so far, that they have asked me to paint some of their other works! So I will receive more UDock busts and items in the future. So expect there to be a lot more of these projects coming in the future, and hopefully we see another level of evolution of my painting skills with each of the busts. But one thing is for sure with this.. I have been bitten by the bug to paint bigger and more details pieces! Almost crazed about it now! So let's see if this begins to be the turning point for Mr Lee here in what kind of pieces I paint up, and learn from!
In the meantime.. enjoy.. more posts from the workshop to come.. but in different aspects.. hope you all enjoy!

