Last time on Derp It Yerself, I covered the first part in basic custom base mold-making which was to design something on top of a base using green stuff (or equivalent). As per the last part, this attempt at a guide can be extrapolated beyond base-making (although if you make it past second base with this article, kudos to you) and applied to other areas where a custom job is needed e.g. making a single-piece mold for a custom space marine shoulder pad.
Continuing on from last time, in this stage of mold-making (with this particular medium) you will need to work fast.
Step de One:
Get your putty/silicone. As you can see, I used Pinkysil 2 part kneadable (not liquid) silicone
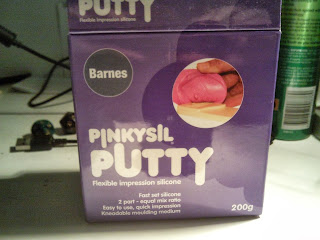 |
| It's pink! In a purple box! And it's putty! 200g! |
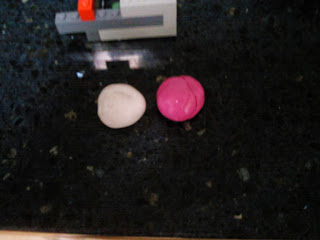
Once you've removed them from the box, use a small knife (or scoop) and measure out two portions of Part A and Part B, ensuring you clean the knife/implement between scraping out the different parts. Roll each part into a ball and make sure they're both roughly the same size (close enough is good enough, although if you have a set of scales handy, by all means use them! :) )
 |
| I'm a happy little |
It's also worthwhile at this stage to make a rough 'guesstimate' of how much silicone you'll need. Keep in mind that both portions individually may not seem like much, n+n =2n and that you can always make a little bit more silicone to fill in an unexpected gaps around the mold/edges.
Step de...erm...three point one four?
Take a bunch of lego blocks (preferably the 2x4 brick, although any straight block will work- whatever is on-hand) and assemble them into a quadrilateral (excluding rhomboids, trapezoids and parallelograms). This will form the boundary of the mold and make it easier to store. Find a flat surface (say...a kitchen bench-top) and stick a small blob of blue-tac onto the bottom of each base, preventing them from moving during the setting of the mold. Use some more blue-tac, rolled into rods and do the same for the legos to prevent and leakage of silicone underneath them.

It's at this stage, if you're using a liquid silicone, to give the bases a brush with the silicone to ensure all gaps are filled and you don't end up with unexpected air bubbles in the final product. I'm not covering liquid silicone in this guide, as I haven't any nor have I used it- I'm just pointing it out as a contrast to using a non-liquid silicone.
This is the step where speed is necessary: Combine Part A and Part B of the silicone together thoroughly (i.e. No white steaks- it's a uniform light pink) within a minute. That's what it says on the box, anyway.
Quickly press the silicone down into the box, making sure that there's plenty of silicone to cover everything. If you have something flat that can be pressed down into the mold, I suggest you use that to flatten the bottom of the mold out/press the silicone onto the bases. This has to be done within 10, count 'em ten minutes as the mold will set in that time.
 |
| It should look something like this... |
Remember in the first part how I said you should have something to do for ten minutes? Go do that now.
After those ten, arduous, excruciating minutes are up, disassemble the lego border, remove the blue-tac and pop out the bases.
Ta-da! You've now probably done a better job than I did :D
Crack open that congratulatory booze- after enduring this guide you've earned it :P
 |
Now, this guide is for small jobs, i.e. characters. If you want to make many more identical bases, you should probably cast this several times using resin and then make a larger mold encompassing ten or so of each design. When I get some liquid silicone, I'll more than likely do this and thus cover a guide on using liquid silicone (with subsequent compare/contrast the merits of liquid/non-liquid silicone).
That concludes the first attempt at a guide/tutorial so comments and critiques/constructive criticism are more than welcome :)
The Warlock