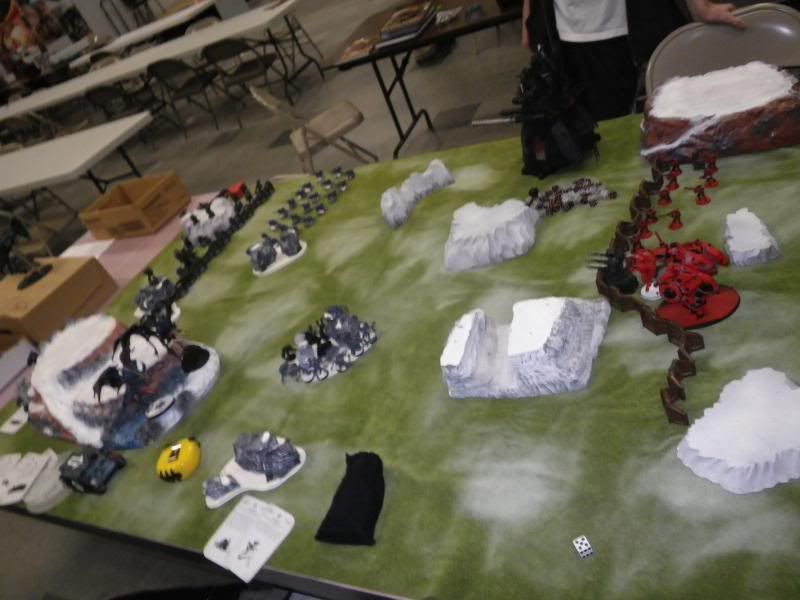
Our last game was the only game to use an Escalation unit. It was Big Guns Never Tire with 4 objectives with Hammer and Anvil deployment, and our opponents were Orks and Tau with Chaos Space Marine allies.
Orks
Big Mek w/ Kustom Force Field, Grot Oilers
10 Grots w/ Ork Minder
10 Grots w/ Ork Minder
5 Lootaz w/ 3 upgraded to Meks
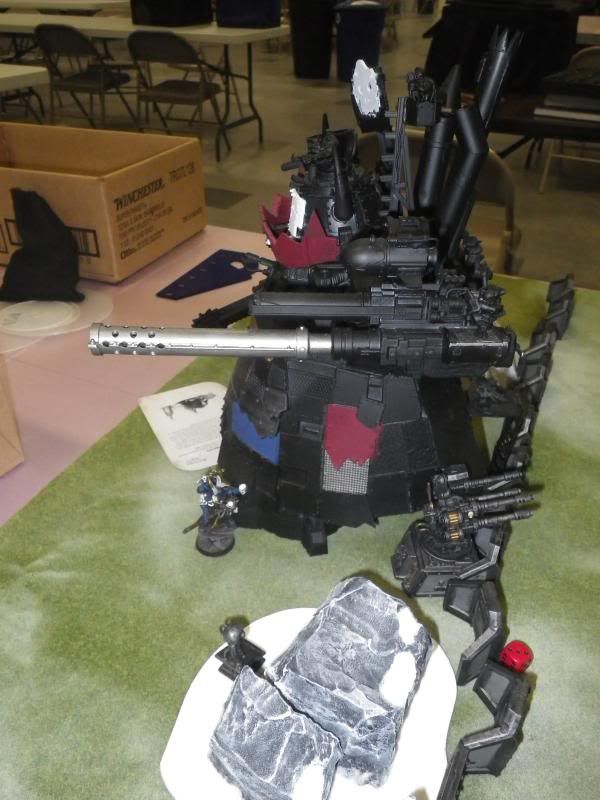
Stompa w/ lots of weapons, 6 power fields (like Void Shields that don’t recharge)
Tau
Commander
6 Fire Warriors
6 Fire Warriors
Riptide w/ Ion Accelerator
Chaos Lord
30 Cultists
Heldrake w/ Baleflamer
Aegis Defense Line w/ Quadgun
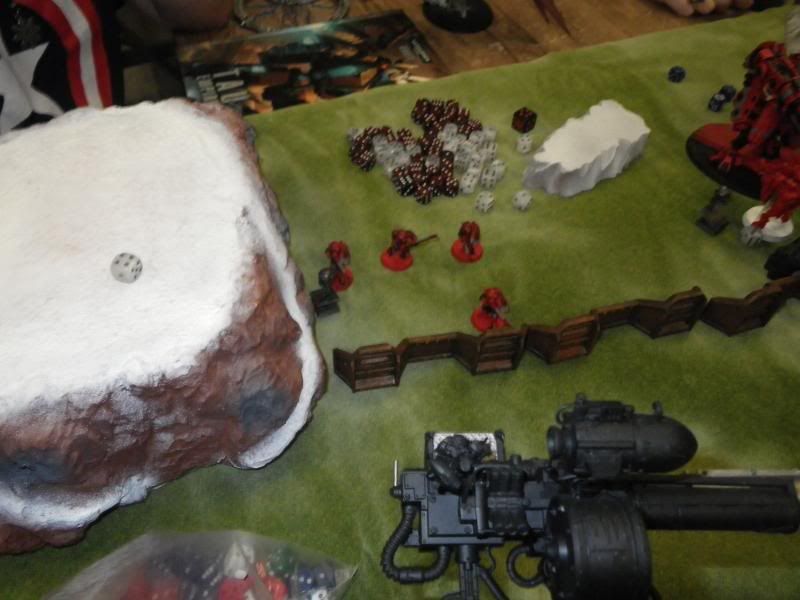
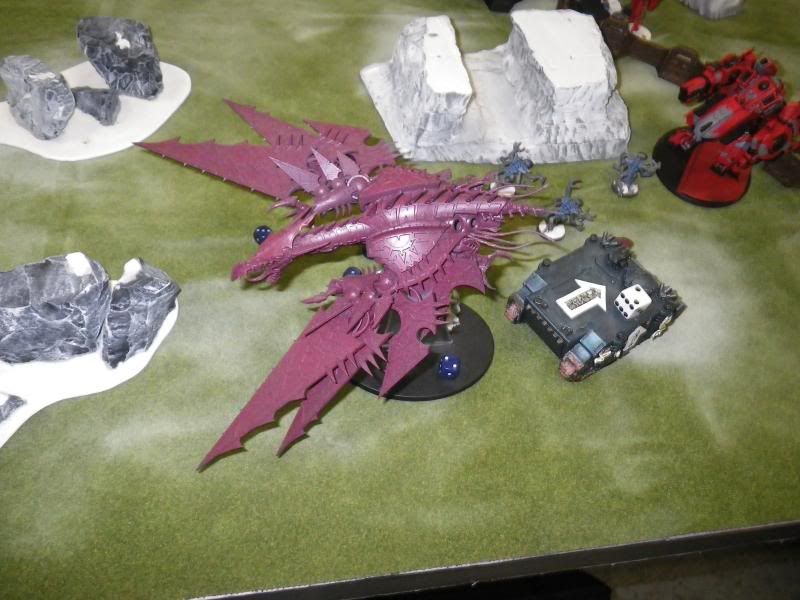
The first turn was Night Fight. Our opponents deployed first, taking up defensive positions behind their Aegis Defense Line with the Stompa out front. We deployed equally defensively, with my heavy weapons just in range of the Stompa. The field was very open, with only one hill that could hide units from the Stompa. The Biovores hid back there. The Hive Tyrants and my Rhino set up on our right flank, hoping to zoom past the Stompa into the relatively soft units behind it. The Genestealers infiltrated on the same flank. My Librarian stayed back with my Scouts, planning to cast Invisibility on my Devastators and try to keep them safe from the Stompa’s firepower.
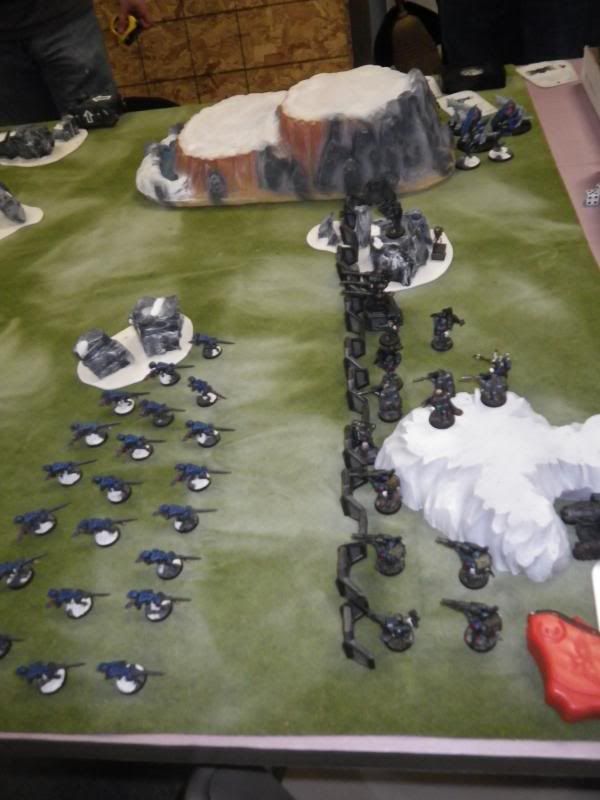
We stole the initiative and started our plan. The Hive Tyrants swooped toward the enemy line, combining their fire to kill off one squad of Fire Warriors. The Genestealers ran forwards and pinned the Riptide with The Horror, with my Rhino racing up behind them. My Devastators and Scouts blasted the Stompa, inflicting 5 damaging hits on the power fields, but all but one was saved by its Night Fighting cover save (only the Scouts’ missile got through).
 |
| My Devastators open fire on the approaching Stompa. |
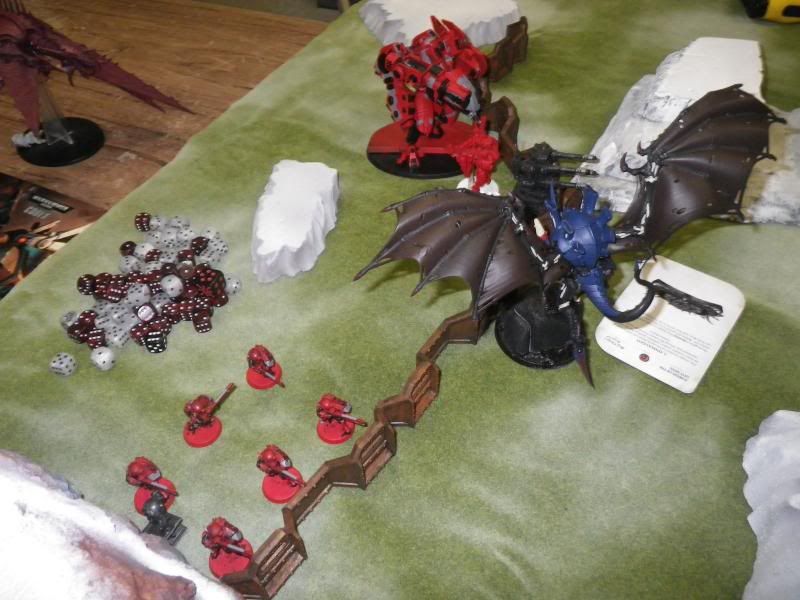 |
| The Hive Tyrant annihilates a squad of Fire Warriors. |
I have to admit, the enemy turns are kind of a blur to me. That Stompa just had so many weapons! I do know that the Hive Tyrant that was closest to the Tau lines was killed, and the Stompa leveled most of its firepower at the Genestealers. Three miraculously survived due to night fight.
 |
| I'm not sure how, but these three survived the full fury of the Stompa. |
In our turn 2, the remaining Hive Tyrant charged the Tau Commander and brought him down to two wounds. The Genestealers and Rhino moved up toward the Riptide, while the Devastators stripped the power fields from the Stompa and did 4 hull points of damage. My Thunderfire killed two Fire Warriors (the only targets in range), and the Biovore shot at the same unit. However, their spore mines deviated 10” toward the Cultists and annihilated 11 of them.
 |
| The Thunderfire kills a few Fire Warriors. |
 |
| The Biovores step up and target the same Fire Warriors... |
 |
| But blast apart 11 Cultists instead. |
The enemy turn was pretty straightforward. The Fire Warriors shifted over and the Cultists moved forward to hold objectives, keeping carefully out of range of the Thunderfire. The Riptide killed off the Genestealers, while the Heldrake arrived and vector struck my Rhino, doing one glancing hit. The Meks inside the Stompa returned it to 12 hull points. The Stompa couldn’t fire as it needed to charge in to kill the Hive Tyrant, which it did easily. The Hive Tyrant tried to kill the Tau Commander before being squished, but only did one wound.
 |
| The Stompa turns to deal with the Hive Tyrant. |
 |
| The Heldrake vector strikes my Rhino, but the Tactical Marines stay safely inside. |
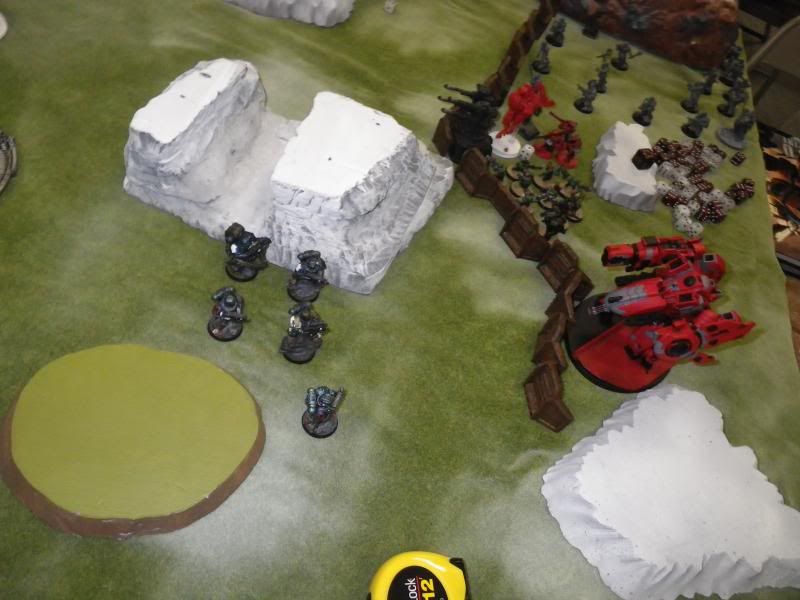
Our turn was rapidly becoming desperate. My Rhino moved up further to threaten the Tau line, while the Thunderfire moved up to the Aegis Defense Line to bring the enemy into range. The Biovores blasted a few Cultists, while the Devastators hammered the Stompa down to 8 hull points.
The Stompa dropped off a squad of Grots to help hold objectives, then turned to advance on our lines. Its firepower mostly thinned out the Termagants in its path, but one of its blasts killed two Invisible lascannon Devastators (I still can’t make 2+ saves) and my Thunderfire, but not the Techmarine. The Meks inside restored the Stompa to 11 hull points. The Riptide blew up my Rhino, leaving my Tactical Marines in a crater. The Heldrake flew into our deployment zone, barbecuing my missile Devastators and leaving my Quadgun unmanned.
Our turn started with my Stormtalon finally showing up. My Scouts moved over to man the Quadgun. Between them and the Stormtalon, I was able to destroy the Heldrake. My Devastators caused another 4 hull points of damage to the Stompa, bringing it to 7 (this was actually enough damage to kill it if the Meks hadn’t been fixing it so well). The Biovores kept hitting the enemy Troops, trying to rob them of scoring units. My stranded Tactical squad advanced and rapid fired on the Grots holding the objective, but only killed two.
 |
| The Stompa scythes through the Termagants, Devastators, and Thunderfire. |
The Stompa continued its advance, wiping out the Termagants and killing my last lascannon Devastators, leaving the sergeant alone. It also killed the hiding Zoanthropes and two of the Biovores. The Riptide killed off my Tactical Marines.
 |
| The Tacticals ineffectually fire at the Riptide before being destroyed. |
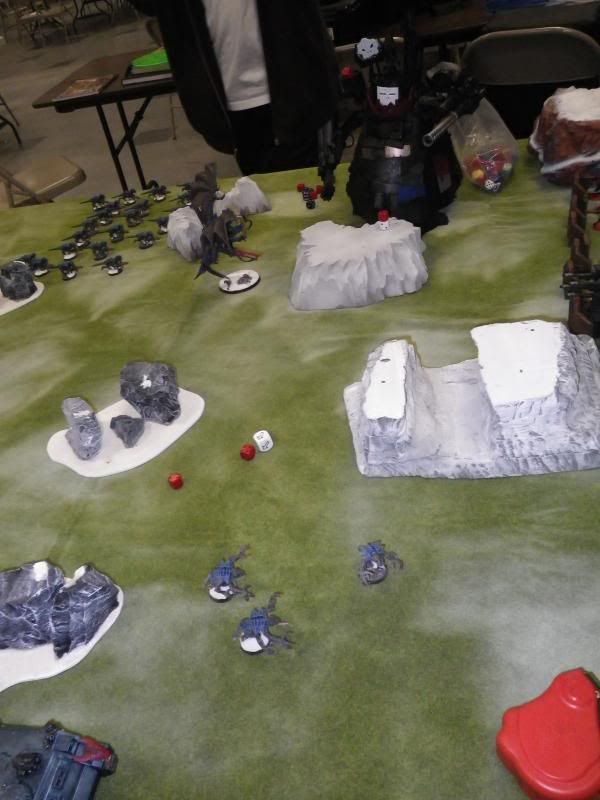
We were short of options at this point. My surviving Devastator Sergeant ran into cover, while my Scouts and Stormtalon shot futilely at the Stompa. The Biovore continued to hide.
The Stompa continued its advance, gunning down the Scouts despite their Invisibility (they were the only squad left to cast it on, really). Only my Librarian survived. It also took some pot shots at my Devastator Sergeant, doing 5 wounds on him with a 5+ cover save. I rolled this:
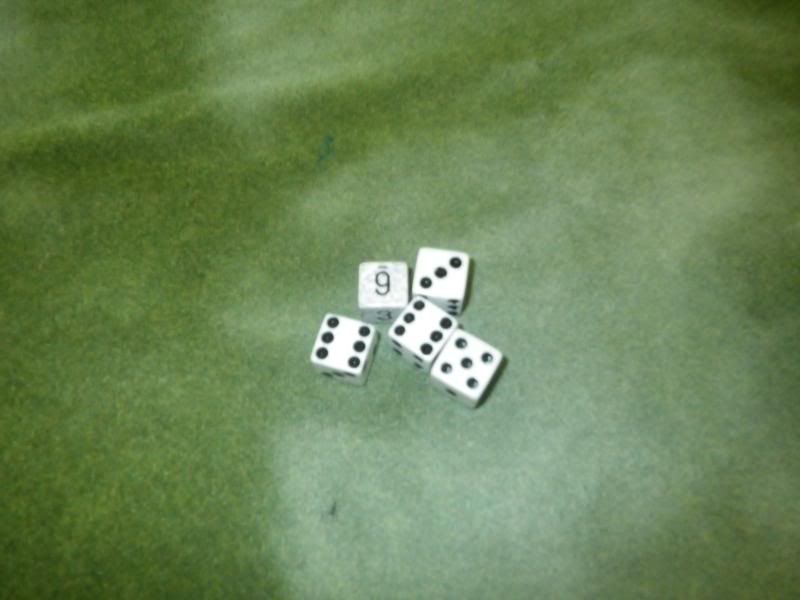 |
| Almost. |
The Stompa then assaulted my Librarian, promptly smashing him into a fine paste.
 |
| From hell’s heart I stab at thee; for hate’s sake I spit my last breath at thee. |
We rolled to see if the game ended, but it continued. Since we only had one Biovore and the Stompa could see it, we conceded the game.
Lessons Learned
1) That Stompa was ridiculous! I keep reading reviews of Escalation where they say that the Stompa is one of the more reasonable Lords of War. That might be so, but it seemed near unkillable with 4 Meks riding around in it, repairing it. Our opponents said that we did the most damage of it out of any of the games they played, so that’s a morale victory at least.
2) Tank Hunting Devastators really pulled their weight in this game. They are absolutely awesome when dealing with the right targets. The rest of our army worked as planned too. We just couldn’t get around that Stompa.
3) Stompa. Ouch.