I really feel like I've hit a good stride with the Salamanders. I model some, I paint some, I model some more… It's been a nice way to break up the monotony and rigors of slamming together a 1000 point force in 2 months that I can actually be proud to field on the table. It doesn't hurt that the airbrushing is a new shiny way to do things, and learning it helps keep the interest as well.
To lead this merry bunch of green marines, I'm going to paint one of them blue! But first, I need to build him…
Being that this is a Heresy-Era force, I wanted my Librarian to be dressed appropriately for the occasion. Now, I could have used one of the other Tartaros Terminators I already own, but I really wanted my HW to stand out visually. I thought about trying to rush order a Praetor set from Forge World, but then a good friend of mine gave me one of his Cataphractii Terminators to use! Thankful beyond words, I went to work trying to give this guy a more custom look. I'll skip the basic assembly, because let's face it, it's pretty basic.
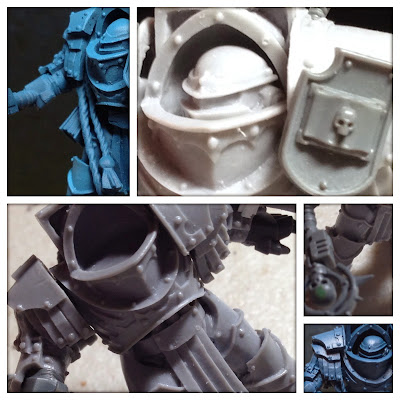
To start off the custom work, I went to pillage my Grey Knight Terminators for a Nemesis Staff, but then I found I had none to steal from them. Disheartened, but still determined, I instead grabbed one of their Daemon Hammers and a staff from the remains of my Strike Squad boxes. A little snip-snip here and pinning there, and I had myself the staff we all know and love. The only thing left to do was to fill in the Inquisitorial "I" with green stuff and smooth everything out. I pinned in the hand to the right arm, and was in business!
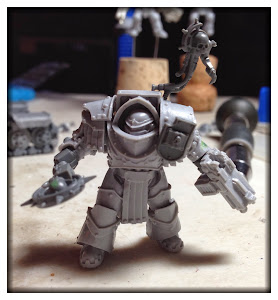
I also wanted to have an open hand on this guy, as I like the effect it gives poses, so I decided I'd carve up a Tartaros Pattern Storm Bolter and mount it to his forearm, ala the Grey Knights once more. Unfortunately as you can see in the above picture, it was extremely bulky and awkward looking. Also unfortunately, I had actually drilled down into the forearm to secure the weapon with a pin. Dangit. At this time, I tried to salvage the look with a Grey Knights Paladin shield for his shoulder that fit nicely and called it a night.
After showing the pictures to some friends of mine, we all agreed the forearm-mounted Bolter must go. I cut my losses and carefully removed the gun, cleaning up the glue residue and filling the pin hole in the forearm with green stuff. Instead I grabbed yet another Grey Knight Terminator left hand (man those things are handy), this time in a fist, and pinned that to the arm, to hold a Storm Bolter from the Tartaros Terminators.
I like this much better, now he just needs some bling.
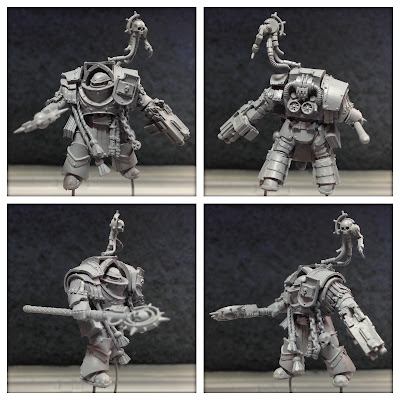
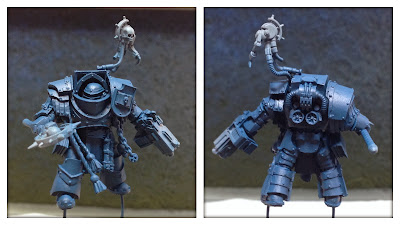
I added the Salamanders brass etch symbol on his waist for starters, and then went digging for more. I found some rope and tassels from the Cadian Standard Bearer in their command squad box that I had clipped off a long time ago and did nothing with. Those are flowing from the right shoulder pad. Flowing from the left are two chains from the Marauder Horsemen kit. From his belt hands some scroll tubes that came from one marine kit or another, and on his right hip is yet another Grey Knight bit, this time one of the many books they have where all I had to do was shave off the Inquisition symbol on the binding. Finally a Servo Skull, again from the GK kits, perches form his left shoulder, and he will of course get his own drake scale cloak.
I think I need to make sure I never give away my Grey Knights bits. They just come in WAY too handy.
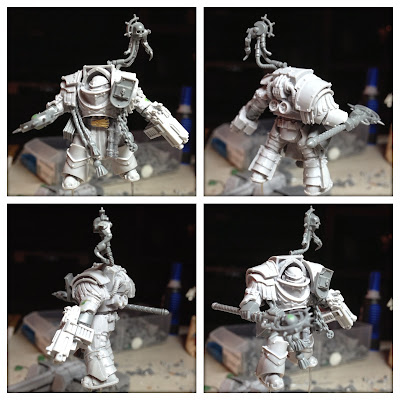
Here he is primed and ready for painting! Everything works really well together. He's not horribly ostentatious in his bling, but he is most definitely more than just your standard Terminator.
Finally, here are some Painting in Progress shots. Please keep in mind, these are shot with my iPhone as I go so I can record the progress. The first are just the shadow color, and the mid tone. The following four have the highlight color applied.
Yeesh, that's bright. It's nowhere near that bright in person, and I'm definitely looking forward to getting the figures in a light booth to show you actual color. I will admit that I did have the blue go way too bright at first, but with the magic of the airbrush I mixed my mid tone color with acrylic medium at a 1/10 ratio to create a glaze and "erase" a bit of the brightness with a very thin layer of paint. I then when back in and redefined the bright points and am much happier with it.
Every time I pick up that airbrush, I learn something new. Every time I learn to do something new, I am extremely thankful that I watched all those You Tube channels I put in this airbrush post here. I wouldn't have even thought of the "erasing" technique without having watched some of those.
What would you like to see next? Maybe some Painting in Progress shots of the troops?
- Tim
