
There are a few tricks to it, and without knowing or understanding the steps it can be easy to become disheartened by decals and avoid them altogether.
Tools;
- Scalpel blade.
- Tweezers.
- Paint brush.
- Cotton Bud (aka Q-tip).
- Gloss varnish (in a pot).
- A small, shallow container (you can use the plastic part of a blister pack for example!)
- And of course, your decals!
The Prep.
Prepping your model couldn't really be easier. All you need to do is apply a solid coat of gloss varnish to the area you want to apply the decal. I tend to apply it to the entire panel / section. The reason for this is that the gloss coat will allow you to shift the transfer about, so you will be given more freedom when it comes to placement.Once dry, you can crack on with the following easy steps;
1. First thing's first... stick the kettle on!
2. Once you've made your brew, pour some warm water into your shallow container. It will be very hot so whilst you wait for it to cool a bit you can prepare your transfer. Use your scalpel blade to cut the chosen decal from the sheet. The trick is to try and leave additional space on at least one side so that you will be able to hold it with the tweezers!3. Taking your tweezers, pick up the transfer and submerge it into the water. Do not let go. Just hold it and watch it closely, you will see the decal start to lift from the backing paper, by making soft movements with your hand you will see once the decal has freed completely... catch it with the backing paper if it tries to escape!
4. Take the decal to your model, and using a moist brush transfer the decal from the backing paper to the glossed panel. It is important to ensure the brush is slightly moist because otherwise it might pull up the water. The water is what will keep the decal from sticking too soon. Use your moist brush, to position your decal.
5. Once your decal is in place, take your cotton bud (Q-Tip) and push the centre of the decal. This will push out the water from underneath. Then carefuly and softly rub down the decal to pull out all of the water and ensure that the edges are all neatly fixed. Be sure to dry the area completely with the cotton bud.
6. With the area dried off, take your gloss varnish and re-apply it over the decal area and model panel again. This will help seal the decal onto the model and prevent it from rubbing off etc. You can then apply your chosen varnish over the entire model and people will be none the wiser. I use Matt Varnish (from Army Painter) and it works a treat!
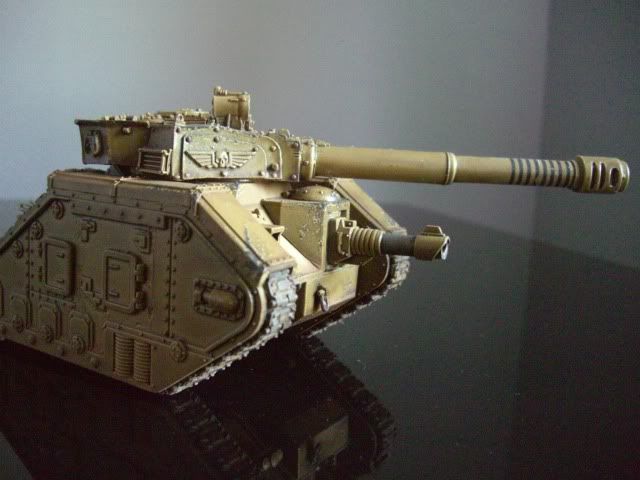
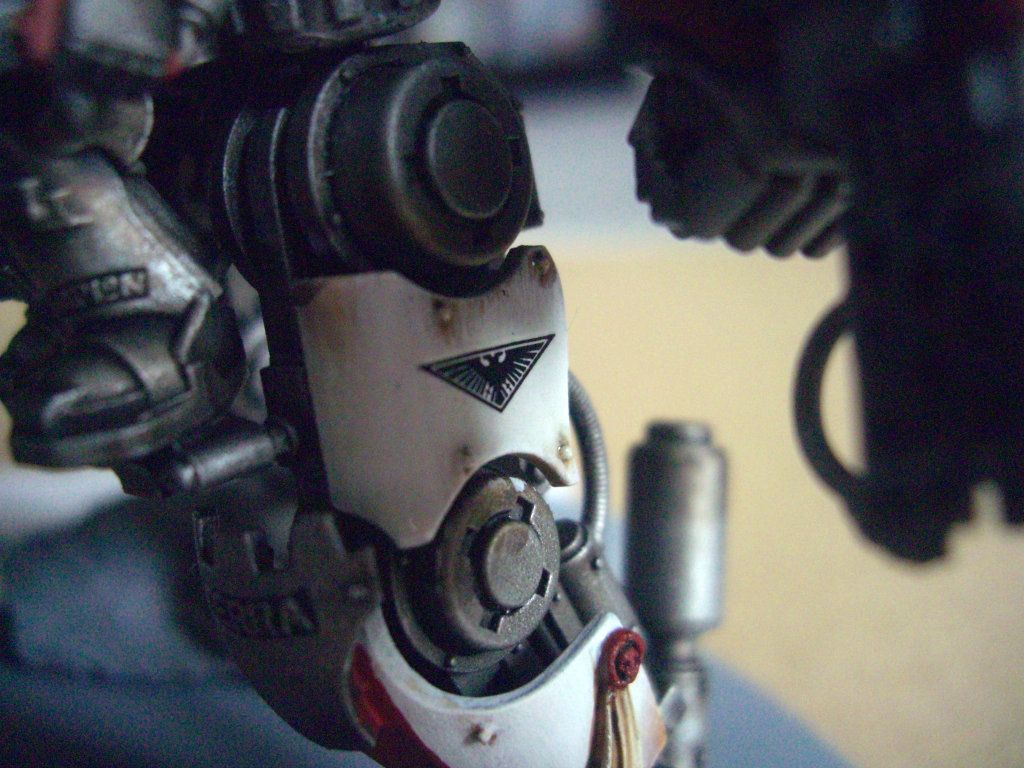
Now, this is just a very simple way to apply decals to your model, it is perfectly reasonable and acceptable for "simple" applications. What I mean by this is for applying decals to simple surfaces such as tank armour plates, flat surfaces or ones which might be curved in one direction only. Once you start looking at more complex situations, such as shoulder pads that are curved in more than one direction you will want to use some additionl products. These products help by literally dissolving the decal paper, transfering the ink directly to your model. As such, they allow you to not only conceal the decal but apply it to folds, creases and across panels etc.
Rather than covering this ground again, head over to From The Warp for Ron's "7 things to remember" as well as a number of similarly great tutorials on applying (and even creating) your decals! For more info on the products you might need (MicroSet and MicroSol) head over to THIS post from the Pit of Oni.