Welcome to the first tutorial on Roemer’s Workshop!
Today I’ll be sharing the technique I used for the force weapon effect on the commissioned Dreadknight model‘s Nemesis Greatsword. Wet blending can be used on a variety of places however it is generally used to apply NMM (non-metallic metal) effect on miniatures’ metallic parts: swords, armor plates, shields etc. This is a demanding yet rewarding technique for those who would like to improve their paint work. Hop in for a gander after the jump.
For this technique to work you need to work with the following:
- Primed model, ready for base paint application. I use Vallejo Black Surface Primer in a can, also available in tube for airbrush.
- X number of colors to work with blends. In this example I have 4 colors that range from a deep purple all the way up to white. We’ll be working with well thinned paints. More on this later.
- A brush with a fine tip, preferably a second such brush to work with the pigments. I personally use Winsor and Newton Series 7 brushes, number 1 and 2.
- A surface that’s sufficiently large to work on. As you gain experience you’ll be comfortable with smaller surfaces, but start with a large one on the first few tries.
- Patience. Really. If you try to rush this you’ll either ruin your paint work or have unconvincing blends.
- Optional: Drying retarder. As the technique is aptly named, this is wet blending, so anything that keeps your paints wet is a bonus.
Paint range in this tutorial:

From dark to light: Naggaroth Night, Ultramarine Blue, Ceramite White, with a transition mix of UB + CW at 1:1 mix ratio. You can also use Fenrisian Grey or a similar hue.
The theory here is to use the wet paint while on the model to do the work for you: after applying the two colors, clean up the brush in your water pot and wipe excess water from it (or use the spare brush, damp) and start “pulling away” the paint towards the other color. This will break the surface tension on both colors and cause the pigments to move over to both sides. This way you can create mixed colors on the spot and create a seamless blend. Think of it like creating a new palette on the mini itself!
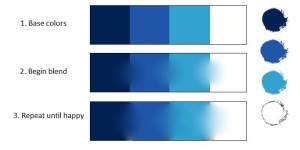
1. First apply the basic shapes, blocks or zig-zags.
2. Start blending the base colors while wet on piece.
3. Repeat as much as needed to get the perfect blend.
Let’s see this on an actual piece.
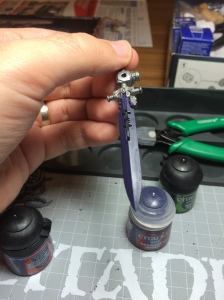
The very first thing to do on the part where you want the blend is to basecoat with the darkest color on the range. You can also use the opposite approach and base the lightest color, however it is easier to fix early mistakes with a dark undercoat. Depending on the coverage of your paint, you may need multiple coats to have an even, smooth finish. In this example we’re painting force weapons, so having a good finish with no paint strokes is essential. On a black basecoat it took me two coats of Naggaroth Night to get the proper coverage.
Next, decide where you want the blends to happen and in which direction. Following the example of the force weapon displayed on the GW site, the Greatsword has two “transitions” from dark to light and vice versa. Whichever pattern you follow on the blade, you have to apply the same on the other side of the blade, but mirror across the same side. So when you look across the blade you see opposing colors, blended by the midtone color along the blade. Let’s take a look at the GW store page as an example:
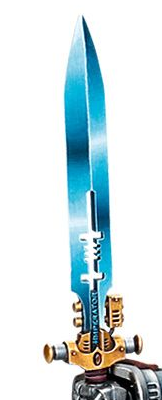
Left side of blade: Starts from white to dark then again to white and dark at the hilt. Right side has the opposite progression.
In order to achieve this we put down the first base colors that will provide the foundation of the colors. You do not have to put in exact block shapes here, you can also have a zig-zag tooth pattern (just don’t make it too obvious). The line or the “teeth” will be covered later with the blends.
Next, apply the same base colors on the proper spots (blues on blues, whites on whites, you get my meaning) in a thin consistency and leave a little area at the blend point dry. This is where we’ll let the paints converge. The wording on the internet is “milk consistency” but I like to call it “consistency-you-have-ease-working-with”. There is no magic ratio here because it heavily depends on the paint’s ability to cover. For example Khorne Red is a base paint with excellent coverage compared to Mournfang Brown or Naggaroth Night and thus requires more water to thin it down to workable form.
You have to act quickly now (if you don’t have a drying retarder) before the acrylics dry out. Pull the desired color away towards the other with a wet brush and you’ll see the colors start to mix. Work with your brush in the pattern you are happy with, for the sword I used the brush along the blade instead of across it to avoid glaring brush marks. As you gain more experience you can create your own patterns like swirls or zigzags, you name it.
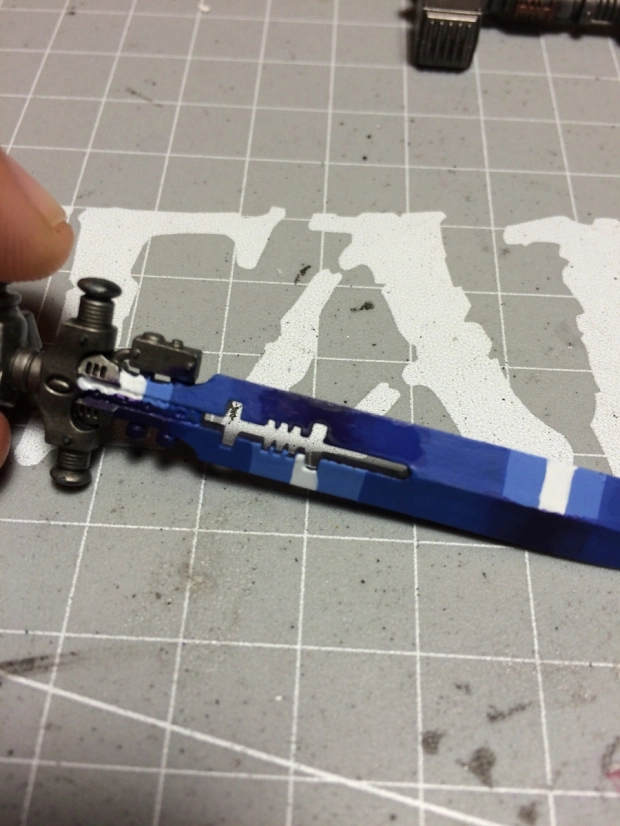
The paint is drying and will show a darker hue when fully dry. Keep working on the transition with your brush in a back and forth motion until you’re happy with the result.
Let dry and see if you’re happy with the result. Since you’re working with thin layers, you can (usually) add however many layers you want. During the blend you can also “refill” the wet paint on the model with the original color to increase strength of one pigment over the other. Just add a little wet paint to the opposite ends and pull with your brush to the blend point.
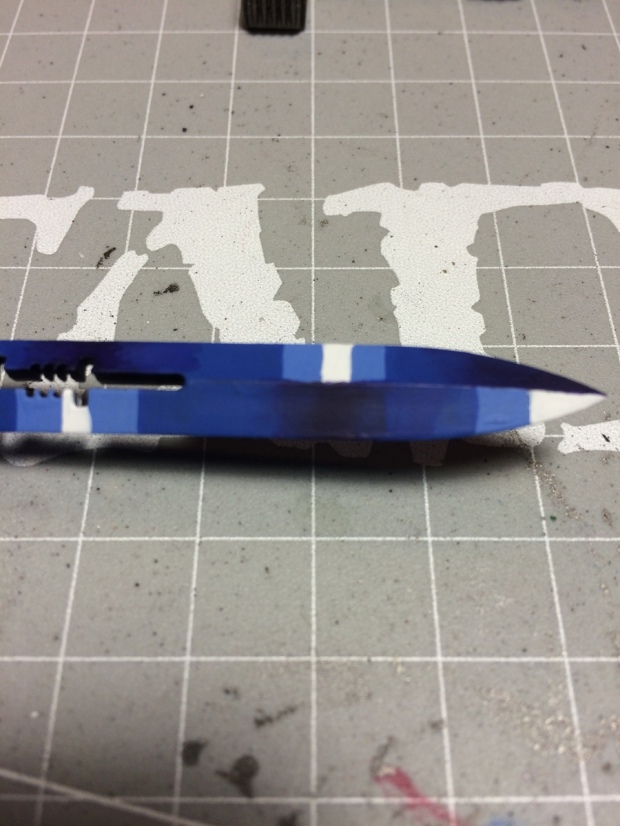
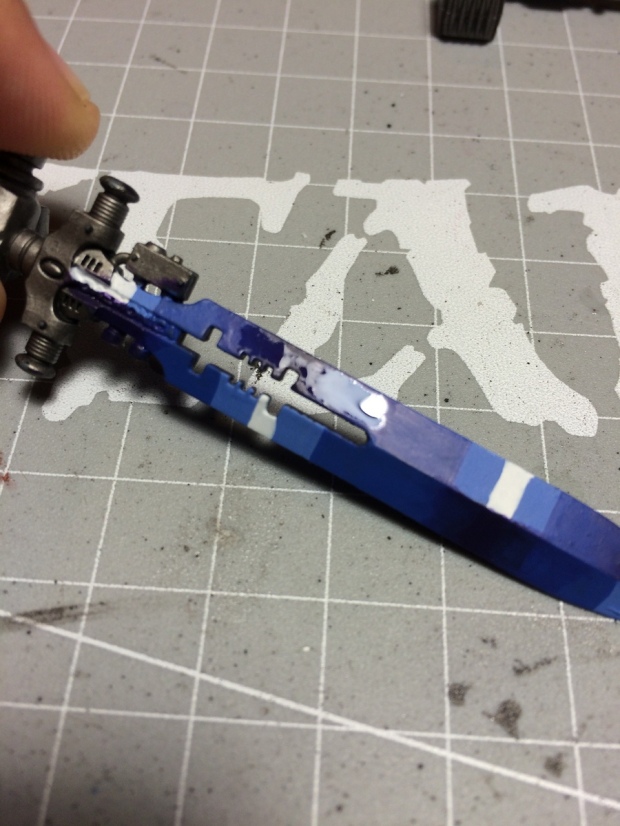
Finished blend from Naggaroth Night to Ultramarine Blue, on bottom and top left/right. Note that blending lighter colors will require more of the lighter color as filler than the darker one that’s “invading” the surface.
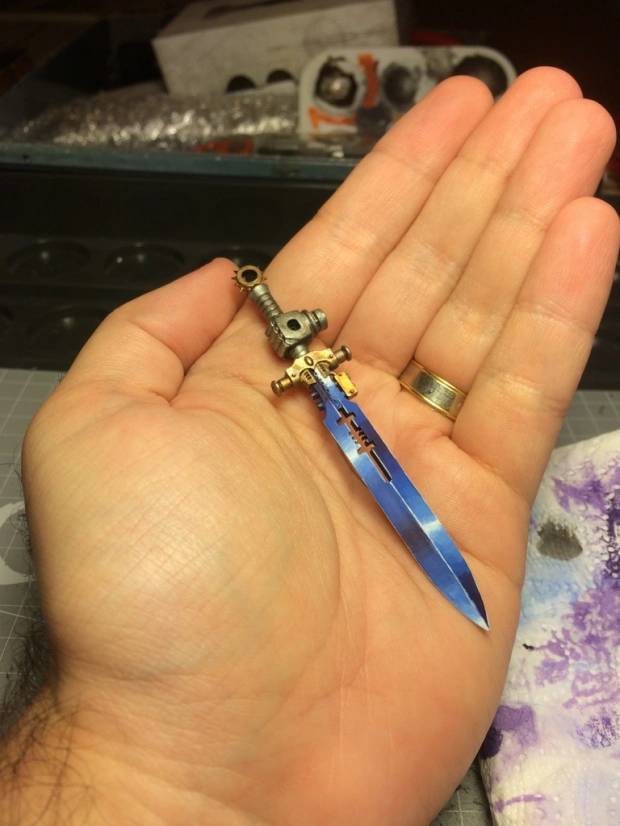
Here’s the finished Greatsword from the Dreadknight kit. Check my WIP posts for more step by steps on this piece!
And that’s it. The application is simple but you have to experiment on your own to see the results. Now go out there and paint! If you like, share your results with me and I’ll post them in this corner for future painters!
Filed under: Tutorial Tagged: dreadknight, miniature hobby, NMM, painting, tips, tutorial, wet blending
