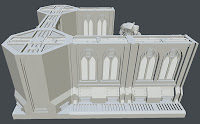
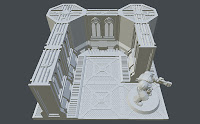
Now that I have the floor finished, I moved on to the wall and pillar. This took me quite a bit longer to do than modeling the floor. When doing final modeling in the video game industry you’re typically working from concept art and a fairly fleshed out gray box level. Here is another great article from 80.lv on how a group of devs were updating the Nintendo classic Contra with modern tech. The article shows the pipeline and how the final look was built from the ground up.
Working from concept art is always the best, but in my case I’m modeling from just a few reference images (which I showed in previous posts) and doing this more off the cuff. I’m no concept artist, so it took a few days of pulling verts, moving stuff around, and trying different approaches. I ended up with a finished wall piece I was really happy with, and a pillar that I like, but it still needs more additional detail on the diagonal part of the wall.
I tried a lot of different approaches to that blank section of the pillar, but nothing I’m happy with yet. I try not to linger too long on one particular element when working on something so I decided to leave it for now. Plus, there was a package delivered that I was eagerly waiting for.
I created a full 3d preview of the scene that you can view here. Be advised, this will take a bit of time to load as it is almost 40 MB. If you click on the “?�, it’ll explain how to navigate the scene.
Next time I’ll work on putting my Ender 3 Pro together and I’ll hopefully have some test prints to share.
Until then,
The Harrower


