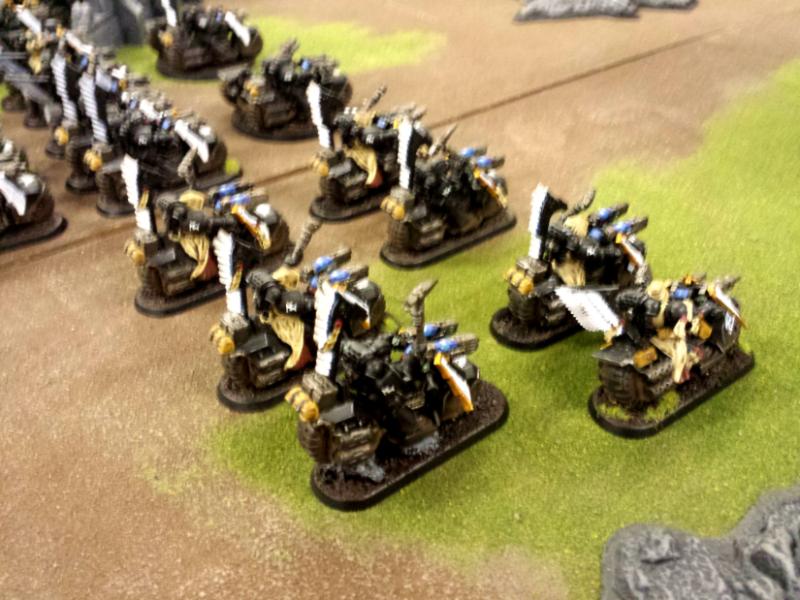
Dark Angels 'Ravenwing' - 2,000 points
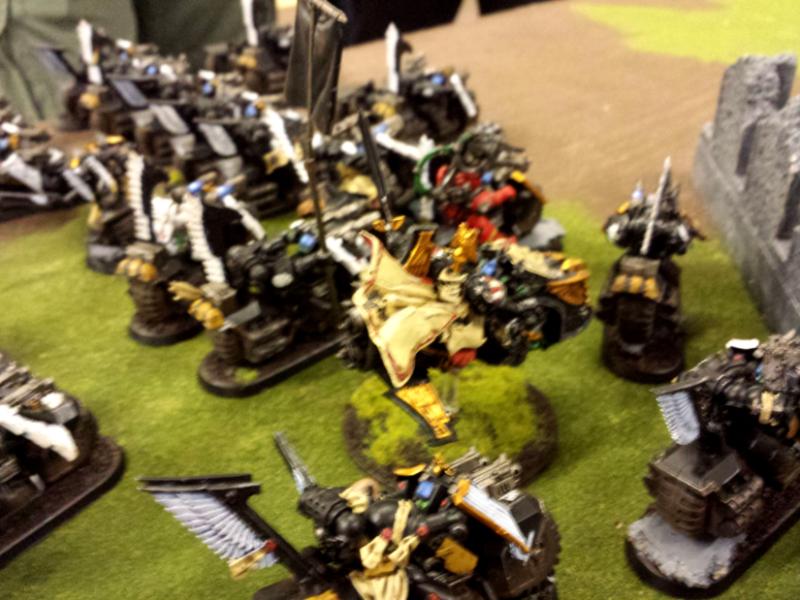
HQ
Sammael
Ravenwing Command Squad - 2 x black knights, apothecary, grenade launcher & standard of devastation
Techmarine - bike, auspex & power field generator
Troops
6 x Ravenwing w/ Attack Bike - 2 x meltaguns - Sgt w/ melta bombs - Attack Bike w/ multi melta
6 x Ravenwing w/ Attack Bike - 2 x meltaguns - Sgt w/ melta bombs - Attack Bike w/ multi melta
6 x Ravenwing w/ Attack Bike - 2 x plasma guns - Attack Bike w/ multi melta
6 x Ravenwing w/ Attack Bike - 2 x plasma guns - Attack Bike w/ multi melta
6 x Ravenwing - 2 x flamers
Fast Attack
7 x Ravenwing Black Knights - 2 x grenade launchers
Tyranids 'Hive Fleet Krakken' - 2,000 points
HQ
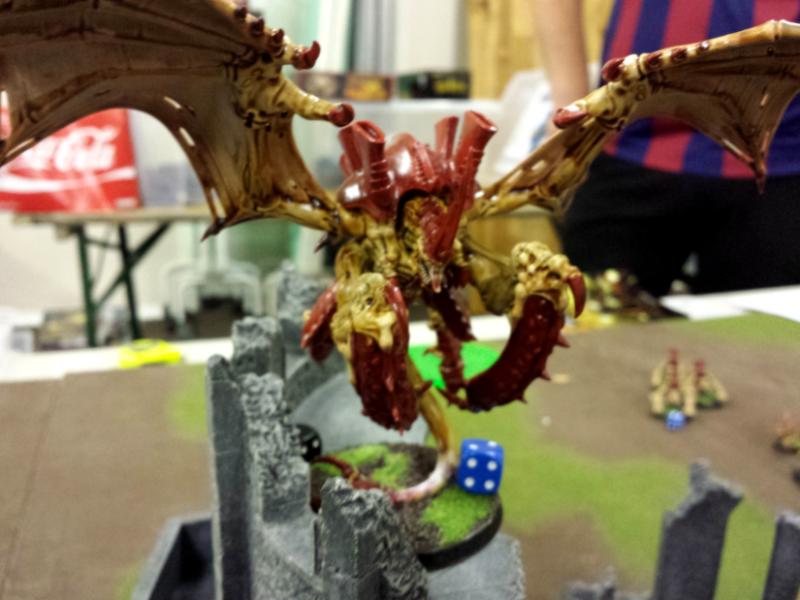
Hive Tyrant - 2 x twin-linked devourers & wings
Hive Tyrant - 2 x twin-linked devourers, hive commander & wings
Elite
3 x Hive Guard
3 x Zoanthropes w/ Mycetic Spore
Doom of Malan'tai w/ Mycetic Spore
Troops
10 x Termagant
Tervigon - crushing claws, toxin sacs, adrenal glands, catalyst & other psychic power
10 x Termagant
Tervigon - crushing claws, toxin sacs, adrenal glands, catalyst & other psychic power
Heavy Support
Trygon
3 x Biovores
Game: Dawn of War & Scouring - no night fighting
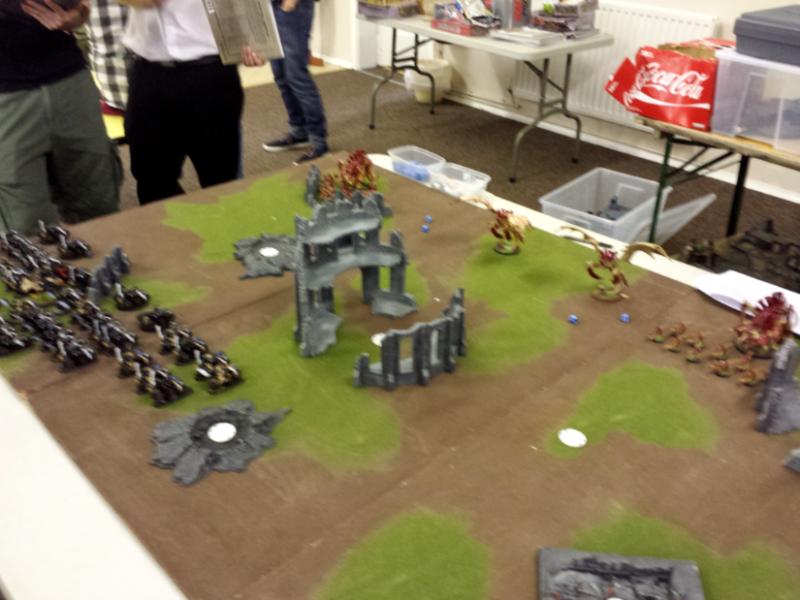
Deployment
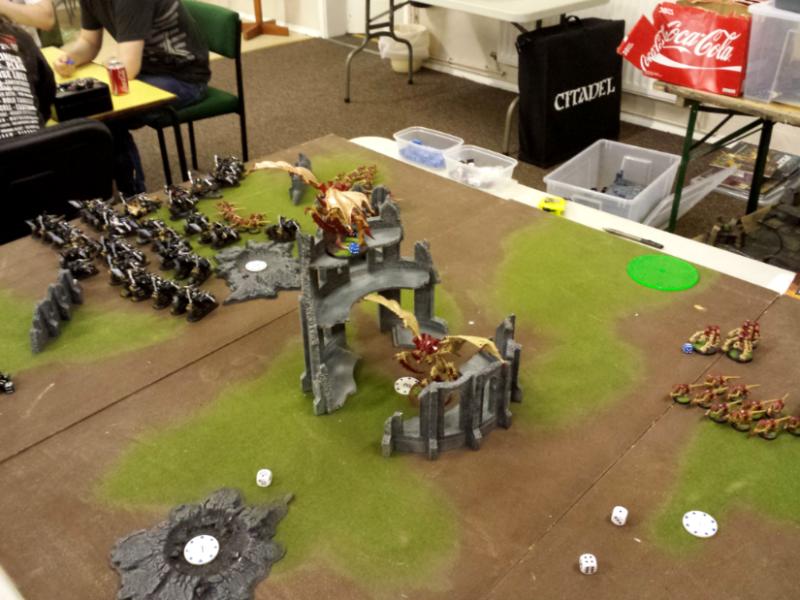
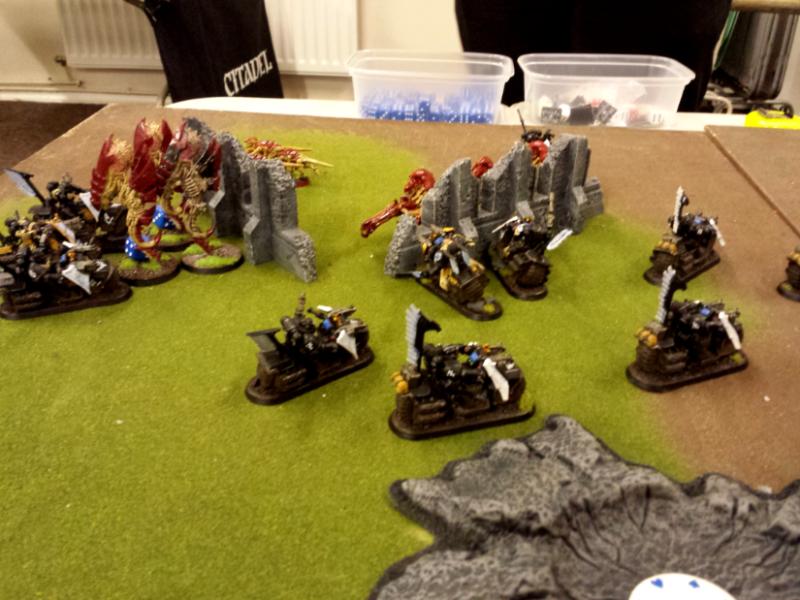
Objectives have been placed with three on the right flank, two in the centre and one on the left flank. The reason these objectives were placed here was we actually were meant to deploy using vanguard strike, but Chris deployed first and did dawn of war by mistake, so we just left it how it is.
Chris spread his bugs out with a Tervigon, Termagants and Hive Guard on the left flank, both Tyrants in the centre, Biovores on the right with the other Tervigon and Termagants. Everything else is in reserves.
I decide to refuse flank and using some sneaky premeasure I check and find the Biovores are 54" away from where I position the banner, which is by the table edge.
Luckily for Chris he rolled the warlord trait which allows him to move a unit (princeps of deciet). He told me he rolled nothing good for psychic powers, I only know he got one endurance and one enfeeble and I do not know what they are on.
* Tactical Notes
Using sneak premeasure I have managed to avoid the Bivores, but Chris will move them with his sneaky warlord trait and will be in range. So, I shall scout forward and reposition the banner.
The danger with Tyranids for my Ravenwing is there are so many threats. The big monsters can easily wipe out three bikes a turn and the Termies can tackle units if they have toxin sacs.
I will go for the Tervigon first, hopefully it will take out some Termagants when it dies - at least the Termagants won't get buffs.
I will then go for the Tyrants, the one with hive commander so tackle Chris' reserves.
Then I'll use my units to tie up his shooting units and move over to the other flank.
Turn 1
Chris moves the Biovores closer, chances are will be in range. I scout moving my army towards the Tervigon, I'll probably get assaulted first turn by Termgants,but that's ok as I have room to hit and run. More importantly the banner in on the table edge, so if the template scatters off the board then all barrage shots following will miss.
I attempt to seize and fail.
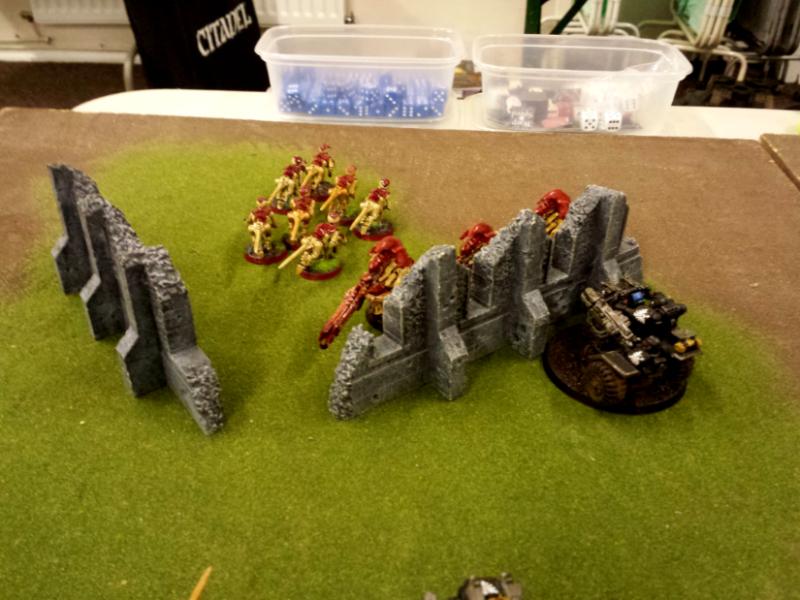
Tyranids; Tervigon on the left spawns 8 Termagants, they move up in my grill. Both Tyrants come down and land in the ruin (I told Chris if I drop his Tyrants then he can use cover). Tervigon on the right moves out with little bug support while Biovores move over to get into range.
Shooting; Tyrants dakka my Black Knights and wipe them out, first blood to Chris. An Attack Bike gets shot by Tervigon and both Termagants, bike is wiped out which means those units cannot charge. Hive Guard fire at another Attack Bike and knock a wound off. Biovores are out of range of sniping the banner, they drop on the Apothecary, the Techmarine does look out sir on majority of them and saves them all and Apothecary saves two - all ok.
Ravenwing; I move up so I have my units right in the Tyranids faces. One Attack Bike moves up to the Hive Guard.
Shooting; RCS fires on the Tervigon, grenade launcher hits with rad shell and the Tervigon drops several wounds, long range plasma guns fire and finish it off - both Termagant units take damage, one falls back. Attack Bike fires into the Hive Guard to soften them up and takes off a wound. All remaining units fire into the Hive Commander, drops on the first salvo, but as now in cover gets cover saves from my melta and plasma - I drop it down to two wounds after some cracking saves by Chris.
* Tactical Notes
Not a too bad start, though I was hoping for more Black Knights to be still standing. I guess I cannot complain as I took out a Tervigon, though shame the Tyrant absorbed so much fire power. On a good note the Hive Guard are locked in assault and cannot shoot next turn.
Next turn I'll try and drop both those Tyrants, though it greatly depends on which one based on what reserves come in. All forms of Zoanthropes will be shot at, the Doom with melta while the Trygon can take plasma shots.
Turn 2
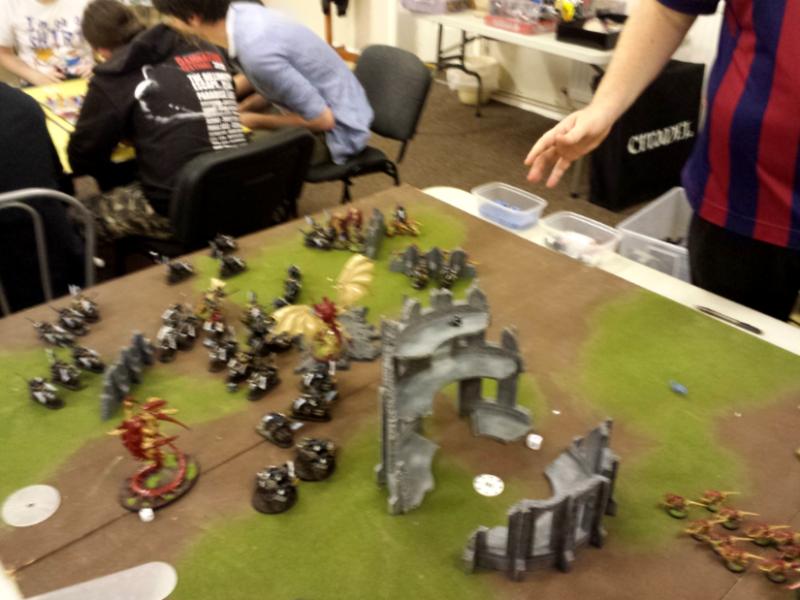
Chris rolls reserves and the Zoans drop down where the Tervigon was positioned and the Trygon deep strikes behind my bikes, luckily no Doom :)
Tyranids; Tyrants fly towards me ready to unleash the pain. Tervigon spawns 12 I think and the Nids move out to the objectives.
Shooting; first Tyrant shoots at the RCS, Chris forgets precision shot, so the Apothecary takes it, who the Techmarine does look out, sir and saves majority of them. Chris fires the other Tyrant, the banner dude takes three wounds, I save two and the banner dies. I forgot to do look out, sir on the Apothecary and he snuffs it as well - doh! Zoans fire at a unit of Ravenwing in front of them, two die and unit passes morale.
Assault; Attack Bike does hit and run and Hive Guard stand there looking like lemons. Termagants charge the wounded Attack Bike, do nothing and I hit and run.
Ravenwing; I spread my units out now as I have no banner and I doubt I'll be lucky and avoid the Doom for the second turn, though I shall do my best evening the odds and take down the Hive Commander. Solo Ravenwing moves up to dakka the Termagant unit who regrouped while a full strength unit moves up to shoot and assault the Zoanthropes, another unit moves to tackle the Spore as they cannot draw LOS on the Zoans. Another unit moves up to shoot and assault the Hive Guard while remaining units position to dakka the Hive Commander and Trygon.
Shooting; flamers destroy the Termagant unit who just charged. Spore gets wasted, Zoans take a single wound, two Termagants die. Hive Commander hits the deck after second salvo, my multi meltas fail to hit and I have to use plasma from the RCS to finish it off. I do manage to dakka the Trygon and knock three wounds off it.
Assault; Ravenwing charge the Zoans, cause a single wound. Solo Ravenwing charges the Termagants and batters three of them, other unit charges the Hive Guard, one dies to dangerous terrain though combat nothing happens.
* Tactical Notes
Not a too bad turn, I got off lightly with the Doom not coming in and I managed to take down the Hive Tyrant. A few wounds were knocked off the Trygon too. All in all it doesn't seem a lot, but the two shooting units are now locked in close combat and the Trygon will die next turn as it can only kill three bikes max.
Next turn I'll try and bring the Tyrant down, finish off the Trygon, if Doom comes in I'll introduce it to melta. I'll keep the shooting units tied up until turn 4, I can then run off and get some objectives which are mostly the other side of the table.
Turn 3
Chris rolls for reserves and the Doom fails to arrive, yes!
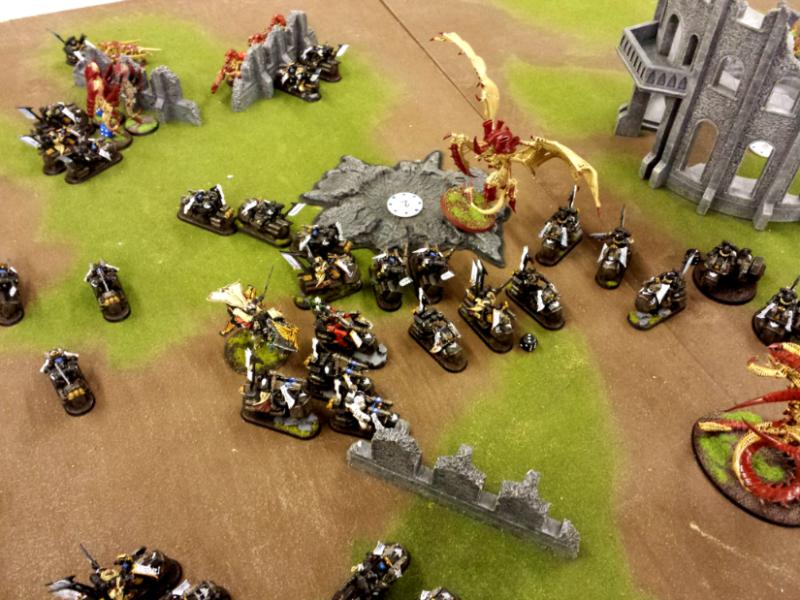
Tyranids; Tervigon spawns and burns out, the Termagants move out and start taking the objectives. Hive Tyrant drops down and eyes up my RCS while the Trygon goes for a melta unit.
Shooting; Trygon dakkas the meltas and the Sgt dies. Tyrant dakkas the RCS, I do bad on saves and only Sammy remains with two wounds. Biovores fire, though they scatter and do not do a fat lot.
Assault; Trygon charges the remaining meltas, I roll double six for overwatch and take two wounds off the Trygon, both bikes die,which is fine. Hive Tyrant gets laughed at by Sammy, who does hit and run leaving the Tyrant standing. In the other fights my Ravenwing hold out, unit of two hit and run and head towards the Biovores. Single Ravenwing bike does hit and run.
Ravenwing; Sammy joins a plasma unit, they line ready to tackle the Tyrant with support from remaining melta and plasma units.
Shooting; bolters fire into the Biovores and put a wound on one of them. Plasma rips through the Tyrant and takes it down while multi meltas slag the Trygon.
Assault; Ravenwing vs the Zoans ends in a stalemate. Lone biker charges the Hive Guard, one Hive Guard takes a wound. Unit of two Ravenwing batter the Biovores and sweep them, they are just out of range of the Tervigon.

* Tactical Notes
A good turn this one and I hope it is the first nail in Chris' coffin; last two big monsters on the flank are gone and i have started to move over to the right. Shooting units are tied up so I won't be taking much pain next turn.
Next turn I'll move over and start taking the objectives, some Termagant units are out of synapse, so they should be easy to beat in close combat and chase off.
Turn 4
Doom arrives and lands by the two Attack Bikes and a plasma unit.
Tyranids; Tervigon pisses around in the open, not sure what it is meant to be doing. Termagants take the objective in the centre ruin.
Shooting; Dooms sucks off my Ravenwing, two plasma gunners die, both Attack Bikes snuff it but luckily the meltas survive. Doom tries to shoot something but perils.
Assault; nothing really happens and both my units fail hit and run.
Ravenwing; meltas move to blast Doom while Sammy and plasma unit move up towards the Tervigon with the last Attack Bike. One unit of Ravenwing move through the ruin with another one in support. The two man unit who battered the Biovores move on a unit of Termagants on an objective in a ruin top right.
Shooting; Sammy's unit moves flat out to get closer to the Tervigon, when I actually do use his warlord trait I get a 1 for extra movement; pants. Meltas fire into Doom, passes melta save fails bolter. Single Ravenwing from the plasma unit (now sitting on objective in the crater) fires and Doom takes another wound. Ravenwing fire into the Termagants in the centre, five remain. Termagants at the top right get fired at but all are safe.
Assault; Termagants in the centre get charged, one unit loses a bike via overwatch, but the Termagants get battered and are destroyed. Unit of two charge, one dies to overwatch, though Termagants get battered and die to sweeping advance. Doom gets charged and loses another wound and remaining combats just stalemate.

* Tactical Notes
Looks like Tyranids have lost the upper hand with two troop choices being destroyed this turn. Tyranid shooting units are still tied up, which is great, though would be nice if I could hit and run to get some shooting in.
As it stands I have the 2, 3 and 1 point objective while Chris holds 3 and could easily get the 4. Chris has point for first blood while I have linebreaker and slay the warlord. Chris could also get linebreaker. I have 8 points in total and Chris could get 9 if he plays his cards right.
Turn 5
Tyranids; Tervigon moves and claims the 4 point objective.
Doom tries to suck off my Ravenwing and they pass morale :)
Assault; Doom takes another wound and I hit and run :) other units stay locked, though Termagants try to join in the Hive Guard fight, but fail the assault roll.
Ravenwing; Attack Bike moves and claims the 1 point objective in the crater in the centre, even points now. Unit of three Ravenwing move from the centre objective and contest the Tervigon while the other unit holds it in their place. Plasmas rock up with Sammy.
Shooting; meltas fire and slag the Doom. Tervigon eats bolters, melta and plasma and drops down to two wounds.
At the end we find I have 9 points and Chris has 5. We roll for the game and it continues, though Chris calls it a day as all I need to do is dakka the Tyrant with plasma and melta and use Sammy to chop down the remaining Termagants.
Ravenwing win!
Summary
A cracking game with Chris, nice and relaxed and we had a good laugh.
Chris played really well considering this is his second game. He took my advice on how to deal with the Ravenwing well and scored an impressive amount of damage on me. He also runs a pretty decent list too.
Naturally there was some mistakes, such as lining up the units for dawn of war, dropping the Tyrant down around plasma guns etc, all of this I mentioned to Chris and he took note.
My Ravenwing did pretty well, but when that banner goes you do notice - half fire gone! I can't complain about my hit and runs too much, at least the units tied up where meant to tie enemy units up. Only mistake I did was forgetting to do look our sir with the Techmarine, though I rolled a 1 anyway!