For a start this a great kit and once built looks v. cool! It took a lot of building and suffered from some of the more common issues with resin kits but with judicious pinning and patience it came out as I wanted.
I'm going to show step by step how I built this, so first here's the finished build;
And now I'll go through each step with piccies (Take it as read that each piece is trimmed of flash, filed, sanded as required and washed in warm soapy water before any gluing commences).
All pinning uses 1.20mm (18 gauge) uncoated jewellery wire and 1.00mm drilled holes using a pin vice.
The Legs;
These are quite complex structures and I would highly recommend dry runs before you even trim the mould lugs off as you may decide you want to use some of this excess resin in the finished structure. Each leg comprises a foot piece, lower leg, knee joint pin, upper leg piece and several pistons which stick on but are not structural. The knee pin is designed to fit through holes in both leg sections at the knee joint and thus allow a movable joint; in reality as there is no movement in the lower leg/ankle joint I saw no point in this knee movement and also you need to drill the holes for the pin to go in. Instead I chose to chop the heads off the pins and fix the knee joints in place with metal pins for strength, the resin pin heads were then glued on where the pins would be.
The next 2 photos are the lower legs and feet with pinning holes and pins showing prior to fixing;
This is all the subassemblies for the legs and pelvis prior to trimming and fixing;
You can see above the locator holes in the upper leg sections where you would need to drill a hole for the supplied knee pin, quite a large diameter hole (3 or even 4mm if I remember right). I drilled and pinned the joints off centre from those dimples and thus could use the solid resin of the lower leg section, the pin heads are quite large and covered up the new pins location, sanded smooth the sections fit snuggly and were glued to create a strong joint.
The upper leg sections have moulded lugs which locate in dimples in the pelvis piece, it is important to point out that at this stage you can alter the final pose of the model by changing the orientation of the pelvis section relative to the upper legs, i.e. by leaning it forwards or backwards. To do this simply remove the lugs and pin the assembly in the position you require, the natural position gives a pose which has the torso leaning forward slightly, I was happy with this and so kept the lugs in place. Note that this is the only joint that allows such positioning, later assemblies allow no movement of the torso forward or backwards!
I used additional pinning in the pelvis joints because this section will support the models full weight and will also take a lot of stress if the model is picked up by any part above the pelvis. All 3 pieces are quite large and solid so could take nice long pins.
Here's the leg assembly completed;
The Torso and Shoulders;
This section comes in several parts too; main torso, engine block, 2 shoulder joints and teef plate. Here you can choose the torso's position relative to the leg assembly by rotating its large bottom lug within the pelvis. The join between torso and pelvis took a lot of sanding and filing to get a true fit.
Here's the torso and shoulder joints with pins shown;
Again you need to carefully decide on the positioning of these pieces as they will determine the position of the arms and also where the large shoulder guards will sit in relation to the torso, try dry runs. I positioned mine so that the ripper klaw arm would be raised above the torso and lunging down on its target, with the kilkannon arm held level.
MOST IMPORTANT: Don't fix the shoulder plates to the torso yet, it's better to leave them off so you can construct the arms on the them later and paint the arms before fixing in place, you may also want to keep the arms interchangeable if you've splashed out on extra arms. At this stage just drill your pin holes as required.
Next is the joint between torso and engine block, a straightforward joint with just a little sanding required to be flush, a pin helps to give strength to the joint;
The Teef plate also fits simply with lugs and dimples, again I recommend pinning to give strength;
Here is the torso section constructed and fitted onto the legs;
The joint between torso and pelvis was solid enough to not require a pin, however you should make that decision yourself based on the mould quality of your kit.
In the last photo above you can see the pin holes I drilled in each of the 8 cylinders to mount the piston heads on later. This was a decision I made after the construction of the torso, in hindsight they would have been easier to drill before hand.
Engine Gubbinz;
These are the exhausts and piston heads, the exhausts needed a little work to get them to fit snuggly, a little cutting and filing and 1 was a little warped, but they're thin enough to shape using just the warmth from your hands.
I used a single pin for each piece, 1 to join the 2 part exhaust;
The 2 part exhaust has no guide holes at all so a pin is essential. I found a pin in the top of the 3 pipes on each exhaust was the easiest to work with and was sufficient to give a strong bond. The pipes all fit snug into their recesses and just required some filing and sanding.
This is the finished engine block with a piston head fitted to each cylinder;
Starting to look proper Orky!
Da Big Shootas;
The kit comes with 2 rotary cannon style big shootas, in the codex entry you can swap these for a variety of other weapons and can also add a third big shoota, none of which come with the kit. I want mine to have 3 big shootas so I used the 2 from the kit and added a third from my bitz box.
The 2 from the kit are simple to build and fit either side of the torso, they were located with a short pin into the ammo feed box;
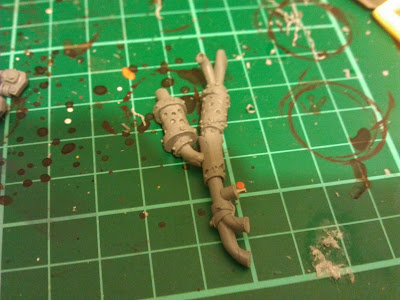
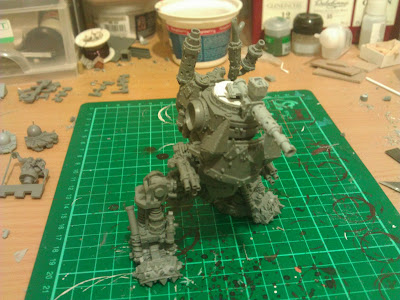
The third big shoota needed a little work to give the model a personal touch, don't want it to look like any other meks work do I!? The position of the 3rd big shoota had me thinking for a while, crotch mounted just wasn't right, the waist was taken by the other shootas and neither arm had a suitable mounting position. I considered shoulder mounted as both shoulder plates are v. large and have plenty of space but I'd already decided that I wasn't going to fit the pilot coming out of the hatch as I am firmly in the school of thought that Ork Dredd pilots are welded, nailed, tied, glued or otherwise permanently fixed inside their new stompy machine and would have absolutely no desire or interest in getting out even if they could!! So the obvious place to mount the 3rd gun was on top of the torso, in place of the hatch, with control connections coming out of the torso. A little plasticard and some tubing later the 3rd gun was fitted;
The 3rd big shoota is from the Forge World "Ork Weapon Set". A little chopping and filing and I quite like the effect.
That's part 1 of the build. In part 2 I'll show how I built the primary arm weapons. Part 3 will cover the painting.
Bluddtoof.
.jpg)


.jpg)
.jpg)
.jpg)

.jpg)
.jpg)


.jpg)
