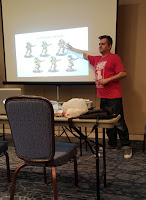
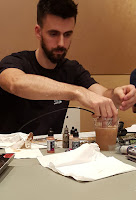
One bummer I didn't foresee was that the first class of each day started before the vendor hall opened and the first evening slot (5-7pm) ended after they were closed. That really limited my exploration time. I should have taken that into consideration when I selected my schedule. I purposely skipped all of the 7:30-9:30pm seminars to accommodate the GNT dinners each night. I also skipped the 10pm-12am slot because, from prior experience, I know I'm too tired at that point to pay attention.
Now to the seminars themselves. Covered below, in order of attendance, are the seminars I took on Thursday and Friday. The second half of the weekend will be covered in a separate post coming soon.
Liber Metallica with Dave Taylor
Bright and early to kick off the event was my first class, Liber Metallica. The class is about painting true metallic metals, which is something I find a bit hard and boring (which is why I signed up for two different classes on it).
Dave gave us some very nice step by steps on how to paint all different types of metals. Included with the class was a small bottle of his "secret" metal wash, which he then tells you how to replicate yourself at home.
Wet Blending & Loaded Brush 101 with Aaron Lovejoy
This is the class I immediately began referring to as the one that changed my life. I learned two-brush blending about two years ago, but had limited success with it. Wet blending is a totally different animal. For me, two-brush blending was like herding sleepy cats (not quite as hard as alert ones, but close) and wet blending was like herding sheep with a pair of trained collies.
Proof:
That was my first wet blend. How long do you think that took? Whatever you're thinking, you're probably wrong. It took about 60 seconds. No joke. Could it be more seamless? Sure. But I think it's pretty smooth for a thing I was trying for the very first time. And I easily doubled my skills with half an hour of practice.
I actually practiced this one all weekend on Guilliman's cloak. I had been saving that piece of him for last, not sure what I really wanted to do with it. But as soon as I saw that wing, I knew. I actually ended up using the same two colors too, since I wanted his cloak to be red and those colors were handy.
Now that I have this skill in my toolkit, I can't help but look at a mini and think "wow, a really nice wet blend could go there". And then I just do it. The magic part isn't getting it right the first time, but that you can easily let a rough blend dry, and just do another layer on top to help smooth it out. Seriously easy.
If you're looking to learn how to blend, this is the class I would recommend.
Vallejo Painting Demos with Angel Giraldez
This year's very special painter guest was Angel Giraldez. And I got to take this class with him, for free! It was a demo class, all you had to do was sign up before it filled up (which was almost instantly). It was a little about airbrushing, a little about the Vallejo paints, and a little bit about asking questions. It was very informal, just watching him go to town. He painted the face and showed us how to use Vallejo's chipping medium on the armor.
The best take away, perhaps, was watching him clean his airbrush between colors. He did it like this:
He loosened the needle, submerged it into the water cup up to the color cup, pushed the trigger, and moved the needle back and forth a little to run all the paint out of the brush so he could switch colors. The whole room gasped at such a brilliant but simple way to do it. I haven't personally tried it yet (my airbrush is designed a little differently so it won't be as fast) but it'll be way better than the super messy method I use now.
Painting Hair with Rhonda Bender
I always seem to paint some dull looking hair. But no more!
Rhonda taught us blonde hair but gave us a fantastic handout to help us do other natural hair colors, too. Thinking about the way light hits hair and the way that changes as the hair falls is very helpful and interesting when considering where the light is hitting the rest of the model, too.
I put it into practice on Guilliman, too, and gave his hair a little touch up.
Plus, the mini we got was a really lovely one from Dark Sword Miniatures.
How to Paint Faster and Better with Anthony Wang
This class was good, even though I forgot to take a photo. Anthony talked a bit about techniques you can use to make army painting a bit quicker, simple techniques that give that 'better than average' look without taking too much time.
We practiced them on a mini and then basically just asked questions about what we wanted to know how to do. We did some nice cloth and leather techniques. Very hands on with a little demoing to get us started.
Blood, Puss,Guts, and Gore with Michelle Blastenbrei
Weak stomach? This class is not for you. But if you're a disciple of Khorne or Nurgle, you need to get your butt to one of these classes. The cost of this one was a little higher than the others, but that's due to the supplies you get to keep. You get a pot of Tamya clear red, a tube of Uhu (desperately difficult to get in the States), a bottle of Vallejo wash, some small cups, and mixing sticks. Totally worth it!
Michelle was fantastic. She's got a great energy and the class was super fun. The handout she made for us was really awesome. Honestly, huge props to all the painters that made us handouts. They are so helpful when you get home and want to try the technique again on your own.
The basic effect is achieved by mixing a little Tamya clear red in with the Uhu, which is what gives it those stretchy properties. Using other colors, like the green wash, you can get some lovely puss and gut effects. Definitely worth taking.
I have a Papa Nurgle in the closet who is just calling for me to try these techniques on him.
Lose the Fear: Green Stuff Miniature Modeling & Sculpting with Joe Orteza
This was the most expensive class I took, at $42, but entirely worth it just for the tools. We got a set of 4 very nice and super useful sculpting tools to take home with us. So don't let the price scare you off from this on, because if you want to start working on sculpting, it's worth it.
We made a purity seal, a leaf, a feather, a chain, and a rope. I think I did best on the chain, it was hilariously easy and came out looking pretty neat. I did make the original strand a little too small so it was difficult to get the details all in, but I'm incredibly pleased with it.
Joe did a really nice job with this class. He used a white board to draw each step as we went along, a very easy way for everyone in the class to see exactly what the step was without a dozen people crowding over him to watch him demonstrate it with greenstuff.
I definitely lost my fear of greenstuff after taking this class. I'm not going to be sculpting entire miniatures any time soon, but I definitely have the confidence (and the tools!) to make some cool conversions going forward. I highly recommend this class as well.
Stay tuned for the second half of my classes over the next few days!


